Wood is a great material for your laser engraving projects. But one huge demerit with wood is the residue that the engraving machine leaves behind. In some cases, you might even have to deal with some burn marks on your material.
So, how do you clean laser engraved wood? There are three main methods of cleaning laser engraved wood:
- using hand soap
- light sanding
- using white vinegar
Table of Contents

Why Cleaning Laser Engraved Wood Matters
- Improves contrast – removing smoke stains makes your engraving stand out.
- Professional finish – eliminates scorch marks for cleaner results.
- Preserves durability – removing soot prevents buildup that can weaken finishes or sealants.
Common Issues After Engraving Wood
- Soot & smoke stains around engravings.
- Sticky residue from burning resin in softwoods.
- Uneven coloration where wood fibers absorb smoke.
Best Methods to Clean Laser Engraved Wood
Method 1: Using Hand Cleaner
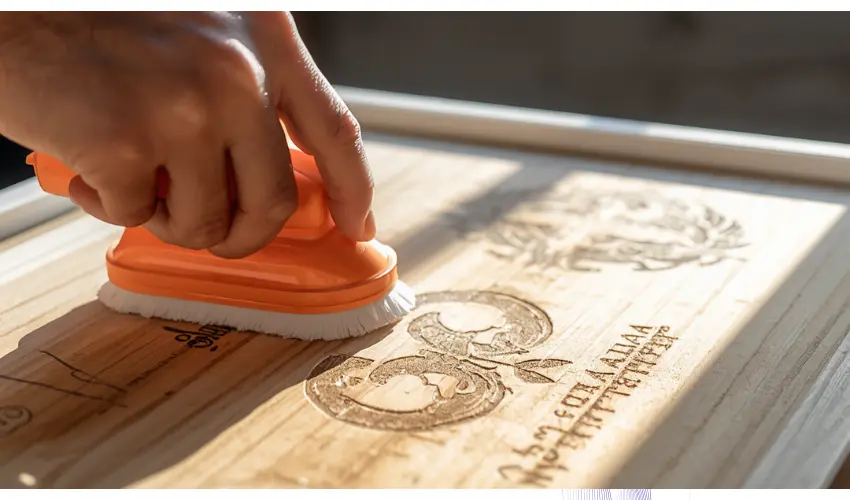
- You will need an orange hand cleaner that is waterless and has no toxic chemicals or ammonia. A soft brush and paper towels will also come in handy.
- Place some of the hand clean on a soft brush and then use it to gently clean the surface.
- Check to ensure the wood is residue-free and then use a paper towel to give it one last polish with a little dab of the orange cleaner.
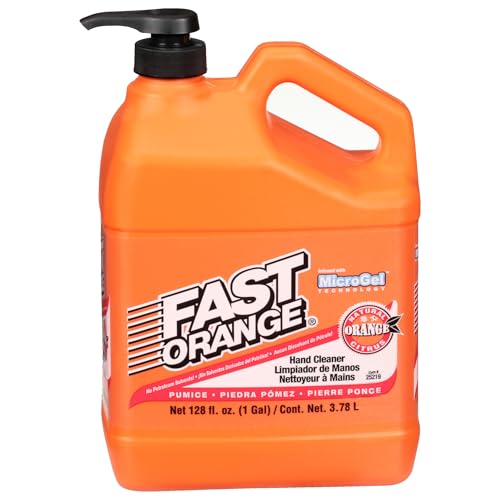
- Powerful Citrus Cleaning: Harnesses the natural power of citrus to deeply clean and remove stubborn grease and grime from mechanics' and industrial workers' hands
Fast Orange 25219 Pumice Lotion is originally designed as a heavy-duty hand cleaner, but it also happens to work surprisingly well for cleaning laser engraved wood in certain situations.
The reason comes down to how it removes residue without being overly harsh on the surface when used correctly.
Fast Orange is effective here because it combines mild solvents with very fine pumice particles, which help lift residue instead of just smearing it around.
One of its biggest advantages is that it works without needing large amounts of water. Excess moisture can raise the grain of unfinished wood or cause warping, especially on plywood or MDF.
Since Fast Orange is designed as a waterless cleaner, you can control the amount used and target only the stained areas.
It also breaks down greasy or smoky residue left from laser cutting edges. When used lightly with a soft cloth or brush, it can help clean up burn marks around engraved details without requiring aggressive sanding.
This is especially useful for projects where you want to preserve fine detail while still improving contrast.
That said, it is not a universal solution. The pumice content means you still need to be careful, especially on soft woods or shallow engravings, since excessive scrubbing can soften edges or slightly dull the surface.
It works best when applied gently, in small amounts, and tested on scrap material first.
Overall, Fast Orange is a practical option for makers because it sits in a useful middle ground. It is stronger than a simple damp cloth, but less risky than sanding or harsh chemical cleaners.
For laser engraved wood pieces that need a quick, controlled cleanup before finishing, it can be a handy tool in the workshop.
Method 2: Using Light Sanding
For this method, you will need smooth sandpaper to gently sand the engraved wood.
Inspect the engraved area and use your discretion to sand off unwanted marks and burns, but remember to be gentle to avoid ruining the intricate laser-engraved patterns.
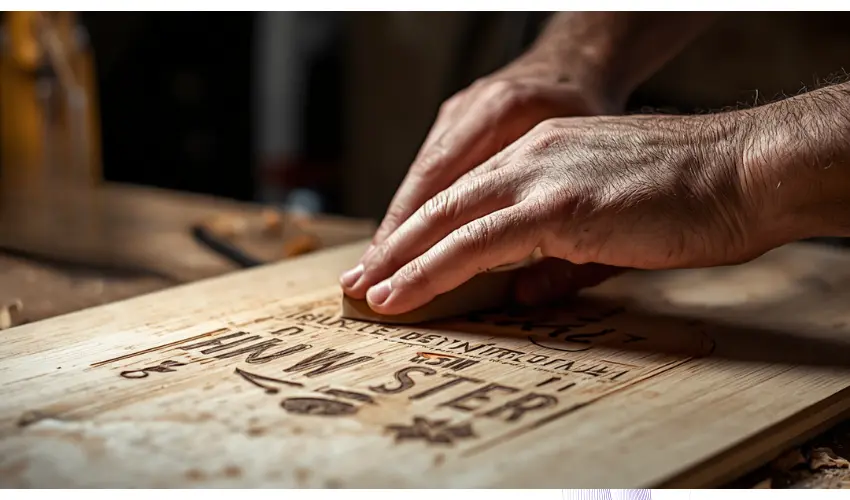
- Use fine-grit sandpaper (220–400 grit) to remove deep stains.
- Sand lightly to avoid flattening engraved details.
- Excellent for unfinished wood but not recommended on pre-finished surfaces.

3M 220 grit sandpaper is a good option for cleaning laser engraved wood because it hits a practical balance between cleaning power and surface control.
The key advantage of 220 grit is that it’s fine enough to avoid being too aggressive, but still strong enough to lift burn marks from the surface.
Coarser grits can easily damage delicate engraved details or leave visible scratches, especially on soft woods like pine or basswood. 220 grit reduces that risk while still being effective on typical laser residue.
It also works well for edge cleanup. Laser cutting often leaves darkened borders around shapes, and a light sanding pass can brighten those edges without needing chemicals or wet cleaning methods.
This is especially useful when preparing pieces for finishing, staining, or sealing, where clean edges improve how evenly the finish absorbs.
Another benefit is consistency. Aluminum oxide abrasive, like the one used in 3M sheets, wears evenly and gives predictable results across larger surfaces.
That makes it easier to control how much material you’re removing, which matters when working with detailed engravings where over-sanding can soften fine lines.
That said, it still needs a light touch. Even at 220 grit, pressing too hard or sanding too long can flatten engraved detail or change the texture of the wood.
It works best with gentle, even strokes or wrapped around a soft sanding block for more control.
Overall, 3M 220 grit sandpaper is a reliable workshop staple for laser engraving cleanup. It’s simple, affordable, and effective, especially when you want a clean, natural finish without introducing moisture or chemicals.
Caution: Don’t use the sanding method on painted wood as it might scrape the paint and leave you with an ugly surface instead of the masterpiece you were aiming for.
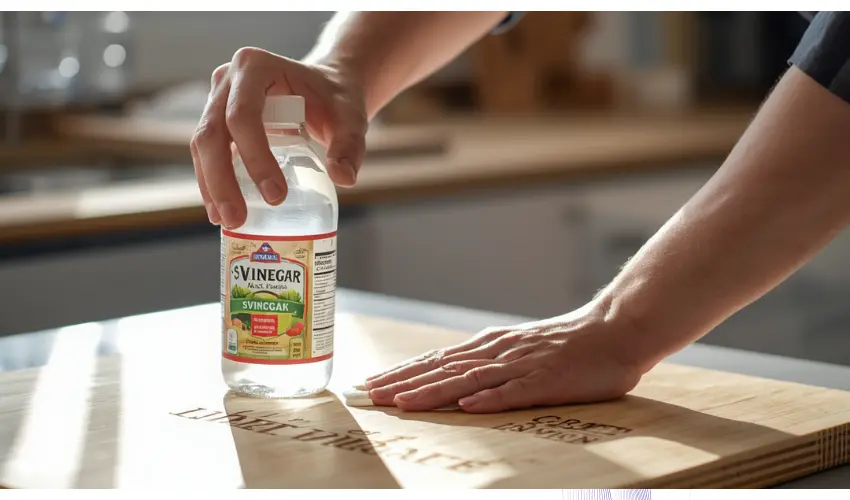
Method 3: Using White Vinegar
For this method, you will need a paper towel and white vinegar.
To clean your laser-engraved wood, dab your paper towel in vinegar (you can also use a soft piece of cloth) and then use it to wipe off the residue on your wood. Repeat the process until you are satisfied with the result.
Amazon Saver Distilled White Vinegar can be a useful option for cleaning laser engraved wood because it offers a simple, low-cost way to break down light smoke residue and surface staining without harsh chemicals.

- One 16-fluid-ounce bottle of Distilled White Vinegar
One of the main advantages is that distilled white vinegar is mild and water-based, which makes it safer for unfinished wood compared to stronger chemical cleaners.
When diluted with water, it can lift light burn marks without heavily affecting the grain or structure of the wood. This makes it a good choice for delicate projects where you want to avoid sanding or abrasive cleaning.
It is also useful for cleaning engraved details where dust and smoke settle into small grooves. A lightly dampened cloth with diluted vinegar can help clear out those areas and improve clarity in fine text or intricate designs.
Because it evaporates fairly quickly, it reduces the risk of leaving moisture behind if used sparingly.
However, it does need to be used carefully. Vinegar is still mildly acidic, so using it too strong or applying too much liquid can raise the wood grain or slightly change the surface texture.
It is best used in diluted form and applied with a soft cloth rather than soaking the wood.
Overall, distilled white vinegar is a practical cleaning option for laser engraved wood when you need a gentle, accessible solution for light residue.
It works best as a finishing cleanup step rather than a heavy-duty stain remover, especially before applying stain, paint, or protective coatings.
Comparison Table: Cleaning Methods for Laser Engraved Wood
Cleaning Method | How It Works | Pros | Cons | Best For |
|---|---|---|---|---|
Waterless Hand Cleaner (e.g., Fast Orange) | Apply a small amount of cleaner on a soft cloth and gently rub over the engraved surface to lift smoke stains and residue. | Safe for most wood types Effective at removing light smoke stains Quick and easy | May leave a slight oily residue Not as effective on deep burns | Everyday cleaning and light smoke stains |
Light Sanding | Use fine-grit sandpaper (220–400 grit) to gently remove the top layer of wood and any stains. | Very effective for tough stains Restores fresh wood surface Works on deeper burns | Risk of sanding away engraved details Time-consuming Dusty process | Deep cleaning or when other methods fail |
White Vinegar | Apply white vinegar with a cloth to break down smoke stains and disinfect the surface. | Natural and eco-friendly Inexpensive and widely available Removes odors as well as stains | Can slightly raise the grain Requires drying time Not ideal for all wood finishes | Budget-friendly cleaning and deodorizing |
Top Tips on how to clean laser engraved wood
- Avoid using any corrosive agents or coarse cleaning products as they could easily ruin your wood.
Test a small piece of wood first before you clean your engraved material. This will help you judge whether or not the cleaning supplies will actually work without leaving behind a mess. - Remember to clean your laser machine as well. Over time, the laser engraver will get lots of dust which combine with the resins to form a sticky mess that can cause your machine to malfunction.
How to reduce cleaning of laser engraved wood?

In general, cleaning time can be shortened in half by reducing the amount of smoke and residue produced during the engraving or cutting process.
The type of wood you use, as well as the thickness of the particular piece, can have a big impact on the final result. Speed, power, wattage, and your surroundings are all important considerations.
As a result, we recommend conducting a materials test on an off-cut before you begin. To improve the engraving outcome and reduce the cleaning work, consider the following points.
1. Don’t Engrave Too Deep
Only engrave as deep as is required for the desired outcome. This results in a brighter, more detailed engraving image as well as a significant reduction in smoke residue.
2. Correct Power & Speed Settings
When laser engraving wood, the first thing you can do is adjust the power and speed settings on the laser engraving machine.
If the laser emits too much power, it will undoubtedly leave burn marks. High power begins to burn the wood and particles at the edge of the engraving. As a result, you must reduce the power as much as possible.
Speed is also vital in avoiding burn marks. When the speed is too slow, the laser beam spends a long time on the area, leaving burn marks as a result. The speed should be high enough to minimize burn marks.
Reduce the laser power and/or increase the laser speed settings as needed to get the best results. You can experiment with different settings to avoid scorching.
Once you’ve found the setting that works best for each type of wood, make a note of it to speed up the procedure in the future.
3. Engrave from the bottom up
Engrave from the bottom up so the smoke is drawn away from rather than over the etched region. The amount of residue that can settle on the (hot) engraved area is reduced as a result.
4. Use a Honeycomb Table
Excessive heat is produced when a laser beam hits your material. It is critical to evacuate the heat otherwise, the temperature of the wood will rise.
This will undoubtedly result in burn marks if the heat dissipation is inadequate. For engraving, a honeycomb table is always recommended.
It not only protects the table area beneath it, but it also prevents burn marks due to its excellent heat dissipation.
5. Use Laser Engraving Masking Tape
Laser-engraving masking tape is a great way to avoid burns when engraving on wood. When you apply the tape, it is the first thing that comes into contact with the laser beam.
It prevents burn marks by reducing the smoke and fumes produced during the engraving process. The tape can be pulled off the surface after laser engraving, and you will have a clean laser-engraved design.
We recommend TapeManBlue Wide Painters Tape, which yields excellent results.
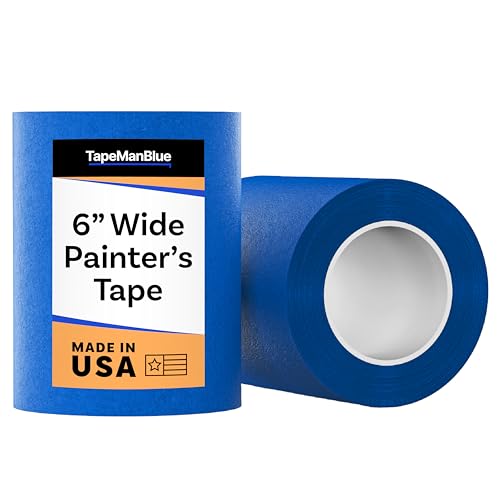
- SUPERIOR ADHESION & CLEAN REMOVAL: Our wide blue painters tape, perfect as 3D printer tape or laser masking tape, removes cleanly without residue, streaks, or stains for up to 21 days. Unlike other painting tape or masking tape that peels prematurely, TapeManBlue's extra wide painters tape stays put on your surfaces. Whether you're using it as 3D printing tape, for laser engraving, or general painting projects, our thick painters tape delivers reliable performance every time.
6. Use Air Assist with your Laser
Smoke is created from the surface of the wood as a result of the engraving. This smoke collects around the material, causing a temperature rise.
Burn marks are a result of this high temperature. The smoke can be blown away with the use of an air assist.
An air assist is a vital component of a laser engraver. It delivers a consistent and high-pressure airflow to blow away the hot smoke, which results in reduced burn marks.
Also, make sure you are using an exhaust fan, fume extractor, or enclosure to reduce smoke around and on your workpiece.
Final Thoughts
Cleaning laser engraved wood is simple with the right techniques. Whether you brush, wipe, or sand, you can remove smoke stains and achieve a professional, polished finish.
For best long-term results, combine good engraving settings, proper masking, and protective sealing. With these tips, your wood engravings will look sharp, clean, and ready to impress.
Frequently Asked Questions – FAQ’S
How do you remove smoke stains from laser engraved wood?
Smoke stains are common after engraving. The easiest way to remove them is by wiping the surface with a waterless hand cleaner. For tougher stains, use white vinegar on a soft cloth. Avoid soaking the wood to prevent warping.
Can I sand laser engraved wood to clean it?
Yes, but use fine-grit sandpaper (220–400 grit) and sand lightly. This is especially helpful for removing deeper stains or resin buildup. Be careful not to sand away the engraved details.
Is it safe to use soap and water on laser engraved wood?
Generally, no. Excess water can cause swelling or damage. A slightly damp cloth is fine, but avoid soaking the surface. For cleaning, a waterless hand cleaner is a safer option.
How do I protect the laser engraved wood after cleaning?
After cleaning, apply a protective finish such as mineral oil, beeswax, or a clear polyurethane coat. This not only enhances the wood grain but also prevents future stains and makes cleaning easier.
How can I prevent burn marks when engraving wood?
You can reduce burn marks by applying masking tape over the engraving area before laser engraving. Another option is to use an air assist attachment, which helps blow away smoke and debris during the engraving process.