Laser engraving on wood can create stunning designs, but achieving a deep, dark engraving requires more than just running the laser.
So how do you darken laser engraving on wood? Factors such as wood type, laser settings, pre-treatment methods and post-processing techniques all influence the final result.
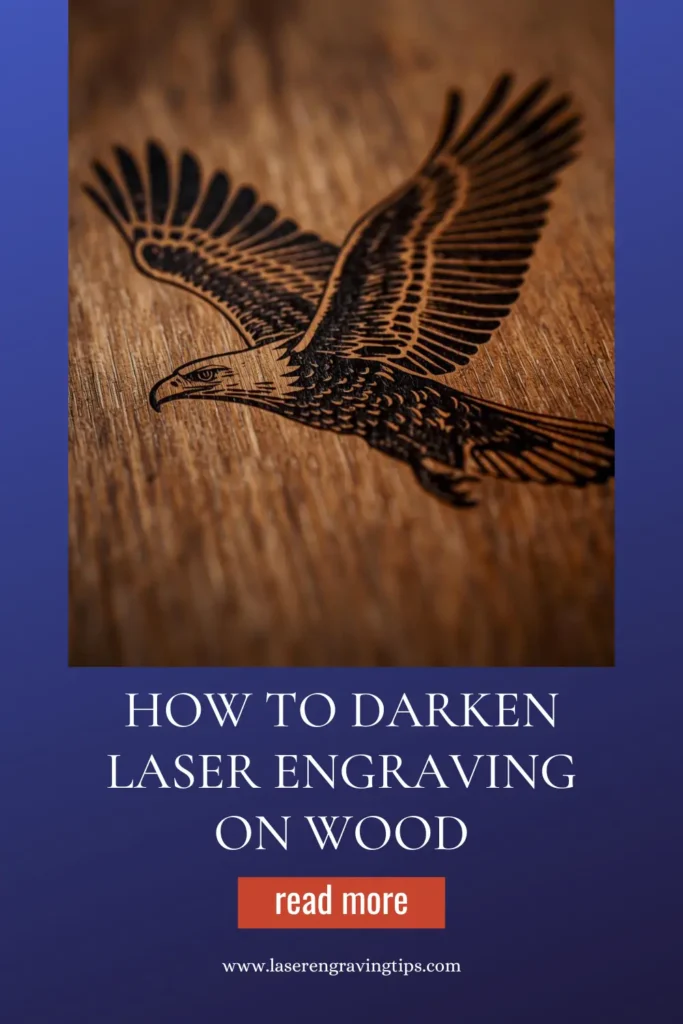
In this guide, we’ll cover everything you need to know about how to darken laser engraving on wood for a professional and visually striking finish.
Table of Contents
Why Your Laser Engraving Looks Light
Before fixing the problem, understand the cause:
- Low laser power
- High engraving speed
- Light-colored wood
- Poor wood grain absorption
- Incorrect focus
Wood reacts differently depending on its type, density, and moisture content
Best Methods To Darken Laser Engraving On Wood
There are four main strategies that are used to darken laser engraving on wood. These are;
- Adjusting Laser Settings
- Choose The Right Wood
- Pre-Treatment Methods
- Post-Processing Techniques
Let us have a look at each of these in greater detail.
1. Adjusting Laser Settings To Darken Laser Engraving On Wood
Optimizing laser settings is one of the most effective ways to achieve a darker engraving without relying on post-processing. Below is a step-by-step guide on how to fine-tune your laser engraver for deeper, darker marks.
Adjust Laser Power and Speed
Increase Power
- Higher power settings burn deeper into the wood, creating a more pronounced engraving.
- However, excessive power can cause overburning and charring, reducing detail.
Recommended Power Settings:
- Softwoods (Pine, Cedar, Balsa): 40-70% power
- Hardwoods (Maple, Oak, Cherry): 70-100% power
- Plywood & MDF: 50-80% power
Lower Speed
- A slower speed allows the laser to linger longer on the material, enhancing darkness.
- However, if the speed is too slow, it may lead to excessive burning.
Recommended Speed Settings:
- Softwoods: 200-400 mm/s
- Hardwoods: 100-300 mm/s
- Plywood & MDF: 150-350 mm/s
Testing Approach
- Perform test engravings on scrap wood using different power and speed combinations.
- Adjust in small increments (e.g., 5% power or 20 mm/s speed) to find the optimal balance.
Optimize Focus for Maximum Burn Effect
A well-focused laser beam ensures maximum energy concentration, leading to a darker engraving.
Steps to Optimize Focus:
- Adjust the Laser Head: Set the focal point at the surface or slightly below for deeper burns.
- Use a Smaller Spot Size: Focusing the laser to the smallest possible dot increases engraving intensity.
- Check & Clean the Lens: A dirty lens diffuses the laser beam, reducing engraving efficiency.
Pro Tip: If using multiple passes, slightly adjust the focus between passes to maintain effectiveness as material burns away
Increase DPI (Resolution) for Better Engraving Depth
- Higher DPI (Dots Per Inch) settings allow for more laser pulses per inch, creating a deeper and darker effect.
- However, extremely high DPI values (>600) may not significantly improve darkness and can slow down engraving.
Recommended DPI Settings:
- Softwood & Plywood: 300-400 DPI
- Hardwood: 400-600 DPI
Testing Tip: Start at 300 DPI and increase in increments of 100 to see how darkness improves
Use Multiple Passes To Darken Laser Engraving on Wood
Instead of a single high-power pass, running multiple passes at moderate power can darken engravings while maintaining detail.
Best Practice for Multiple Passes:
- Reduce power slightly (by 10-20%) to avoid excessive burning.
- Adjust focus slightly between passes to account for material removal.
- Let the wood cool between passes to prevent excessive heat buildup.
Adjust Pulse Frequency & Interval (PPI Settings)
- PPI (Pulses Per Inch) determines how many laser pulses are fired per inch.
- Higher PPI increases the density of laser burns, making engravings darker.
- Lower PPI can leave gaps, resulting in lighter engravings.
Recommended PPI Settings:
- Softwood: 200-400 PPI
- Hardwood: 500-1000 PPI
- Plywood & MDF: 300-700 PPI
Tip: Experiment with different PPI values to find the best setting for your wood type
Enable Cross-Hatching for More Coverage
Some engraving software allows for cross-hatching, where the laser moves in multiple directions instead of just left-to-right.
- Enable Bi-Directional Engraving: Laser moves both left-to-right and right-to-left.
- Enable Cross-Hatch Mode: Adds diagonal passes, increasing burn density.
When to Use Cross-Hatching:
- For darker images or text where contrast is essential.
- When engraving on high-grain woods where a single-direction pass may leave uneven darkness.
Consider Air Assist Settings
- Too much air assist can cool the engraving area, reducing burn depth and darkness.
- Lower air assist or turning it off can allow more heat buildup, leading to darker burns.
Best Practice:
- Reduce air assist when aiming for a dark engraving.
- Keep minimal airflow to prevent excessive charring and smoke stains.
Final Testing & Best Practices
- Use Test Grids: Create a test pattern with different power, speed, and DPI combinations to compare results.
- Monitor Engraving Process: Watch for signs of excessive burning, charring, or lack of contrast.
- Keep a Settings Log: Document the best laser settings for different wood types for future reference.
2. Choose The Right Wood To Darken Laser Engraving

The type of wood you use has a significant impact on how dark your laser engravings appear. Some woods naturally produce darker burns, while others require additional processing to enhance contrast.
Here’s how to select the best wood for achieving dark, high-contrast engravings.
Best Wood Types for Dark Laser Engraving
Some woods engrave darker due to their density, resin content, and burn characteristics.
Best Choices:
Wood Type | Why It’s Good for Dark Engraving? | Recommended Power (%) |
|---|---|---|
Cherry | High resin content, burns dark, smooth grain | 60-80 |
Maple | Fine grain, good contrast, even burning | 70-90 |
Walnut | Naturally dark, engraves with high contrast | 60-90 |
Mahogany | Dense but burns dark with high power | 80-100 |
Alder | Softwood, darkens well with light burning | 50-70 |
Why These Woods Work Well:
- Higher resin content leads to darker burns.
- Even grain patterns prevent uneven burning.
- Moderate density allows for deep engraving without excessive charring.
Why Cherry Wood is a Top Choice for Producing Deep, Dark Laser Engravings
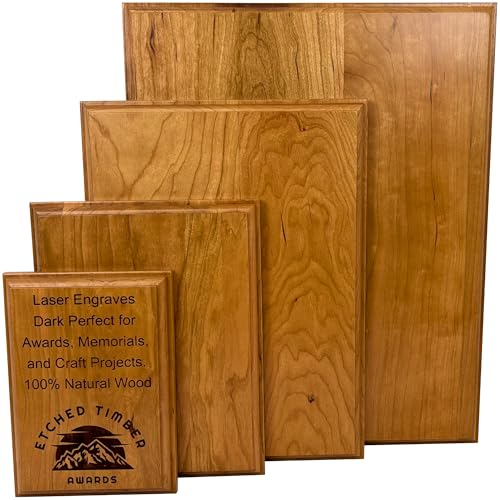
- {100% Solid Cherry Wood} – No veneers or stains. Just authentic American Cherry with beautiful grain and natural coloring.
If your goal is rich, high-contrast laser engraving, cherry wood is one of the best materials you can use. It consistently produces deep, dark burns with clean detail, making it a favorite among both hobbyists and professionals.
Here’s why it’s a great option.
Naturally Dark Burn Reaction
Cherry wood has a tight, even grain and natural density that reacts beautifully to laser heat.
- Produces deep brown to almost black engravings
- Requires less power compared to harder woods
- Creates strong contrast without extra processing
This means you get darker results straight off the machine
Smooth, Fine Grain
Unlike rough or open-grain woods, cherry has a smooth surface.
- Keeps engraved lines sharp and crisp
- Prevents uneven burning or blotchy results
- Ideal for small text and detailed designs
Perfect for logos, lettering, and intricate artwork
Consistent Engraving Results
Cherry is predictable.
- Fewer inconsistencies compared to plywood
- Minimal glue layers (which can burn unevenly)
- Reliable results across different batches
What you test is what you get—no surprises
Beautiful Natural Contrast
Cherry wood starts as a warm reddish tone and darkens over time.
- Engraving creates a natural contrast without paint
- Looks premium even without finishing
- Ages beautifully, enhancing the engraved design
Great for products that need a high-end look
Works Well with Finishes
Cherry responds well to oils and finishes.
- Oils deepen both the wood and engraving color
- Makes engraved areas pop even more
- Adds a professional, polished appearance
A simple oil finish can dramatically boost visual impact
Compatible with Most Laser Types
Cherry works well with:
- Diode lasers
- CO₂ lasers
You don’t need high-end equipment to get great results
Woods to Avoid or Modify for Darker Engraving
Some woods are difficult to engrave darkly due to their composition:
Wood Type | Why It’s Not Ideal? | How to Improve? |
|---|---|---|
Pine | High sap, burns unevenly, light contrast | Increase power, use multiple passes, or apply stain |
Birch | Pale color, engraves lightly | Stain after engraving for better contrast |
Oak | High grain variation, uneven burning | Use masking tape to prevent overburning |
MDF/Plywood | Engraves light due to glue content | Increase power, use post-processing methods |
Fixing Light Engravings:
- Apply wood stain after engraving.
- Use a lower-speed setting to allow deeper burns.
- Experiment with multiple passes for richer contrast.
Consider Wood Grain and Moisture Content
Choose Wood with a Fine, Even Grain
- Woods with consistent grain patterns engrave more uniformly.
- Avoid woods with knots, as they can disrupt engraving depth.
Keep Wood Dry for Best Results
- Wood with high moisture burns less effectively and may produce lighter engravings.
- Tip: Store wood in a dry area before engraving.
3. Pre-Treatment Methods to Darken Laser Engraving on Wood
If you’re working with wood that doesn’t naturally engrave darkly, try these techniques:
Staining Wood with Varathane Water-Based Wood Stain
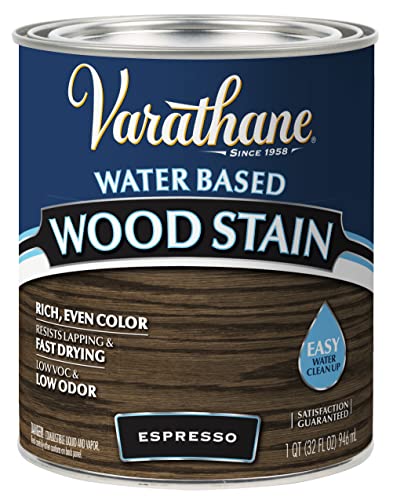
- Water-based wood stain creates rich, even color in 1 coat on most surfaces
Applying Varathane Water-Based Wood Stain before engraving can enhance the contrast of the laser marks. This stain penetrates the wood fibers, creating a darker background that makes engravings stand out.
How to Apply:
- Sand the wood surface smoothly to ensure even stain absorption.
- Use a clean cloth or brush to apply a thin, even layer of the stain.
- Let it dry completely (usually within a few hours).
- Once dried, perform laser engraving—the darker wood background helps the engraving appear more pronounced.
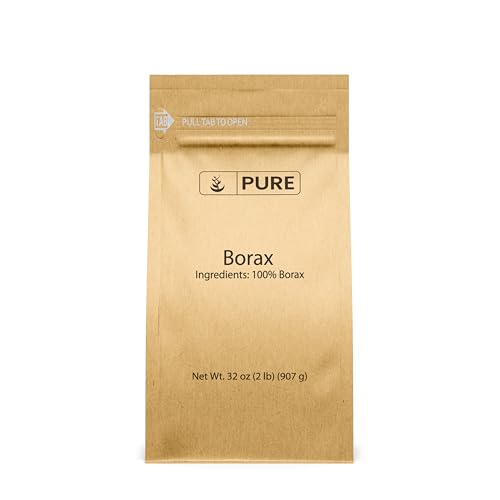
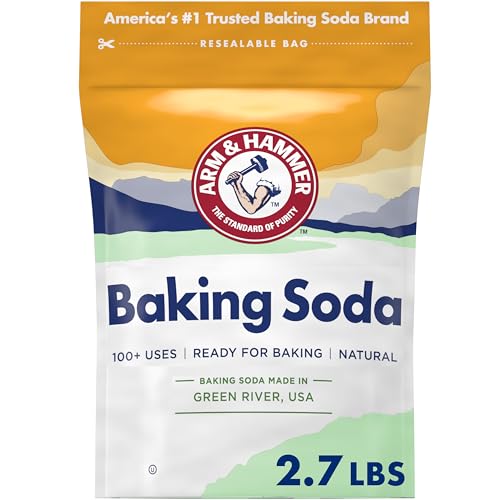
Borax or Baking Soda to Darken Laser Engraving on Wood
Laser engraving on wood creates beautiful designs, but sometimes the contrast may not be as dark as desired. Using Borax or Baking Soda can enhance the engraving’s darkness by modifying how the wood reacts to the laser.
These natural compounds help achieve deeper burns, improving the overall engraving contrast. We will explain how to use Borax and Baking Soda effectively and safely to darken your laser engravings on wood.
Why Use Borax or Baking Soda?

Both Borax and Baking Soda affect the way wood absorbs heat and burns during laser engraving.
- Borax (Sodium Borate) helps wood fibers react more intensely to the laser, creating a darker engraving. It acts as a mild flame retardant, slowing down combustion slightly while allowing the wood to char more evenly.
- Baking Soda (Sodium Bicarbonate) raises the wood’s pH level, making it more reactive to heat, which can lead to a deeper and darker burn.
These substances are safe and eco-friendly alternatives to chemical wood treatments.
Here’s a comparison table for using Borax and Baking Soda to darken laser engraving on wood:
Feature | Borax | Baking Soda |
|---|---|---|
Effect on Engraving | Enhances contrast, deepens color | Slightly darkens, mild contrast |
Application Method | Mixed with distilled water and applied before engraving | Applied before or after engraving |
Reaction with Laser | Improves burn depth and darkness | Reacts mildly, enhancing details |
Ease of Use | Easy to mix and apply | Very simple, commonly available |
Safety Considerations | Non-toxic in small amounts, requires ventilation | Generally safe, minimal concerns |
Best Wood Types | Works well on soft and hardwoods | Most effective on softwoods |
Overall Effectiveness | High – creates darker engravings | Moderate – slight enhancement |
Borax generally provides darker engravings, while baking soda offers mild enhancement with less dramatic results.
Materials Needed
- Borax or Baking Soda (whichever you choose, or you can experiment with both)
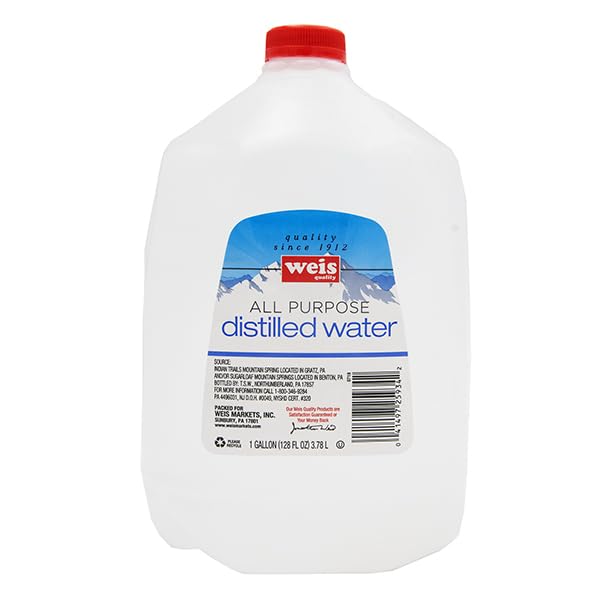
- Water (distilled or filtered for best results)
- Spray bottle or brush
- Measuring spoons
- Mixing container
- Clean cloth
- Wood piece for testing
Step-by-Step Guide
Prepare the Solution
For best results, mix the Borax or Baking Soda with distilled water to create an easy-to-apply solution.
Borax Solution:
- Mix 1 tablespoon of Borax with 1 cup of warm distilled water.
- Stir until fully dissolved.
Baking Soda Solution:
- Mix 1 tablespoon of Baking Soda with 1 cup of warm distilled water.
- Stir well to ensure even distribution.
Apply the Solution to Wood
- Use a spray bottle to lightly mist the wood surface, or apply the solution using a brush or sponge.
- Avoid over-saturating the wood; a thin, even layer is sufficient.
- Let the wood fully dry before engraving (this may take 30 minutes to 1 hour).
Engraving Process
- Once the wood is dry, proceed with laser engraving as usual.
- The pre-treated surface will result in a darker and more defined engraving.
- Adjust your laser power and speed settings as needed for best results.
Post-Engraving Finishing
After engraving, consider enhancing the darkness further:
- Wipe the surface gently with a damp cloth to remove excess residue.
- Apply a light coat of wood oil or clear sealant to protect the engraving and enhance the contrast.
Safety Considerations
- Always work in a well-ventilated area when using chemical treatments.
- Avoid inhaling fine powders—wear a mask if necessary.
- Test the solution on scrap wood first to see how it reacts with different wood types.
Using Borax and Baking Soda to darken laser engravings is an effective and safe method. These natural compounds help create deeper burns, making your designs stand out with improved contrast. With the right preparation and laser settings, you can effortlessly enhance the quality of your laser engravings on wood.
These pre-treatment methods help achieve darker, high-contrast laser engravings, making the designs more visible and visually striking.
4. Post-Processing Techniques to Darken Laser Engraving on Wood
If your laser engraving appears too light, you can use various post-processing methods to enhance the darkness and contrast. These techniques help bring out details, create a professional finish, and make engravings more visible.
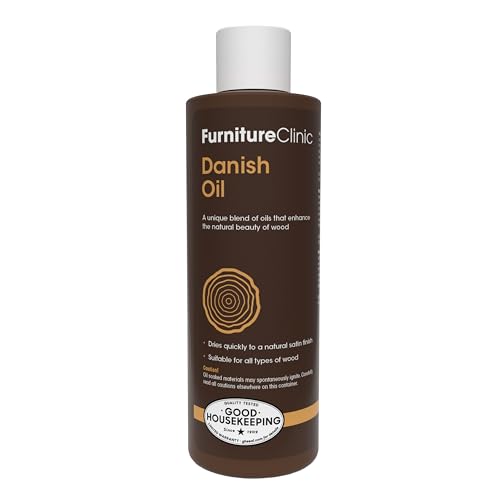
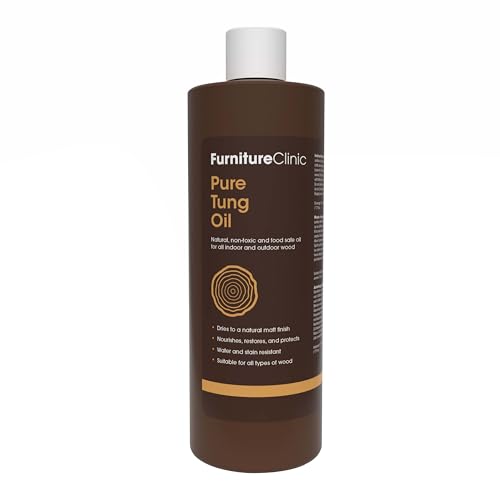
Using Oil or Finish After Engraving
Finishing oils can dramatically enhance contrast.
Best options:
- Mineral oil
- Danish oil
- Tung oil
What happens:
- Darkens engraved areas
- Enhances wood grain
- Makes details pop
Our recommendations:

Using Marsh Black Stencil Ink Spray
Marsh Black Stencil Ink Spray is another effective method to darken laser engraving on wood. This product is excellent for achieving jet-black lettering on wood without any bleeding or prep work!
Simply apply masking to the wood, engrave your design, spray with Marsh, and seal it with a clear coat. Once dry, peel off the mask to reveal crisp, dark engravings.

- Permanent, waterproof, fast-drying, bold
How to Apply:
- Apply masking tape to your wood surface. We recommend using TapeManBlue wide painters’ tape found on Amazon.
- Engrave your design.
- Shake the spray can well before use.
- Apply a light, even coat from about 6-8 inches away.
- Allow the spray to dry completely, then seal it with a clear coat of water-based protective finish. We recommend using Minwax Clear Polycrylic Water-based Protective Finish found on Amazon.
- Let it dry, and then peel off the masking tape.
Applying Wood Stains
Why It Works:
Wood stains seep into the engraved areas, enhancing contrast without affecting the surrounding surface.
How to Apply Stain:
- Choose the Right Stain – Use gel-based stains as they are thick and less likely to bleed into non-engraved areas.
- Apply with a Brush or Cloth – Gently dab the stain into the engraved area.
- Wipe Off Excess – After a few minutes, use a dry cloth to remove stain from the surface while keeping it in the engraving.
- Let It Dry – Allow the stain to dry completely before sealing.
Staining wood after engraving can be challenging due to uneven absorption. A better approach is to apply masking tape before engraving, allowing the laser to engrave through the mask. After engraving, apply the stain over the design, letting it settle into the engraved areas. Once dry, simply remove the masking for a clean, sharp finish.
Why Varathane Premium Gel Stain is a Top Choice to Darken Laser Engraving On Wood

- Designed for vertical surfaces including doors, window trim and furniture; creates a natural wood look on fiberglass and composite doors
Varathane Premium Gel Stain is a great choice for darkening laser engravings on wood because of its thick consistency, deep pigmentation, and easy application. Here’s why it works well:
- Thick Gel Formula – Unlike liquid stains, the gel consistency prevents excessive absorption into the surrounding wood, reducing the risk of bleeding and ensuring the stain stays within the engraved lines.
- Rich, Dark Pigments – The deep color enhances contrast, making engravings stand out more prominently.
- Easy Application & Control – It can be applied with a cloth or brush directly into the engraving and wiped clean from the surface, leaving the recessed areas darker without staining the entire wood.
- Works on Various Wood Types – It adheres well to both softwoods and hardwoods, making it versatile for different engraving projects.
- Quick Drying & Durable Finish – Once sealed with a clear coat, it provides long-lasting protection and maintains the enhanced contrast.
This makes Varathane Premium Gel Stain an effective post-processing method to achieve deeper, darker engravings with minimal effort.
Sealing for Long-Lasting Darkness
After applying any darkening technique, sealing helps preserve the look and prevents fading.
Best Sealers to Use:
- Clear polyurethane (matte, gloss, or satin sheen)
- Spray lacquer
- Beeswax finish
How to Apply:
- Lightly Sand the Surface – Smooth out any rough edges.
- Spray or Brush on the Sealer – Apply in thin layers.
- Let It Dry Completely – Avoid handling until fully cured.
We recommend using Minwax Clear Polycrylic Water-based Protective Finish
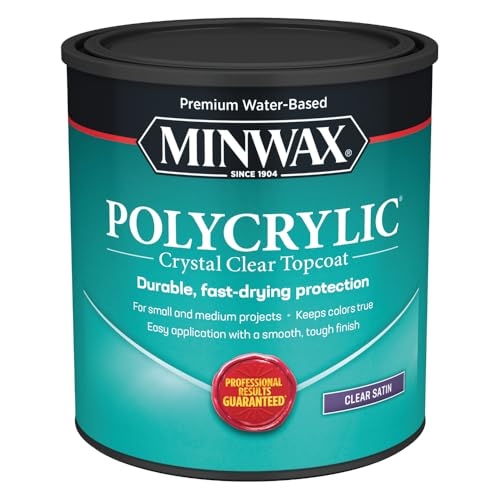
- PROTECT WOOD SURFACES – Minwax Polycrylic Protective Finish protects and adds beauty to your interior wood projects, including woodwork, furniture, doors and cabinets. The clear top coat protects against scratches, spills, dirt and more.
Minwax Clear Polycrylic Water-Based Protective Finish (Satin) is an excellent choice for sealing wood after darkening laser engravings due to its clarity, durability, and ease of use. Here’s why it’s a great option:
- Crystal Clear Finish – Unlike oil-based finishes, this polycrylic dries clear without adding a yellowish tint, preserving the true color of the engraving and any applied stains or paints.
- Water-Based & Low Odor – Easy to clean up with soap and water, making it a convenient and eco-friendly option with minimal fumes.
- Satin Sheen – Provides a subtle, professional-looking finish that enhances the wood grain and engraving without being too glossy or too matte.
- Protects Against Wear & Moisture – Forms a durable protective layer that prevents fading, smudging, or damage from handling and environmental exposure.
- Fast Drying – Dries quickly between coats, reducing waiting time and allowing for faster project completion.
- Non-Yellowing Formula – Ensures that darkened engravings retain their contrast and depth over time.
Applying Minwax Polycrylic as a final sealant helps lock in any darkening techniques used (such as stain, ink, or paint) while keeping the engraving sharp and well-protected.
Conclusion
Darkening a laser engraving on wood enhances its depth and visibility. By optimizing laser settings, selecting the right wood, and using pre-treatment methods and post-processing techniques such as staining, or painting, you can achieve a professional, high-contrast engraving.
Experiment with different methods to find what works best for your specific project.
Frequently Asked Questions
How to make wood laser engraving darker?
To make wood laser engraving darker, you can:
Adjust Laser Settings – Increase power, slow down speed, and use multiple passes.
Choose Darker Woods – Use high-tannin woods like walnut or cherry.
Apply Pre-Treatment Methods – Use wood stain, Borax, or Baking Soda.
Apply Post-Processing – Use wood stain, oils, or stencil ink spray.
Seal the Engraving – Apply clear polyurethane or wax to deepen contrast.
Can you paint over laser engraving?
Yes, you can paint over laser engraving. Use acrylic paint, wood stain, or ink to fill the engraved areas for better contrast. Wipe off excess paint before it dries to keep the surface clean. Sealing with a clear coat can enhance durability.
What is the best wood for dark engraving?
The best woods for dark laser engraving are hardwoods like cherry, maple, and walnut. These woods burn well and produce high-contrast engravings.