Laser engravings can occur with several different materials. From wood to aluminum, your choice of material heavily influences the look and feel of your final product. One popular material that’s used for many engraving projects is plastic but you may be asking why you should engrave plastic with laser.
For engraving and cutting plastics, laser machines work best because they produce fine, accurate results quickly. You should choose laser technology for engraving and cutting plastics because of their amazing precision, performance, and speed.
Plastic is an ideal material for laser engraving for several different reasons. However, knowing how exactly to go about laser engraving plastic is essential to ensure that the result matches your vision.
Table of Contents
In this article, you’ll learn what types of plastics work best with lasers and how to engrave plastic using laser technology. You will also learn about the benefits of engraving plastic and things you should look out for throughout the process.
Why Engrave Plastic With Laser?
Plastic is a popular choice for engraving because it’s versatile, widely used, and easy to work with. Laser engraving is especially effective since it’s fast, precise, and works by vaporizing the surface to create clean designs.
Compared to other materials, plastic is easier to engrave, clean, and even fix if mistakes happen. It also takes paint well, making it great for detailed or colored designs.
That said, not all plastics behave the same, so choosing the right type is essential for good results.
Types of Plastic that Can Be Laser Engraved
When it comes to learning how to engrave plastic with laser engraving machines, it’s important to know what types of plastic you can use to complete your project. Some plastics release toxic fumes when they are being engraved. These types of plastic should be avoided to not inhale those toxic fumes.
Below are several types of commonly used plastic that are safe for laser engraving:
- Acrylic
- PET
- Delrin
- Mylar
- Polyimide
- Polyester
- Polystyrene
- Polymethylmethacrylate
Choose your laser based on the plastic you’re working with. Diode lasers struggle with clear or blue acrylic unless you coat it (like painting it black), while CO₂ lasers can cut and engrave all acrylic colors and are generally the best option for plastic.
Avoid very thin plastics, as they can melt easily and reduce power if you have to work with thinner materials. Most importantly, stay away from unsafe plastics like Teflon, ABS, and PVC, as they release harmful fumes when engraved.
Other materials to avoid include:
- Polyvinyl Butyral (PVB)
- Materials That Contains Halogens, Epoxy, or Phenolic Resins
- Vinyl
- Carbon Fiber
If you do want to engrave any of these plastic materials, it is recommended that you opt for a CNC Router instead.
Best Plastics for Laser Engraving
Below is a practical guide to the safest and most reliable plastics to use, plus the right laser type for each.
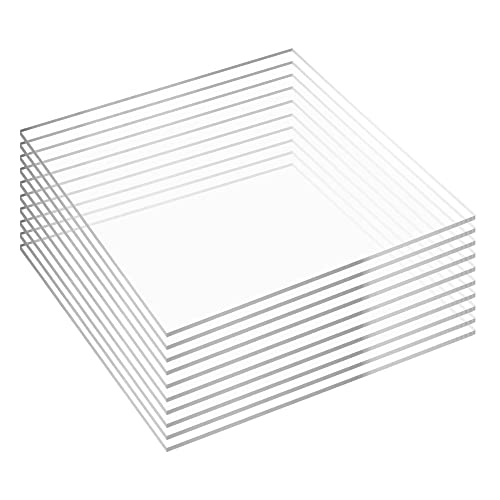
1. Acrylic (PMMA)
Best for: Signs, displays, awards, jewelry, light panels
- Laser type: CO₂ laser (best choice), diode (works but limited), fiber (not ideal)
- Why it works: Acrylic vaporizes cleanly instead of melting, giving crisp edges and frosted engravings
- Tips:
- Cast acrylic engraves better than extruded
- Use air assist to keep edges clean
Recommended Acrylic Materials For Laser Engraving

2. Delrin (Acetal / POM)
Best for: Gears, mechanical parts, industrial labels
- Laser type: CO₂ laser
- Why it works: Produces clean engravings with minimal residue
- Tips:
- Engraves better than it cuts
- Use ventilation, as it can produce noticeable fumes
3. PET / PETG
Best for: Packaging, protective covers, prototypes
- Laser type: CO₂ laser, diode (light engraving)
- Why it works: Safer than many plastics and engraves with decent clarity
- Tips:
- Lower power helps prevent melting
- Avoid slow speeds to reduce edge deformation
What Laser Machine Is Best for Engraving Plastic?
The short answer: it depends on the type of plastic and the finish you want. Each laser type works differently, so choosing the right one makes a big difference in quality, speed, and safety.
Here’s a clear breakdown of the four main options.
CO₂ Lasers (Best Overall for Most Plastics)

Best for: Acrylic, laser-safe laminates, and PET plastics
- Wavelength: 10.6 µm
- Why it works: CO₂ lasers are strongly absorbed by most non-metal materials, so they engrave plastics cleanly and efficiently
- Results: Smooth cuts, frosted engravings, polished edges (especially on acrylic)
Pros
- Excellent for cutting and engraving
- Clean, professional finish
- Works on a wide range of plastics
Cons
- Not ideal for very thin or heat-sensitive plastics
- Larger machines, higher cost than diode
Bottom line: If you want the most reliable, high-quality results on plastic, go with a CO₂ laser.
Diode Lasers (Best Budget Option)

Best for: Light engraving on dark plastics, hobby projects
- Wavelength: ~445 nm
- Why it works: Diode lasers rely on color absorption, so darker plastics engrave better than clear or light ones
Pros
- Affordable and beginner-friendly
- Compact and easy to set up
Cons
- Struggles with clear or transparent plastics
- Limited cutting power
- Lower engraving contrast
Bottom line: Good for entry-level use, but limited if you plan to engrave a variety of plastics.
UV Lasers (Best for Precision and Delicate Plastics)

Best for: Clear plastics, medical parts, electronics, fine detail work
- Wavelength: 355 nm
- Why it works: UV lasers use a “cold marking” process, meaning very little heat is applied
Pros
- Extremely fine detail (micron-level precision)
- No melting, burning, or warping
- Works on transparent and heat-sensitive plastics
Cons
- Higher cost
- Not ideal for thick cutting
Bottom line: The best choice for high-end, detailed plastic engraving without heat damage.
Fiber Lasers (Best for Industrial Plastic Marking)

Best for: Certain engineered plastics, coated plastics, industrial parts
- Wavelength: ~1064 nm
- How it works: Marks plastics by causing a surface color change rather than cutting
Pros
- Very fast marking speeds
- Durable, permanent marks
- Great for barcodes, serial numbers, and logos
Cons
- Doesn’t work on all plastics
- Not suitable for cutting
- May require additives for best results
Bottom line: Best for industrial marking, not general plastic engraving.
Quick Comparison
Laser Type | Best Use Case | Strengths | Limitations |
|---|---|---|---|
CO₂ | General plastic engraving | Versatile, clean cuts | Larger, higher cost |
Diode | Hobby and basic projects | Affordable, easy to use | Limited compatibility |
UV | Precision and delicate work | No heat damage, ultra-detailed | Expensive |
Fiber | Industrial marking | Fast, permanent marks | Limited plastic compatibility |
Now that you know the best laser and which plastics to use for laser engraving and have your exhaust system or fume extractor in place, let’s look at how to engrave plastic with laser technology.
Preparing Your Plastic for Laser Engraving
Good results start before you even turn on the machine. A few simple prep steps can mean the difference between a clean, professional engraving and a melted, messy one.
1. Clean the Surface
Dust, oils, and fingerprints can affect how the laser interacts with the plastic.
- Wipe the surface with a lint-free cloth
- Use a small amount of isopropyl alcohol if needed
- Let it dry completely before engraving
Even small particles can leave marks or reduce engraving quality. We recommend using Cleanaroo Isopropyl Alcohol 99.9%.

- All-Purpose Cleaning Agent and Solvent, High Purity & Quality
2. Apply Masking (If Needed)
Masking helps protect the surface from smoke marks and debris.
- Use low-tack masking tape or transfer paper
- Apply it smoothly with no bubbles or wrinkles
- Press it down firmly so edges don’t lift
This step is especially useful for glossy plastics like acrylic.
We recommend TapeManBlue Wide Painters Tape, which yields excellent results.
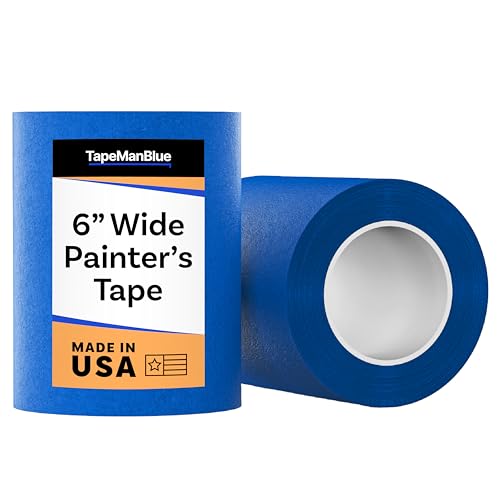
- SUPERIOR ADHESION & CLEAN REMOVAL: Our wide blue painters tape, perfect as 3D printer tape or laser masking tape, removes cleanly without residue, streaks, or stains for up to 21 days. Unlike other painting tape or masking tape that peels prematurely, TapeManBlue's extra wide painters tape stays put on your surfaces. Whether you're using it as 3D printing tape, for laser engraving, or general painting projects, our thick painters tape delivers reliable performance every time.
3. Secure the Material
Plastic can shift or warp during engraving if it’s not held properly.
- Place it flat on the bed
- Use magnets, clamps, or hold-down pins
- Make sure it doesn’t move at all
Movement leads to blurry lines and misaligned designs.
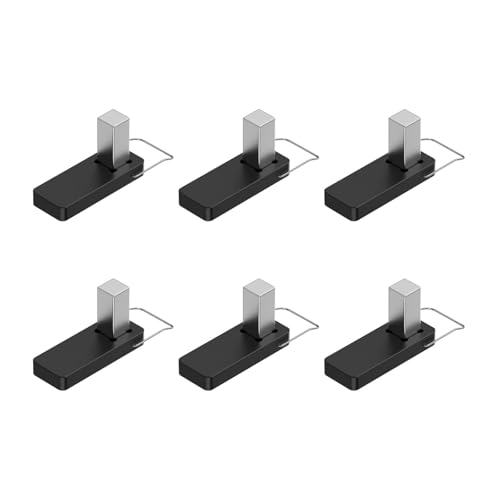
- It is made of strong plastic and magnets that press down on the wood for a clean and consistent cut on warped boards
These xTool honeycomb material hold-down pins are made of durable plastic and feature strong magnets. The pins hold acrylic firmly in place for cleaner, more consistent engraving and cutting.
They’re designed to fit xTool beds and work just as well with most standard honeycomb beds.
4. Check Focus and Alignment
Proper focus is key to sharp engraving.
- Set the correct focal height for your laser
- Double-check alignment using your software preview
- Run a frame test to confirm positioning
A small focus error can make your engraving look soft or uneven.
5. Test Your Settings
Never jump straight into your final piece.
- Use a scrap piece of the same material
- Test different power and speed settings
- Look for clean lines without melting or discoloration
This step saves time, material, and frustration.
6. Ensure Proper Ventilation
Engraving plastic creates fumes and residue.
- Turn on your exhaust or air filtration system
- Use air assist if your machine has it
- Work in a well-ventilated area
This keeps your workspace safe and improves engraving quality.
Quick Checklist
Before you start engraving, make sure:
- Material is laser-safe
- Surface is clean and dry
- Masking is applied (if needed)
- Plastic is flat and secured
- Focus and alignment are correct
- Settings are tested
- Ventilation is on
Final Tip
Take your time with setup. Most engraving problems come from skipping prep, not from the laser itself. A few extra minutes here will give you cleaner results and fewer wasted materials.
Choosing the Right Laser Settings
The correct laser settings depend on the plastic type, thickness, and your machine’s wattage. Here are some general guidelines for CO₂ and diode lasers:
- Power: Start low (10–25% for thin plastics) and increase if needed.
- Speed: Higher speeds help avoid excessive melting; start around 300–600 mm/s for CO₂ lasers.
- DPI/Resolution: 300–600 DPI is usually sufficient for clear detail.
- Air Assist: Helps remove debris and reduce surface melting.
For fiber lasers, use lower power and higher speeds to mark plastics with precision without burning them.
How to Engrave Plastic with Laser: Step-By-Step Guide
The process of laser engraving plastic isn’t overly complicated, but it does require preparation. Before you start, you need to have a clear vision of your desired outcome.
Here are the steps for how to engrave plastic with laser technology.
Create your design
The most crucial part about figuring out how to engrave plastic is to decide on your design. When creating your design, it’s essential to keep in mind that you will be engraving on plastic throughout the process.
The result may look different from other materials, such as wood. Make sure you save your design in a file format compatible with your laser engraver.
Choose your plastic
Next, it’s time to choose a plastic material. First and foremost, your plastic must be compatible with laser engraving, as outlined in the list above. What’s more, choosing a plastic that you choose will best showcase your finished work for its intended purpose.
Before beginning the engraving process, you must ensure the plastic is clean. Be sure to wipe off any dust and use a mild cleaner if required.
Engrave the plastic with your laser machine
Once you have your design and plastic, it’s time for the fun part: laser engraving.
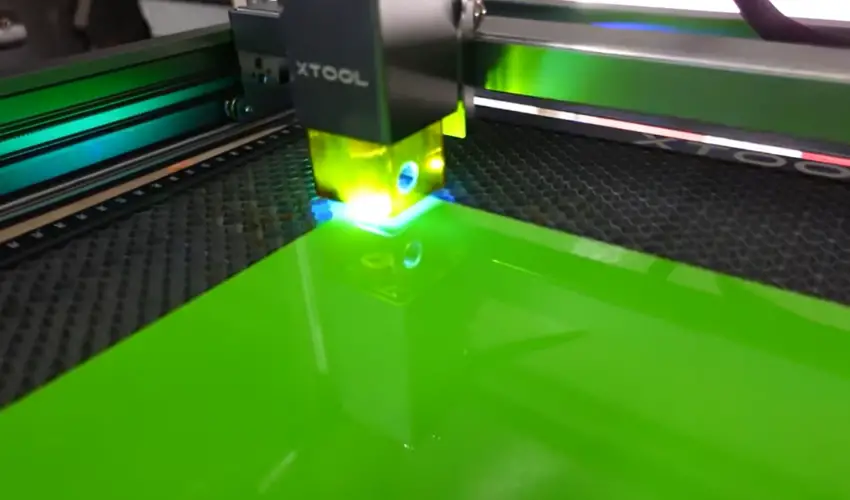
Laser engraving plastic starts similarly to how you would engrave any other material. Position the plastic material and align the laser beam to the desired location on the plastic. From there, you just let the laser machine do its thing! The machine should vaporize the plastic surface.
Be sure to supervise to ensure that the machine is engraving the plastic as it should and that no flames are being produced. Make sure you have a fire extinguisher handy and that your work area is well ventilated by using an exhaust fan or a fume extractor to ensure your safety.
Check the finished product
Once your machine is done, check the final product to ensure precision and accuracy. This is the time to remove any unwanted residue from the engraving. You can simply use clean water to do this, or you can use a mild cleaner that doesn’t affect plastic. Avoid using Alcohol or any harsh cleaners.
If there is a small mistake, you may be able to fix it by engraving over the mistake. If there is a more significant mistake, you may need to start over.
Tips for Better Results
- Use Laserable Plastics: They’re designed for clean contrast and durability.
- Avoid Overheating: Multiple light passes are better than one heavy pass.
- Test Different Fonts & Graphics: Bold designs engrave more visibly than thin lines.
- Keep Ventilation On: Even safe plastics can produce odors — good airflow improves results and safety.
- Use a Rotary Attachment for Round Items: Perfect for engraving plastic cups, bottles, or cylindrical parts.
Optional: Paint your laser engraving
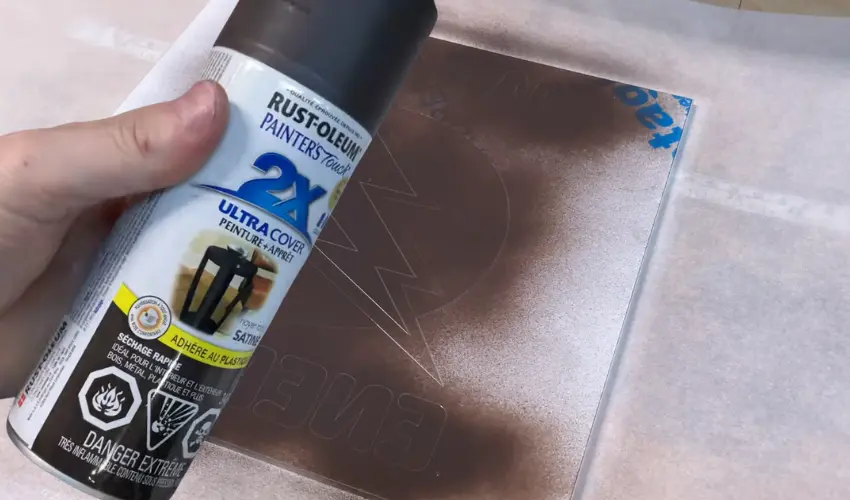
We recommend using Rust-Oleum Painter’s Touch 2X Ultra Cover Spray Paint, 12 oz, to color fill laser-engraved acrylic. Follow these steps for a smooth and professional finish.
This process can work with acrylic available in more than 50 different color options, ensuring versatile results:
Materials Needed:
- Laser-engraved acrylic
- Rust-Oleum Painter’s Touch 2X Ultra Cover Spray Paint (Flat Black or any desired color)
- Painter’s tape or masking tape
- Soft cloth
- Rubbing alcohol or a cleaning solution

- Ideal for use on interior/exterior surfaces including wood, plastic, plaster, metal, masonry and unglazed ceramic
Step-by-Step Process:
- Prepare the Acrylic Surface:
- Clean the acrylic thoroughly using a soft cloth and rubbing alcohol or a suitable cleaning solution to remove any dirt, dust, or oils. This ensures the paint adheres well.
- Mask the Non-Engraved Areas:
- Use painter’s tape or masking tape to cover the non-engraved areas of the acrylic to prevent overspray from sticking to unwanted areas. Make sure the tape is applied securely along the edges.
- Spray Paint Application:
- Shake the can of Rust-Oleum Painter’s Touch 2X Ultra Cover Spray Paint vigorously for about 1-2 minutes to mix the paint properly.
- Hold the can about 10-12 inches away from the engraved surface. Spray the paint in light, even coats directly over the engraved areas. Multiple light coats are preferable to avoid running or pooling of the paint.
- Allow each coat to dry for about 10-15 minutes before applying the next one. Continue until the engraving is fully covered.
- Remove Excess Paint:
- Once the paint is dry to the touch, gently remove the painter’s tape. If excess paint has spread onto the acrylic, you can carefully remove it using a soft cloth with rubbing alcohol.
- For detailed engravings, you can use a plastic scraper or razor blade to gently scrape away any paint that may have spread beyond the engraved areas.
- Final Drying:
- Let the acrylic dry completely, which may take about 24 hours for the paint to cure fully.
- Optional Finishing:
- For added protection, you can apply a clear acrylic sealant to ensure the paint stays intact.
Tips:
- Test the spray paint on a scrap piece of acrylic before applying it to your final project.
- Avoid spraying too close to the acrylic to prevent excessive paint buildup.
- Experiment with other Rust-Oleum color options if you want to add vibrant or contrasting color fills.
This method enhances the visibility of your laser-engraved design, making it stand out with a professional and durable finish.
The Takeaway: Consider Plastic for Your Next Project
To recap, engraving plastic isn’t too different from engraving other materials. However, it’s important to know how to engrave plastic with a laser machine to ensure both your safety and the satisfaction with your end result.
Hopefully, you’ve learned more on how to engrave plastic, and that you have some new creative ideas brewing!
Frequently Asked Questions
Is it safe to engrave plastic with a laser machine?
If you take the proper precautions, it is safe to engrave plastic with a laser machine.
Firstly, knowing what plastics you can and can’t engrave with a laser machine is essential.
There are several types of safe plastics, such as Acrylic, but there are also plastics that can produce excessive amounts of toxic fumes when laser engraved, such as PVC.
Beyond that, you should follow the safety precautions you take when engraving any other material with a laser. Be sure to supervise the process to ensure that no flames occur and make sure you have a fire extinguisher handy and that your work area is well ventilated.
How long does it take to engrave plastic with a laser machine?
The time it takes to laser engrave plastic varies based on several factors, including the size of the design and the power of the laser. The fact that the material is plastic plays a minor role in the amount of time that it takes to engrave. Typically, it should usually take no more than a few minutes.
The actual process of engraving is usually quick, but the steps that come before this part of the process, including rendering the design into the computer software and preparing the material and machine may be what take the longest.
Can any laser machine engrave plastic?
While many laser machines can engrave on plastic, not every machine is capable of it. In general, CO2 machines, diode and fiber laser machines can get the job done.
CO2 laser machines are the most commonly used machines when learning how to engrave on plastic. Fiber laser machines are used mainly for industrial plastics such as Polypropylene and Nylon. Engraving Black Cast Acrylic with a fiber laser will usually result in a white mark on the plastic.
A Diode Laser is not able to engrave transparent Acrylic, but black cast acrylic will yield excellent results.
What are some common applications for laser engraved plastic?
There are many different applications for laser-engraved plastic, as this method is used in a variety of industries.
Here are a few common applications for laser-engraved plastic:
Engraving serial numbers and barcodes on products
Adding plastic identification codes for recycling purposes
Create customized gifts
Engrave logos for your business
Engrave signs, including neon signs
Engrave serial codes into medical devices
Of course, one of the best reasons to learn how to engrave plastic is for your own DIY or creative projects!
How can I prevent melting or warping when engraving plastic?
Use lower power and faster speeds to minimize heat buildup. Adding air assist helps remove debris and cool the engraving area. You can also apply masking tape to the surface to reduce burn marks and improve edge sharpness.