Laser engraving depth control is one of the most important skills to master if you want clean results, consistent quality, and professional-looking engravings.
Whether you’re engraving wood, metal, acrylic, leather, or stone, understanding how depth works—and how to control it—can make the difference between a crisp, high-contrast engraving and a ruined workpiece.
Table of Contents
In this complete guide, we’ll explain what controls engraving depth, how different lasers behave, material-specific tips, and best practices for achieving repeatable results.
What Is Laser Engraving Depth Control?
Laser engraving depth control refers to how deeply the laser removes material during engraving. Depth is not controlled by a single setting—instead, it’s the result of several factors working together:
- Laser power
- Engraving speed
- Number of passes
- Focus position
- Material type and density
- Laser type (CO₂, diode, fiber, MOPA, IR, UV)
Mastering depth control allows you to create:
- Light surface marks
- Deep relief engravings
- 3D and grayscale effects
- Consistent production runs
Key Factors That Control Engraving Depth
Laser Power
Power is the primary depth driver.
- Higher power = deeper engraving
- Lower power = shallower engraving
Most laser software allows you to engrave using a power range, especially for grayscale and 3D engraving.
Tip: Increasing power too much can cause charring, melting, or loss of detail—especially on wood and plastics
Engraving Speed
Speed controls how long the laser stays in one spot.
- Slower speed = more material removal
- Faster speed = lighter engraving
Depth control is often achieved by balancing moderate power with slower speeds, rather than maxing out power alone
Number of Passes
Multiple passes allow you to build depth gradually.
Benefits of multiple passes:
- Cleaner edges
- Less burning or melting
- Better control on hard materials like metal or acrylic
This technique is especially useful for deep engravings and thick materials
Focus Position (Z-Offset)
Laser focus directly affects engraving depth and quality.
- Perfect focus = maximum detail
- Slightly defocused (lower focal point) = wider beam, deeper cut
Many professionals intentionally defocus downward by 0.5–2mm to achieve deeper engraving without increasing power
DPI / LPI (Resolution)
Resolution affects surface smoothness and perceived depth.
- Higher DPI = smoother, more refined engraving
- Lower DPI = rougher texture, faster engraving
For deep or 3D engravings, higher DPI helps maintain clean contours
How Laser Type Affects Depth Control
CO₂ Lasers
Best for:
- Wood
- Acrylic
- Leather
- Rubber
- Glass
CO₂ lasers control depth well on organic materials but cannot engrave bare metal without marking compounds.
Diode Lasers
Best for:
- Wood
- Leather
- Dark acrylic
- Anodized or coated metals
Diode lasers engrave shallower than CO₂ or fiber lasers but offer excellent control for light-to-medium depth projects.
Fiber & MOPA Fiber Lasers
Best for:
- Stainless steel
- Aluminum
- Brass
- Titanium
Fiber lasers control depth through pulse frequency, power, and speed.
MOPA fiber lasers add pulse width control, enabling:
- Deeper engraving
- Color marking
- 3D embossing on metal
IR & UV Lasers
Best for:
- Fine detail
- Shallow engraving
- Glass, crystal, plastics, electronics
These lasers focus on precision rather than depth, making them ideal for micro-engraving.
Material-Specific Laser Engraving Depth Control Tips
Wood
- Use moderate power and slower speed
- Avoid resin-heavy woods (like pine)
- Multiple passes reduce burn marks
- Masking tape helps prevent surface scorching
We recommend TapeManBlue Wide Painters Tape, which yields excellent results.
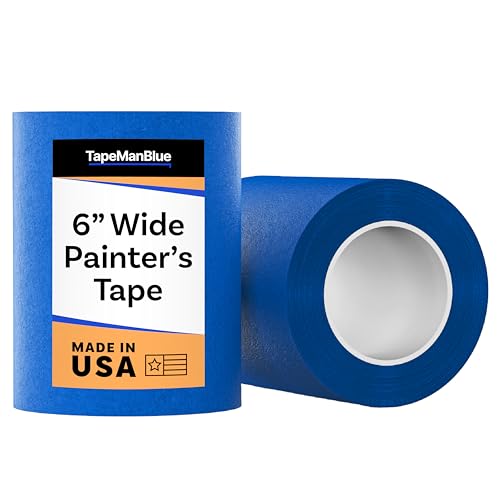
- SUPERIOR ADHESION & CLEAN REMOVAL: Our wide blue painters tape, perfect as 3D printer tape or laser masking tape, removes cleanly without residue, streaks, or stains for up to 21 days. Unlike other painting tape or masking tape that peels prematurely, TapeManBlue's extra wide painters tape stays put on your surfaces. Whether you're using it as 3D printing tape, for laser engraving, or general painting projects, our thick painters tape delivers reliable performance every time.
Acrylic
- Use fewer passes with controlled power
- Too much power causes melting
- Cast acrylic engraves deeper than extruded acrylic
Metal
- Fiber or MOPA lasers are required for depth
- Use multiple passes
- Adjust pulse frequency for deeper results
- Cooling time between passes improves clarity
Leather
- Low power, fast speed
- Depth comes from heat reaction, not material removal
- Test first—leather thickness varies widely
3D and Grayscale Engraving Depth Control

3D laser engraving uses grayscale depth mapping:
- White = no engraving
- Black = maximum depth
- Gray = varying depths
To control depth accurately:
- Use true grayscale mode (not dithering)
- Set a proper power range
- Increase DPI for smoother transitions
- Test on scrap material first
This technique is widely used for relief carvings, 3D logos, and embossed metal designs.
Best Practices for Consistent Depth Control
- Always run a material test grid
- Keep optics clean for consistent power delivery
- Use the same material supplier when possible
- Record successful settings for repeat jobs
- Don’t rely on power alone—balance speed, passes, and focus
Common Laser Engraving Depth Problems (And Fixes)
Problem | Cause | Solution |
|---|---|---|
Too shallow | Speed too fast | Slow down or add passes |
Burned edges | Power too high | Reduce power, add passes |
Uneven depth | Inconsistent focus | Re-level material |
Loss of detail | DPI too low | Increase resolution |
Line width and depth ratio for laser engraving depth control

When it comes to laser engraving, controlling engraving depth is essential for creating detailed, high-quality designs. Two key factors in achieving precise depth control are line width and the depth ratio, which determine the clarity, durability, and overall appearance of the final product.
Understanding these aspects can help engravers create consistent results across various materials while optimizing for both visual impact and functionality.
Understanding Line Width in Laser Engraving Depth Control
- What It Is: Line width refers to the thickness of each engraved line. It’s influenced by the laser’s focus, lens quality, material properties, and laser power settings.
- Why It Matters: Fine line width is critical for intricate designs or small text, as it ensures sharp and defined edges. On the other hand, larger line widths are ideal for bold patterns or branding marks, providing high visibility.
- Adjusting Line Width:
- Laser Focus: A well-focused laser beam results in thinner line widths. Laser focus can be adjusted by fine-tuning the lens, providing a smaller focal point for more detailed engravings.
- Speed and Power Settings: Reducing power and increasing speed typically narrows the line width. This can help maintain detail without excessively deep engraving.
Depth Ratio and Its Impact on Engraving Quality
- What It Is: Depth ratio is the relationship between line width and the depth of the engraving. This ratio is important for balancing the visual depth of a design with the material’s ability to retain detail.
- Why It Matters: A balanced depth ratio ensures engravings are both visually impactful and structurally sound. Shallow engraving with a balanced ratio produces refined details, while deeper engraving provides durability and a more textured feel.
- Adjusting Depth Ratio:
- Power and Speed Combination: Increasing power or decreasing speed allows for deeper engraving, though it may widen the line as well. Testing these settings on sample materials helps achieve the ideal depth without sacrificing clarity.
- Multi-Pass Engraving: For depth control without increasing line width, try using multiple low-power passes. This approach slowly removes material layer by layer, preserving detail and keeping lines crisp.
How Line Width and Depth Ratio Influence Various Materials
- Wood: In wood engraving, maintaining a balanced depth ratio is essential to avoid charring or overly deep cuts that can compromise fine details. Moderate line width and depth work well for wood, especially for intricate designs.
- Acrylic: Acrylic is versatile, handling both shallow and deep engravings. Shallow engravings with a balanced depth ratio create clear lines, while deeper engravings produce a frosted effect.
- Metal: Metals, often engraved with fiber lasers, require shallow engravings for fine details, such as serial numbers or text. A balanced 1:1 or 1:0.5 depth-to-width ratio works well for durability without losing precision.
- Leather: Leather benefits from moderate engraving depth, allowing a 1:1 width-to-depth ratio to create visible and clean designs without overburning the material.
Techniques to Improve Line Width and Laser Engraving Depth Control
- Lens Selection: A lens with a shorter focal length produces finer, more detailed lines, improving depth control and clarity.
- Air Assist: Using air assist reduces debris, prevents material overheating, and helps achieve clean, defined lines.
- Temperature Control: Particularly for heat-sensitive materials, adjusting the laser’s temperature or using cooling techniques can help achieve precise depth without charring or warping.
Widen The Width Of Your Characters
A laser machine needs a certain amount of draft to produce a pattern. Sure, you can manually adjust the settings on your machine to reduce the draft angle but this will not really get you home. The draft is a necessary parameter whether you are engraving into aluminum, stainless steel, or graphite.
The draft angle is important in controlling the light heating the material. The right angle ensures that the laser beam heats the center with a higher intensity than the edges. This is what you want to achieve a deep cut. A laser needs more passes to ensure a deep engraving.
If the depth of your cut is greater than the line width of your letters or numbers, the draft angles from the sidewalls will intersect somewhere on the floor of the engraving blocking further cutting.
With this in mind, the best strategy to increase the depth of your engraving is to widen the width of your characters. As a rule, the line width should be either equal or greater than the depth.
For instance, you cannot sustain a flat floor finish by engraving a 0.0025” wide design over a depth of 0.001”. The best approach here would be to keep both the width and depth at a steady value of 0.025”.
Important tips and tricks for laser engraving depth control
Increasing the line width of your characters or design is one way to achieve laser engraving depth control. You can also try a few more for even better results. Here are some of them:
- Utilize bold font: A bold font is obviously wider than normal font. Using characters and letters of bold font certainly increases their line width and ultimately allows for a deeper engraving. If you want an effortless way of reducing the draft angle and digging a little deeper, consider using bolded characters. It will certainly give a flat and easily readable surface, especially in molded plastic.
- Use a vector line around the characters: another timeless strategy that can help you improve the quality of your engraving is using a vector engraving line around your characters. Doing this adds crisp to the edges of the design, text, letters, or picture. Unfortunately, this method only works with certain materials and not others. A good rule of thumb is to use heavy raster engraving on plastics and medium raster engraving (plus a medium vector outline) on wooden materials. Test your pieces out with different settings before engraving on your final design.
- Increase the number of passes: deep engraving can also be achieved through multiple passes. To increase the passes, change the number of copies contained in the print dialogue box. Like all other materials, the grade and hardness control the number of passes and the settings needed to cut to a certain depth.
- Use the appropriate equipment: unless you don’t care much for deep engraving, you want to purchase a laser machine with the right power output. The recommended threshold is a maximum wattage of 30—50 watts. Any less wattage may not dissipate sufficient light energy to ensure deep cuts on some materials.
- Play with the speed: the speed of the laser engraver also plays an important role in the depth of your cuts. Ideally, moderate speeds of between 20 and 30% coupled with more passes ensure the material chips away and thus a deep engraving project. If you want a relatively shallow cut, increase your speed and reduce the number of your passes.
- Alter the frequency of the laser engraver: most deep engraving projects implement a frequency range of between 1-5%. Basically, a lower frequency range offers more laser power per pulse and helps to ablate the material. Higher frequency, on the other, provides lower power per pulse and avoids deep engraving.
Bonus tips for deeper engraving
The techniques above are good for controlling the depth of your laser engraving. Unfortunately, they can only do so much. What if you want to go deeper than the maximum value stipulated by the techniques? There are two ways of achieving this:
- Combine laser engraving with a secondary process to get rid of the material. Examples include cutting through a huge portion of the material using a table saw or a milling machine. By doing this, you essentially lessen the load for the laser engraver and let it cut deeper into your material.
- Stack up several layers to form your structure. You can control the depth of your cutouts and cavities by playing with different layers stacked up together. Place a solid layer at the bottom and reduce the sizes of the subsequent layers. This creates a change in depth during laser engraving.
Final Thoughts
Laser engraving depth control is both a science and an art. By understanding how power, speed, focus, and material interact, you can achieve precise, repeatable, and professional results across any project.
Whether you’re engraving wood signs, metal tags, acrylic awards, or 3D relief artwork, mastering depth control unlocks the full potential of your laser engraver—and sets your work apart from the rest.
Frequently Asked Questions
What settings control engraving depth the most?
Engraving depth is mainly controlled by laser power and engraving speed. Higher power and slower speeds increase depth, while lower power and faster speeds create shallower engravings. Focus position, number of passes, and material type also play a major role.
Is it better to increase power or slow down speed for deeper engraving?
In most cases, slowing down the speed produces cleaner and more controlled depth than simply increasing power. Excessive power can cause burning, melting, or loss of detail, especially on wood and acrylic.
How does focus affect engraving depth?
A perfectly focused laser gives maximum detail, but slightly defocusing downward (0.5–2 mm) can increase engraving depth by widening the beam. This technique is commonly used for deeper relief engravings.
Can I control engraving depth on metal with any laser?
No. True depth engraving on metal requires a fiber or MOPA fiber laser. CO₂ and diode lasers can mark or discolor metal but cannot engrave real depth without marking sprays or coatings.
Why does the same setting produce different depths on different materials?
Materials vary in density, hardness, moisture content, and thermal reaction. Even the same type of wood or metal can engrave differently, which is why running a material test grid is essential for accurate depth control.