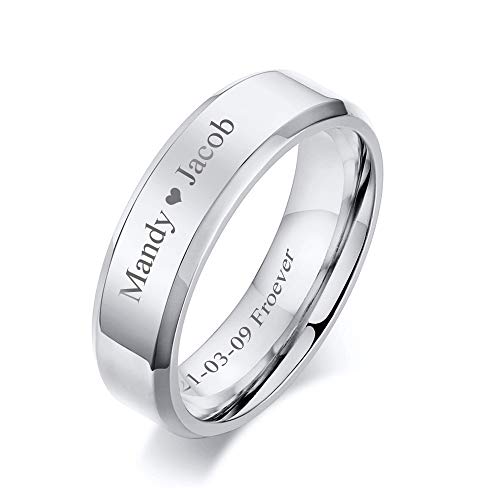
Laser engraving stainless steel is a popular process used across industries for its precision, durability, and ability to create high-quality, permanent markings on one of the most widely used metals.
Whether you’re a hobbyist or a business looking to incorporate laser engraving into your operations, understanding the process, techniques, and materials involved is essential.
Table of Contents
This guide will walk you through everything you need to know about laser engraving stainless steel, from types of lasers to engraving methods and best practices.
What is Laser Engraving on Stainless Steel?
Laser engraving uses a focused beam of light to mark stainless steel surfaces. The process is highly controlled and involves melting, oxidizing, or vaporizing the material to leave a clear and permanent design.
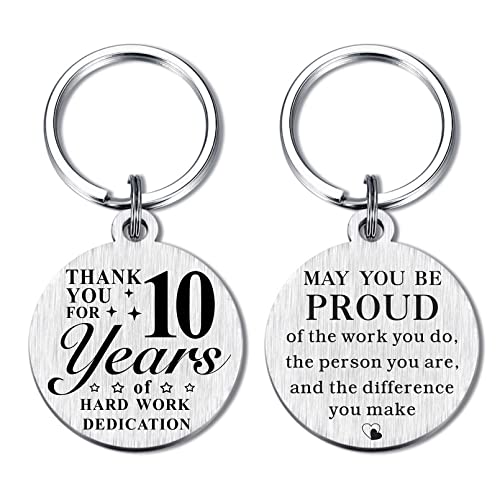
It’s ideal for engraving text, logos, barcodes, serial numbers, and intricate patterns on stainless steel.

Engraving vs Etching vs Annealing
Understanding the difference is important.
Deep Engraving
- Removes material
- Creates visible depth
- Long-lasting and durable
- Best with fiber lasers
Laser Etching
- Surface-level melting
- Shallower mark
- Faster process
- Suitable with IR lasers
Laser Annealing (Color Marking)
- No material removal
- Uses controlled heat
- Produces black, blue, brown, or rainbow tones
- Achieved with advanced fiber/MOPA lasers
Best Types of Laser Engraving Stainless Steel Machines
1. Fiber Laser (Best Overall)
Fiber lasers operate at 1064nm, a wavelength that metals absorb extremely well.
They offer:
- Deep engraving capability
- High-speed marking
- Excellent detail
- Industrial durability
The fiber laser we recommend for laser engraving stainless steel: Gweike G2 Max 50W Fiber Laser

- INDUSTRIAL-GRADE ENGRAVING SPEED: The GWEIKE G2 Max 50W Fiber Laser Engraving Machine Is Equipped With A High-Speed Precision Galvanometer, Achieving An Engraving Speed Of Up To 15000 mm/s And An Accuracy Of 0.001 mm. Its Powerful Performance Significantly Enhances Work Efficiency. Supporting HD 8K Engraving Resolution, It Precisely Captures Every Detail, Delivering An Exceptional Engraving Experience.
When it comes to engraving stainless steel, a fiber laser is the gold standard — and the Gweike G2 Max 50W is an excellent option for several key reasons.
True Direct Metal Engraving
Unlike CO₂ or standard blue diode lasers, the 1064nm fiber laser wavelength is highly absorbed by stainless steel. This allows the G2 Max to:
- Engrave directly into bare stainless steel
- Create deep, permanent markings
- Produce high-contrast logos and text
- Perform annealing (heat marking) without material removal
No marking spray required.
50W Power for Depth & Speed
With 50W of fiber power, the G2 Max can:
- Achieve deeper engraving in fewer passes
- Run faster production speeds
- Handle batch jobs efficiently
- Reduce job time compared to lower wattage systems
This is especially important for tumbler businesses or industrial marking.
Color Laser Engraving on Stainless Steel & Titanium
The Gweike G2 Max 50W supports color engraving on metals such as stainless steel and titanium, enabling you to produce vibrant, multi-tone designs that give your projects a distinctive and eye-catching finish.
Professional-Level Precision
Fiber galvo systems offer extremely fine beam control, making the G2 Max ideal for:
- Serial numbers
- Barcodes and QR codes
- Detailed logos
- Jewelry engraving
- Small metal parts
You get crisp lines and consistent results.
Ideal for Stainless Steel Applications
The G2 Max performs exceptionally well on:
- 304 stainless steel
- 316 stainless steel
- Stainless tumblers
- Knives and tools
- Nameplates and signage
It can even create light 3D depth engraving with proper settings.
Built for Business Use
This machine is well-suited for:
- High-volume production
- Promotional product companies
- Custom tumbler shops
- Industrial part marking
The combination of power, speed, and durability makes it a strong long-term investment.
2. Infrared IR Laser
Infrared lasers (1064nm) are compact and suitable for:
- Stainless steel tumblers
- Small accessories
- Jewelry customization
They offer good contrast but less depth compared to industrial fiber lasers.
The IR laser we recommend for laser engraving stainless steel: xTool F2 5W IR & 15W Diode Portable Dual Laser

If you’re looking for a compact, versatile, and beginner-friendly solution for stainless steel engraving, the xTool F2 is an excellent choice — especially for small businesses and mobile engravers.
Direct Stainless Steel Engraving with 5W IR Laser
The F2 includes a 1064nm infrared (IR) laser, which is specifically designed for metal marking.
This allows you to:
- Engrave directly on bare stainless steel
- Create high-contrast black markings
- Personalize tumblers, tags, and jewelry
- Avoid using marking spray
For light-to-moderate depth engraving, the 5W IR performs very well.
Dual-Laser Versatility
Unlike single-laser machines, the F2 combines:
- 5W IR laser (for metals)
- 15W blue diode laser (for coated metals & organic materials)
This means you can:
- Engrave bare stainless steel (IR)
- Remove powder coating from tumblers (diode)
- Work on wood, leather, acrylic, and more
It’s ideal if you want to engrave stainless steel and expand into other materials.
Color Engraving with xTool F2
The xTool F2 supports multi-color laser engraving on stainless steel using its IR laser. Color engraving works by creating controlled oxidation layers on the metal surface. These thin oxide films produce different colors through light interference.
Portable & Business-Friendly
The F2 is lightweight and compact, making it perfect for:
- Craft fairs
- On-site personalization
- Pop-up events
- Small home workshops
You can offer live stainless steel engraving services, which increases customer engagement and sales.
High Precision & Speed
Thanks to galvo technology, the F2 offers:
- Fast engraving speeds
- Clean, detailed logos
- Crisp text and barcodes
- Smooth marking on curved items (with rotary support)
It’s great for stainless steel accessories like:
- Tumblers
- Keychains
- Pet tags
- Bracelets
Beginner-Friendly Operation
The F2 is designed for ease of use:
- Auto focus assistance
- Simple software workflow
- Minimal setup time
- Enclosed design for added safety
This makes it ideal for beginners entering the stainless steel engraving market.
While a high-power fiber laser is better for deep industrial engraving, the F2 is a smart, versatile, and affordable choice for entrepreneurs, side hustlers, and customization businesses working with stainless steel.
3. Diode Laser Engravers
Diode laser engravers are less powerful than fiber lasers, but they can still mark or lightly etch stainless steel under the right conditions.
Most diode lasers use a blue beam with a wavelength of 450–455nm. Stainless steel can absorb this wavelength, allowing the laser to create surface-level marks.
Due to the lower power output, achieving darker or more visible results may require multiple passes or the use of a laser marking spray—especially with entry-level models. However, the xTool S1 40W Diode Laser delivers solid performance when laser marking stainless steel, producing clear and consistent results.
4. CO₂ Laser Engraver (With Marking Spray)
CO₂ lasers (10.6µm) cannot directly engrave bare stainless steel because the wavelength reflects off metal.
However, when used with marking spray, machines like the xTool P2S CO₂ laser can create durable black surface markings.
Best for:
- Users who already own a CO₂ laser
- Logo engraving
- Coated metal surfaces
The marking spray we recommend for laser marking stainless steel with a CO₂ Laser: xTool Black Laser Marking Spray

If you’re using a CO₂ laser to mark stainless steel, a marking spray is essential — and xTool Black Laser Marking Spray 2.0 is one of the most reliable options available.
Enables CO₂ Lasers to Mark Bare Stainless Steel
CO₂ lasers (10.6µm wavelength) cannot directly engrave bare stainless steel because the beam reflects off metal.
This spray solves that problem by:
- Creating a heat-reactive coating
- Bonding permanently to the metal when lasered
- Producing a durable black mark
Without a spray, CO₂ lasers simply won’t mark stainless steel effectively.
Produces Dark, High-Contrast Results
The 2.0 formula is designed to create:
- Deep black markings
- Strong contrast on silver stainless steel
- Clean logos and sharp text
This is especially important for:
- Tumblers
- Nameplates
- Barcodes
- Custom gifts
Permanent & Durable Markings
When properly applied and lasered, the bonded mark:
- Is resistant to water and wear
- Withstands washing
- Does not fade easily
This makes it suitable for drinkware and industrial labeling.
Easy Application & Cleanup
The spray is simple to use:
- Shake well
- Apply a thin, even coat
- Let dry
- Laser engrave
- Wash off excess residue
Unmarked areas wipe clean with water, leaving only the engraved design behind.
Cost-Effective for CO₂ Laser Owners
If you already own a CO₂ laser, using a marking spray allows you to expand into stainless steel engraving without buying a fiber laser.
It’s a smart way to:
- Add new products
- Increase profit margins
- Offer stainless steel customization
Laser Comparison Table for Stainless Steel
Laser Type | Direct Engraving | Depth | Speed | Best Use |
|---|---|---|---|---|
Fiber Laser | Yes | Deep | Very Fast | Industrial & business |
IR Laser | Yes | Surface | Fast | Small business |
Diode Laser (High Power) | Yes | Surface | Moderate | Entry level |
CO₂ Laser | No (needs spray) | Surface only | Moderate | Logos & coated metals |
Laser Engraving Stainless Steel in Color: How It Works & What You Need
Color laser engraving on stainless steel is one of the most impressive techniques in modern laser marking. Instead of simply creating black or gray marks, advanced laser systems can produce vibrant colors directly on metal — without paint, ink, or coatings.
Here’s everything you need to know.

How Does Color Laser Engraving Work?
Color marking on stainless steel is achieved through controlled oxidation.
When a fiber laser precisely heats the surface, it forms a thin oxide layer. By adjusting:
- Pulse duration
- Frequency
- Power
- Speed
…the thickness of that oxide layer changes.
Different thicknesses reflect light differently — similar to the rainbow effect seen on soap bubbles or oil films — which produces colors such as:
- Gold
- Blue
- Purple
- Green
- Red
- Bronze
Importantly, the metal itself isn’t painted. The color is created by altering the surface chemistry.
What Type of Laser Is Required?
Not all lasers can produce color engraving.
MOPA Fiber Lasers (Best Option)
MOPA fiber lasers allow adjustable pulse width, which is critical for controlling heat buildup and oxidation.
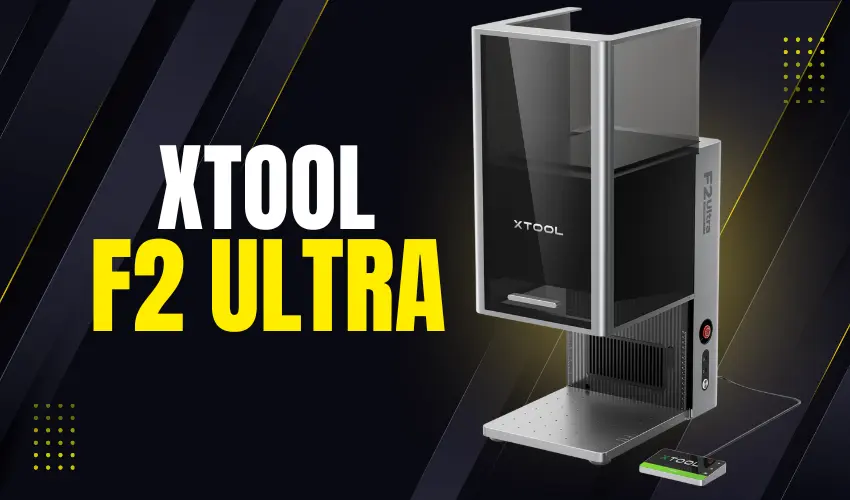
We recommend the xTool F2 Ultra, which supports advanced color marking on stainless steel.
Why MOPA is ideal:
- Adjustable pulse duration
- Better heat control
- Wider color range
- Cleaner transitions
Infrared Lasers
The xTool F2 5W Infrared Laser delivers more consistent color engraving on stainless steel than the older version 2W IR units.
Standard Fiber Lasers
Standard fiber lasers (non-MOPA) can sometimes produce limited color effects, but control is reduced, and color consistency is harder to maintain.
The Gweike G2 Max 50W Fiber Laser features color engraving capabilities, allowing you to mark and engrave vibrant colors on stainless steel and titanium.
CO₂ & Blue Diode Lasers
CO₂ and blue diode lasers cannot produce true color engraving on bare stainless steel. They either remove coating or create surface marks, but not oxidation-based color.
Key Factors for Successful Color Engraving
Surface Preparation
Clean the metal thoroughly with alcohol to remove oil or debris.
Precise Parameter Control
Small adjustments in frequency and speed dramatically affect color output.
Stable Environment
Temperature and surface consistency can influence results.
Testing
Always run color test grids before production.
Is Color Laser Engraving Permanent?
Yes — but with limitations.
The oxide layer is durable and resistant to fading under normal conditions. However:
- Heavy abrasion can remove the color
- Harsh polishing may alter appearance
- Deep engraving removes color entirely
Color marking is ideal for decorative and branding applications rather than high-wear industrial parts.
Popular Applications
Color laser engraving on stainless steel is widely used for:
- Jewelry
- Custom knives
- Logos on drinkware
- Premium branding plates
- Awards and trophies
- Decorative metal art
It adds a premium, eye-catching finish that stands out from standard black marking.
What Stainless Steel Grades Can Be Engraved?
Common engravable grades include:
- 304 stainless steel
- 316 stainless steel
- 430 stainless steel
Fiber lasers handle all of these effectively.
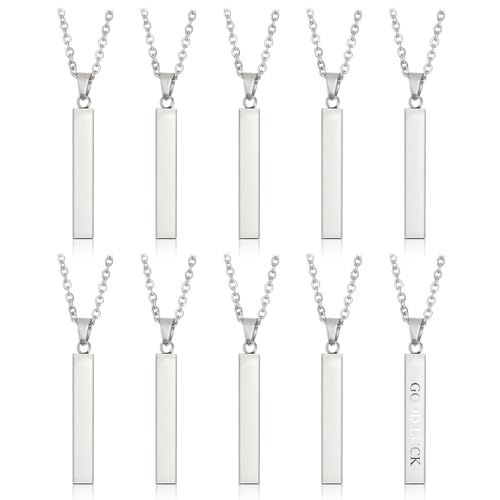
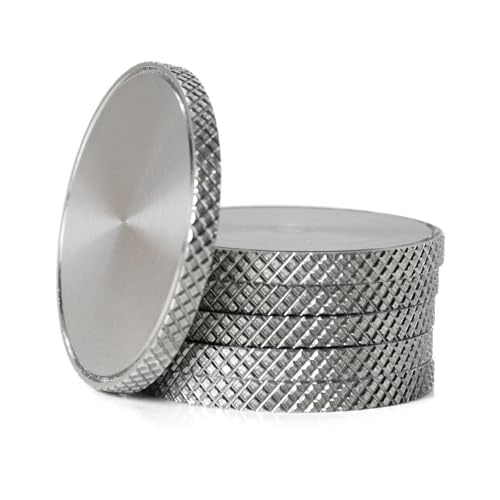
Laser Engraving Stainless Steel Blanks
Stainless steel blanks are available in a variety of shapes, sizes, and finishes to suit different engraving applications.
Dog Tags & ID Tags
- Perfect for military, medical, and pet identification
- Flat, compact design makes them easy to engrave with text, logos, or barcodes
Business Cards
- Durable and eye-catching alternative to paper cards
- Can be customized with logos, contact details, and QR codes
Flasks and Tumblers
- Popular for custom gifts, wedding parties, and promotional branding
- Many are powder-coated to create strong contrast when engraved
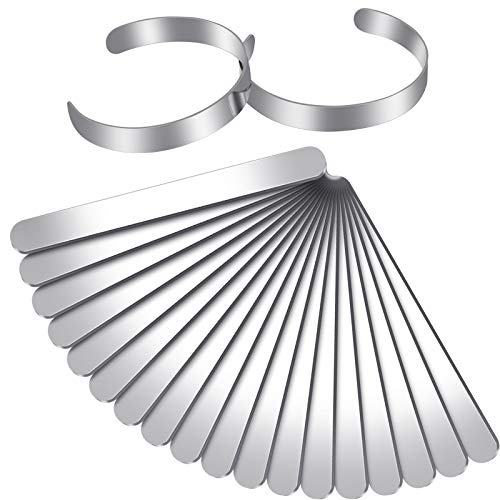
Jewelry Blanks
- Includes pendants, bracelets, cuff links, and charms
- Ideal for engraving initials, dates, quotes, or meaningful messages
Industrial Plates
- Commonly used for machinery labeling and asset tracking
- Suitable for serial numbers, barcodes, and compliance data plates
Stainless steel blanks offer a professional look and exceptional durability, making them suitable for both creative projects and heavy-duty industrial use.
Our Favorite Stainless Steel Laser Engraving Blanks Available on Amazon
How to Laser Engrave Stainless Steel (Step-by-Step)
Choose the Right Laser
Fiber and Infrared lasers are ideal. A diode or CO₂ (with spray) can work depending on your needs and budget.
Prepare the Surface
Clean the stainless steel thoroughly. Remove dust, grease, or oils using rubbing alcohol and a soft cloth. A clean surface ensures better contrast and consistency.
Prepare Your Design
Create or import your design into your laser software. Modern systems allow AI-assisted design generation and automatic parameter optimization.
For curved objects, advanced camera systems can automatically scan curvature and adjust settings accordingly.
Set Laser Parameters
Adjust:
- Power
- Speed
- Frequency (for fiber lasers)
- Focus
Run a small test grid to determine optimal settings before engraving your final piece.
Recommended Starting Settings
Always test first.
Fiber Laser (20–60W)
- Power: 50–80%
- Speed: 1000–3000 mm/s
- Frequency: 20–60 kHz
IR Diode (5W)
- Power: 80–100%
- Slower speeds for darker marks
CO₂ + Marking Spray
- Power: 40–70%
- Medium speed
- Single pass
Position the Design
Use the framing preview or built-in camera system to align your artwork accurately.
Start Engraving
Begin the job and monitor the process. Ensure proper ventilation throughout.
Best Practices for Laser Engraving Stainless Steel

There is a big difference between a professionally engraved item and one done by an amateur. The following practices should always be incorporated to give your product a professional finish.
Marking Speed and Power
The main goal when trying to engrave stainless steel is to make sure that it lasts. The marking speed and power supplied play a vital role in determining the result.
If you want an engraving that will last for a long time, then you need to decrease the marking speed and increase the power. This will increase the intensity of the focused beam and subsequently make deeper grooves.
Repeat the Process
While it is true that you can get a deeper engraving by slowing down the machine and increasing the power, this alone will not guarantee a finer finish.
The reason for this is that slag can accumulate when a lot of material is removed at the same time.
Slag can affect the contrast of the engraved material and may make it stand out from the rest of the material.
To fix this problem, prioritize repeating the process instead of doing it all at once. You can lightly engrave and then repeat it two to three times. Each time, clean the surface to make sure no slag accumulates.
Use Rubbing Alcohol
After the process of engraving, it is a common practice to use rubbing alcohol or an alternative material to clean the surface. This process removes any irregularities and leftover slag.
Calibration
Regardless of how well you set up the entire process, there will always be room for error. This is because of the variation that exists in laser products in general.
Depending on the brand, type of laser, and even the software used, the results can be quite different. Therefore, you will have to do trial and error to calibrate the engraver according to your needs and settings.
Testing
When you are about to engrave a material, things can always go wrong. It may be that the dimensions are a bit off or that the software outputs a slightly different design than what you desire.
Regardless of what the concern may be, running a test is always better. To do this, we suggest you choose a cheaper material. You can find sheets of stainless steel at a local hardware store, which you can use to test what the engraving will look like.
This will ensure that you get the same result that you wanted and also give you room to change the concept in case you do not like the design.
Safety Standards For Laser Engraving Stainless Steel

Proper Ventilation
Laser engraving stainless steel can release harmful fumes and particulates.
- Fume Extraction: Install a high-quality fume extractor to capture toxic byproducts, such as metallic oxides and other emissions.
- Work in Well-Ventilated Areas: Ensure adequate airflow to prevent buildup of fumes.
Personal Protective Equipment (PPE)
Using appropriate PPE reduces the risk of injury.
- Safety Glasses: Wear laser-rated safety glasses designed for the specific wavelength of your laser engraver.
- Gloves: Use heat-resistant gloves when handling materials near the laser beam.
- Face Masks: Wear masks to avoid inhaling fine particulates or fumes.
Laser Machine Maintenance
Proper machine care is essential for safe operation.
- Check Alignment: Ensure the laser beam is properly aligned to prevent stray beams.
- Clean Components: Regularly clean the lenses and mirrors to avoid scattering the laser beam.
- Inspect Cooling Systems: Verify that the cooling system (if applicable) is functioning to prevent overheating.
Material Preparation
Ensure the material is suitable for engraving and free of contaminants.
- Approved Materials: Use stainless steel grades compatible with laser engraving.
- Surface Cleaning: Remove oils, coatings, and debris that could interfere with engraving or release harmful fumes.
Equipment Safety Features
Modern laser engravers include safety features that must be used appropriately.
- Enclosures: Operate the laser engraver with its enclosure or housing in place to contain the beam.
- Emergency Stop: Familiarize yourself with the emergency stop button for immediate shutdown in case of an issue.
- Interlocks: Ensure interlock switches are functioning and not bypassed.
Training and Certification
All operators should be trained in laser safety.
- Understand Laser Classes: Know the classification of your laser (e.g., Class 3B, Class 4) and the associated risks.
- Receive Certification: Complete training programs to operate industrial lasers safely.
- Follow Manufacturer Guidelines: Adhere to the specific safety recommendations provided by the laser engraver’s manufacturer.
Fire Prevention
Laser engraving generates heat, which can pose a fire risk.
- Fire Extinguishers: Keep a suitable extinguisher (e.g., CO2 or dry chemical) nearby.
- Non-Flammable Surroundings: Ensure the work area is free from flammable materials.
- Monitor Operations: Never leave the laser engraver unattended during use.
Compliance with Regulations
Adhere to industry and governmental safety regulations.
- OSHA Standards: In the U.S., follow OSHA guidelines for laser safety in the workplace.
- Laser Safety Standards: Comply with international standards such as ANSI Z136.1 for safe laser use.
- Local Environmental Laws: Dispose of waste and emissions in accordance with local regulations.
Marking Compounds Safety
When using marking compounds follow the product’s safety instructions.
- Application Methods: Avoid inhalation or skin contact with marking compounds.
- Proper Curing: Ensure compounds are properly bonded to the material to avoid residue release.
Post-Engraving Clean-Up
Safely handle the engraved material after the process.
- Debris Removal: Use a vacuum with a HEPA filter to collect fine dust.
- Surface Cleaning: Wipe the engraved surface to remove residues.
Safety is paramount when laser engraving stainless steel. By following these standards and implementing robust safety practices, you can minimize risks while achieving high-quality results.
Always prioritize proper training, maintain your equipment, and comply with safety regulations to create a secure and efficient workspace.
Conclusion
Laser engraving stainless steel offers a precise, durable, and professional way to mark this resilient metal.
Whether you’re engraving for industrial applications or personal projects, understanding the laser types, methods, and best practices will ensure that you achieve the best possible results.
With the right equipment and technique, laser engraving stainless steel can open up a world of creative and functional possibilities.
Frequently Asked Questions
Can you laser engrave stainless steel with any laser?
No. The best results come from fiber lasers (1064nm) and infrared (IR) lasers, which can engrave stainless steel directly.
CO₂ lasers require a marking spray, and standard blue diode lasers typically produce lighter surface marks unless multiple passes are used.
What is the difference between engraving and etching stainless steel?
Engraving removes material and creates visible depth.
Etching melts only the surface layer and produces a shallower mark.
Annealing changes the surface color without removing material.
Fiber lasers can perform all three depending on settings.
Is laser engraving stainless steel permanent?
Yes. Deep engraving permanently removes material, while annealed marks and spray-based markings are highly durable under normal use. However, heavy abrasion or polishing can affect surface-level color markings.
What stainless steel grades can be laser engraved?
Common grades like 304, 316, and 430 stainless steel engrave very well. Smooth, polished surfaces typically produce the best contrast and detail.