Engraving is a fun way to get creative and put your own personal touch on your projects or favorite items. However, sometimes it’s worth adding additional elements to your engraving to boost the excitement, such as color.
While color laser engraving is possible, it has its limits, including its ability to be done on limited materials and the cost. Luckily an easy way to add color to your engravings is by using paint. The Laser engraving paint effect involves filling the engraved area with colored paint.
In this article, we’ll explain how to achieve the ideal laser engraving paint effect to enhance your projects and give them that pop of color you’ve been missing!
Table of Contents
What Is the Laser Engraving Paint Effect?
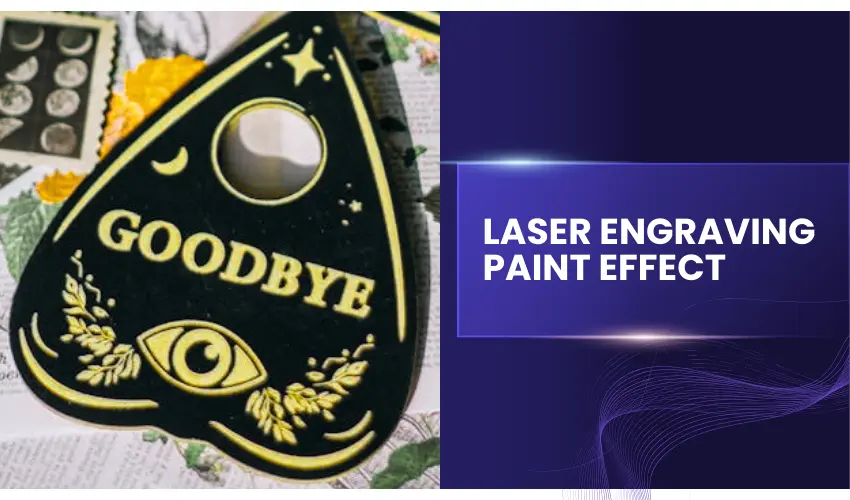
The laser engraving paint effect is a finishing technique where paint is applied into engraved areas to create:
- High-contrast designs
- Clean, sharp lettering
- Professional signage and branding
- Color-filled artwork
The laser removes or burns away material, creating recessed grooves that hold paint cleanly—when done correctly.
Laser Engraving Paint Effect – How It’s Done
Put simply, attaining that laser engraving paint effect involves filling the engraved area with colored paint. The most important component of this process is the paint itself.
Step 1: Use the Right Laser Engraving Settings
Perfect paint fill starts with engraving depth.
Ideal Engraving Depth for Paint Fill
- Deep enough to hold paint
- Shallow enough to avoid excessive charring
- Clean edges with minimal burn marks
Pro Tip: Run a Test Grid
Always run a speed and power test on your material. Look for engravings that create a slight lip around the edges without heavy char. This helps trap paint and keeps lines crisp.
For even cleaner edges, add a final score line around your design. Scoring removes jagged edges left by raster engraving and dramatically improves paint fill results.
Step 2: Choose the Best Paint for Laser Engraving
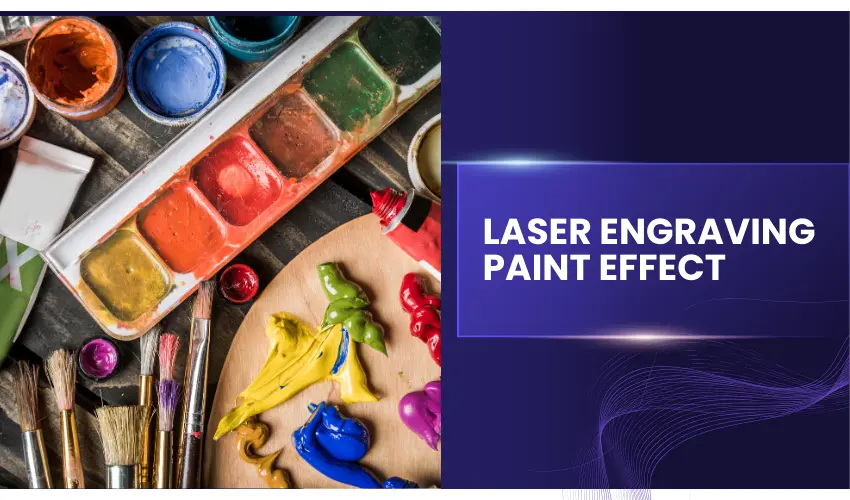
The best type of paint for laser engraving paint fill is acrylic paint. It offers excellent adhesion, dries quickly, and is available in various colors and finishes.
Specifically, water-based acrylic paints are preferred as they are easy to work with, non-toxic, and durable once cured. Additionally, enamel or oil-based paints can also be used for paint filling but may require longer drying times and proper ventilation due to fumes.
For fine detail work, consider using paint pens or spray paints like Rust-Oleum Painter’s Touch for smooth and consistent coverage.
Color is also an essential factor to consider when painting laser-engraved materials. If you’re painting a dark-colored material, finding the right color that will pop in the engraving can be trickier. Metallic paints are often the best choice for dark-colored materials.
Best Paint Types for Laser Engraving
Choosing the right paint is critical for clean results.
Acrylic Paint (Most Popular)
- Water-based
- Easy cleanup
- Ideal for wood and MDF
- Fast drying
We recommend using FolkArt Acrylic Craft Paint for the best results.

FolkArt 99445 Acrylic Craft Paint Set is one of the best paint options for laser engraving infill, especially for wood, MDF, acrylic, and coated surfaces. The set includes 24 rich, highly pigmented 2-oz colors plus a versatile 10-brush assortment, making it an excellent all-in-one solution for engraving projects that require clean, high-contrast fills.
What makes FolkArt ideal for laser engraving is its creamy, non-runny consistency, which settles perfectly into engraved grooves without bleeding into the surrounding material—especially on sealed wood.
The matte finish enhances readability and contrast, while the water-based, non-toxic formula allows for easy cleanup and stress-free use in home workshops.
With strong surface adhesion, vibrant color selection, and reliable performance across wood, glass, metal, and plastic, this FolkArt set is a top choice for both beginners and professional laser engravers looking for consistent, professional paint-fill results.
Spray Paint
- Best for surface coating + reverse engraving
- Ideal for stencil effects
We recommend using Rust-Oleum 334020 Painter’s Touch 2X Ultra Cover Spray Paint.

Rust-Oleum 334020 Painter’s Touch 2X Ultra Cover Spray Paint is an excellent choice for laser engraving infill, especially when you want fast, even coverage over larger engraved areas. Its high-build oil-based formula flows smoothly into engraved grooves, delivering bold, consistent color with minimal passes.
The flat finish is ideal for engraving work because it reduces glare and helps hide minor surface imperfections around the engraved edges.
What sets this spray paint apart is its quick drying time—dry to the touch in about 20 minutes—and its excellent adhesion on wood, metal, and plastic. The any-angle spray and comfort tip make application easy, even on detailed or awkwardly positioned pieces.
For engravers who want durable, professional-looking paint fill with minimal effort, Rust-Oleum Painter’s Touch 2X is one of the best spray paint options available.
Paint Pens
- Excellent for small details and text
- Controlled application
We recommend TOOLI-ART Acrylic Paint Pens.

TOOLI-ART Acrylic Paint Pens (Extra Fine) are an outstanding option for laser engraving infill, especially for projects that require clean lines, fine details, and precise color control.
The 0.7mm extra-fine nylon tip is perfect for filling small engraved text, logos, and intricate patterns without paint bleeding outside the engraved area—something brush or spray methods can struggle with.
These paint pens deliver highly pigmented, opaque coverage on wood, glass, metal, ceramics, leather, and more, making them extremely versatile for laser engraving projects. The quick-dry, lightfast acrylic ink prevents smudging and keeps colors vibrant over time.
Practical features like numbered caps and ink level windows make them easy to use and organize, while the water-based, non-toxic formula allows for simple cleanup. For engravers who want maximum precision with minimal mess, TOOLI-ART paint pens are one of the best infill solutions available.
Once you have chosen your paint, it’s time to select your material.
Step 3: Select Your Material
Laser engraving is a versatile method for creating intricate designs on a variety of materials. One exciting aspect of this process is the ability to enhance your engraved pieces with paint, adding color and depth to your designs.
Here’s a guide to some of the best materials for laser engraving that you can also paint, along with tips for achieving optimal results.
Wood
Wood is one of the most popular materials for laser engraving due to its natural beauty and versatility. Different types of wood can produce varying results in terms of engraving depth and color contrast. Some of the best options include:
- Birch plywood
- Maple
- Basswood
- MDF (excellent for signs)
Painting Tips
- Choose acrylic or water-based paints that adhere well to wood.
- Sand the surface lightly before engraving to ensure a smooth finish.
- Use a brush or foam applicator for precision in filling engraved areas.
Acrylic
Acrylic is a fantastic choice for laser engraving as it can create stunning, vibrant designs. It’s available in a range of colors and finishes, making it a versatile medium.
- Cast acrylic (best results)
Painting Tips
- Choose acrylic paints specifically designed for plastics to ensure good adhesion.
- Clean the engraved areas to remove any debris before applying paint.
- Consider using spray paint for a smooth and even coat.
Glass
Laser engraving on glass can create beautiful effects, especially when combined with paint. The contrast between the clear glass and the colored paint can enhance the overall design.
Painting Tips
- Use special glass paints or acrylic paints designed for glass surfaces.
- Apply a primer if necessary to help the paint adhere better.
- Allow sufficient drying time between coats to avoid smudging.
Leather
Laser engraving on leather allows for detailed designs that can be further enhanced with paint. This is particularly popular for custom items like wallets, belts, and bags.
- Vegetable-tanned leather (best results)
Painting Tips
- Use leather-specific paints or acrylic paints that are flexible once dried.
- Clean the engraved areas with a damp cloth to remove dust before painting.
- Test the paint on a scrap piece of leather first to ensure compatibility.
Metals
While metals are less common for painting after engraving, it’s possible to achieve great results on materials like anodized aluminum and stainless steel.
- Powder-coated steel
- Painted aluminum
- Anodized aluminum (engraved then painted)
Painting Tips
- Use specialty paints designed for metal surfaces.
- Clean the surface thoroughly before painting to ensure good adhesion.
- Consider using a clear coat to protect the painted design.
Stone
Laser engraving on stone creates a striking contrast, and painting the engravings can add an extra layer of visual interest.
Painting Tips
- Use outdoor-rated acrylic paints or specialty stone paints for durability.
- Clean the engraved areas to remove any dust or debris.
- Apply a sealant after painting to protect the design from weathering.
Cardboard and Paper
Laser engraving on cardboard and paper can yield stunning, detailed designs. These materials are often used for prototypes, crafts, and decorative items.
Painting Tips
- Use water-based or acrylic paints to prevent warping.
- Lightly paint over the engraved areas for a subtle effect or use bold colors for a striking look.
- Allow ample drying time to prevent smudging.
Many materials can be laser engraved and painted to create unique and visually appealing designs. By choosing the right paint and following proper techniques, you can enhance your laser-engraved projects and give them a professional finish.
Whether you’re working on crafts, gifts, or custom items, experimenting with different materials and paint combinations can lead to stunning results. Enjoy the creative process and let your imagination run wild!
Now let’s talk about the act of painting laser engraving itself.
Step 4: Prepare the Surface Properly
Surface prep makes a huge difference in the final result.
For Unfinished Wood
- Apply paper masking or painter’s tape before engraving
- Prevents smoke stains and reduces sanding
- Keeps paint from spreading into the grain
For Prefinished or Sealed Wood
- No masking needed
- Paint naturally stays in engraved areas
- Excess paint wipes off easily
For Acrylic
- Apply a thin layer of dish soap before engraving
- Acts as a liquid mask
- Makes paint removal effortless
Step 5: Choose the Right Paint Fill Method
Method 1: Masking (Best for Raw Wood)
- Apply masking before engraving
- Engrave your design
- Dab paint into the engraving (don’t brush)
- Let paint dry
- Remove masking carefully
Best for: MDF, plywood, unfinished hardwood
Method 2: Prefinished Wood (Fastest & Cleanest)
- Engrave prefinished or sealed wood
- Flood the engraving with paint
- Let it partially dry
- Wipe away excess paint with a damp cloth
Best for: Production work, signs, craft businesses
Method 3: Acrylic Paint Fill
- Apply dish soap before engraving
- Engrave design
- Apply paint generously
- Let paint fully dry
- Wipe off excess paint (no alcohol)
Best for: Acrylic signs, nameplates, decorative panels
Step 6: Apply Paint the Right Way
Best Practices
- Dab paint into engravings instead of brushing
- Apply thin layers for better control
- Let each coat dry before adding another
- Use baby wipes or damp cloths for cleanup
For light colors on dark wood, apply a thin clear sealer or primer first to prevent color dulling.
Common Mistakes to Avoid
- Engraving too shallow (paint won’t stay)
- Heavy charring (causes messy edges)
- Pulling masking while paint is wet
- Using alcohol on acrylic
- Overfilling with thick paint
Do I need to seal the paint after applying it?
In most cases, yes—sealing the paint is recommended, but it depends on the material, how the item will be used, and the type of paint you applied.
Here’s a simple breakdown to help you decide.
When You Should Seal Laser Engraving Paint
Seal the paint if the engraved item will be:
- Handled frequently (keychains, signs, coasters, tags)
- Exposed to moisture or humidity
- Used outdoors
- Cleaned or wiped regularly
- Sold to customers (for durability and professionalism)
A clear sealer protects the paint from chipping, fading, and wear over time.
When Sealing Is Optional
You may skip sealing if:
- The project is purely decorative
- It will stay indoors with minimal handling
- You used high-quality acrylic paint on sealed or prefinished wood
- The engraving is deep and well-protected
Even then, sealing adds longevity—it’s just not strictly necessary.
Best Sealers for Laser Engraving Paint Fill
For Wood
- Water-based polyurethane (polycrylic) – Most popular choice
- Clear acrylic spray sealer – Fast and easy
- Shellac – Natural finish, great for indoor projects
Use thin coats to avoid filling in engraved details.
We recommend using Minwax 25555 Clear Polycrylic Water-Based Protective Finish Gloss.
For Acrylic
- Acrylic clear coat spray
- UV-resistant clear spray (for outdoor use)
Avoid solvent-heavy sealers that can craze or crack acrylic.
We recommend using Krylon Clear Matte Finishing Spray.
For Painted Engravings Only (Spot Sealing)
- Light mist coats of spray sealer
- Foam brush with very light pressure
Matte vs Gloss Finish
- Matte / Satin – Best for a natural, professional look
- Gloss – Enhances color vibrancy but highlights surface flaws
Most laser engravers prefer matte or satin for engraved projects.
Pro Tips for Sealing Success
- Let paint cure fully (at least 12–24 hours)
- Apply multiple light coats, not one heavy coat
- Test the sealer on scrap first
- Avoid brushing thick sealers directly into shallow engravings
Quick Summary
Project Type | Seal Needed? |
|---|---|
Indoor décor | Optional |
Handled items | Yes |
Outdoor signs | Yes (UV-resistant) |
Acrylic projects | Recommended |
Products for sale | Always |
Bottom line: Sealing isn’t always required, but it’s the best way to ensure your laser engraving paint effect lasts and looks professional long-term.
Frequently Asked Questions
What is the laser engraving paint effect?
The laser engraving paint effect is a finishing technique where paint is applied to an engraved area after laser engraving. The engraved grooves hold the paint, creating high-contrast, colored designs that stand out against the base material. It’s commonly used on wood, acrylic, leather, and coated metals for signs, logos, and decorative items.
What type of paint works best for laser engraving infill?
The best paint depends on the material, but acrylic craft paint, spray paint, and acrylic paint pens are the most popular options. Acrylic paints are easy to clean and control, spray paints provide fast, even coverage, and paint pens are ideal for fine details and small engravings.
Should I paint before or after laser engraving?
In most cases, you should engrave first and paint after. Engraving creates recessed areas that naturally hold the paint, resulting in cleaner edges and better contrast. Painting first is only recommended for specific techniques, such as reverse engraving on acrylic or coated materials.
How do I prevent paint from bleeding outside the engraved area?
To avoid paint bleed:
Increase engraving depth slightly so the paint stays inside the grooves
Use thicker paint or multiple thin layers
Wipe excess paint off the surface immediately with a damp cloth
Apply masking tape before engraving for extra protection on porous materials like wood
Do I need to seal the paint after applying it?
Yes, sealing is highly recommended. A clear acrylic sealer, polyurethane, or lacquer protects the paint from wear, moisture, and UV exposure. Sealing also enhances durability and gives the engraved piece a professional, finished look—especially for outdoor or frequently handled items.
Conclusion: Bring Your Laser Engravings to Life
If you’re tired of the scorched or burned color created by laser engraving materials and want to add additional uniqueness to your pieces, painting your engravings may be the best way to achieve that.
Getting the laser engraving paint effect is easier than you might think and can significantly impact your finished product. Just be mindful of the type of paint and material you’re working with to ensure you get your desired results every time.