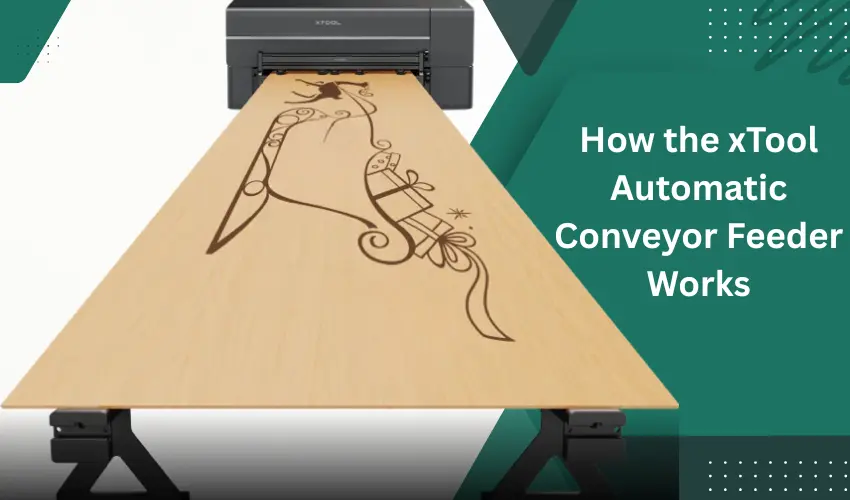
The xTool Automatic Conveyor Feeder is one of the most powerful accessories you can add to the xTool P2/P2S or xTool S1 laser systems. It unlocks true large-format laser processing—allowing you to engrave and cut materials much longer than the bed size of your machine.
Whether you’re producing oversized signs, long wood panels, décor, or batch-processing long materials, the conveyor feeder makes it possible.
Table of Contents
This guide covers how the accessory works, compatibility, setup basics, best practices, and tips for smooth operation.
What Is the xTool Automatic Conveyor Feeder?
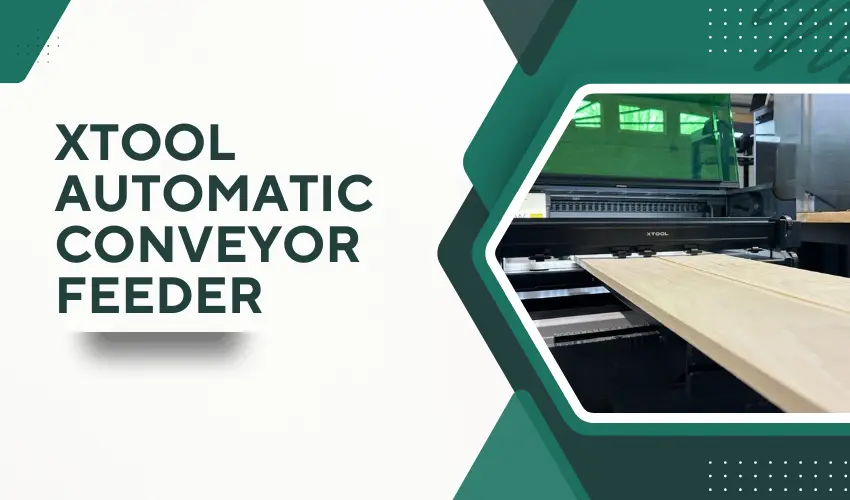
The xTool Automatic Conveyor Feeder is a motorized material-feeding system that moves long materials through your laser automatically. Instead of manually repositioning the workpiece (risking alignment errors), the feeder advances the material with precise incremental control, enabling seamless multi-stage cutting and engraving.
Key Benefits
- Process materials up to 3 meters long
- Perfect alignment for multi-section cuts and engravings
- Hands-free feeding reduces manual error
- Supports materials up to 14 mm thick
- Works with P2, P2S, and S1
- Ideal for long signs, wall art, floorboards, stencils & more
Compatibility of the xTool Automatic Conveyor Feeder
Laser Model | Compatible | Notes | Check Automatic Conveyor Feeder Price |
|---|---|---|---|
xTool P2 | ✔ | Full support with front & rear passthrough | |
xTool P2S | ✔ | Same installation as P2 | |
xTool S1 (40W/20W) | ✔ | Requires passthrough mode enabled |
Maximum Supported Material Sizes
- Max Length: Up to 3 meters
- Max Thickness: 0–14 mm
- Material Types: wood, plywood, MDF, acrylic, EVA foam, leather, felt, kraft paper, cork, and more.
What’s Included in the Box?
Your conveyor feeder package typically includes:
- Main conveyor feeder unit
- Conveyor rails (long & short)
- Conveyor rail risers + riser blocks
- Level adapter (for thicker materials)
- Material pressing rod
- Motor cable clamp + cable tie holder
- Screws (M3, M4) + hex key
- Quick start guide + user manual
Everything needed to install and run the system is provided.
How the xTool Automatic Conveyor Feeder Works
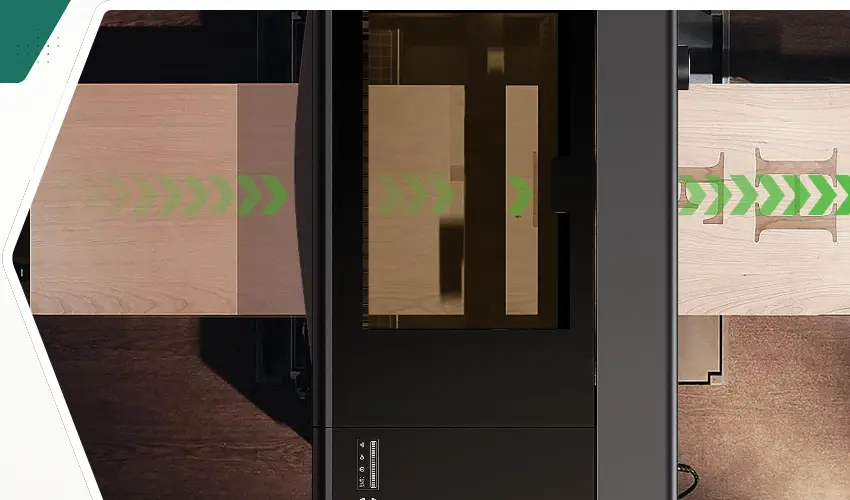
The feeder uses pinch rollers and adjustable conveyor rails to keep your material aligned and pressed down while the motor advances the workpiece in real time.
During cutting or engraving:
- The laser processes the first section.
- XCS commands the feeder to advance the material a precise distance.
- The next section is processed, perfectly aligned.
- This repeats until the job is complete.
This process ensures seamless stitching across large projects.
xTool Automatic Conveyor Feeder Buyers Guide
Thinking about adding the Automatic Conveyor Feeder to your xTool P2/P2S or S1? This buyers guide breaks down exactly who this accessory is for, what it does best, and what to consider before purchasing.
Who Is the xTool Automatic Conveyor Feeder Best For?
Sign makers and large-format creators
Ideal for customers producing long signage, oversized stencils, and tall wall décor.
Small businesses wanting batch production
Perfect for processing multiple long boards or panels consistently with reduced manual handling.
Makers who need perfect alignment across long cuts
The auto-feed mechanism ensures sections line up seamlessly—no guesswork.
Users with limited workspace
Instead of needing a giant-format laser, the feeder lets you process long materials on a compact machine.
Key Reasons to Buy the xTool Automatic Conveyor Feeder
1. Unlocks 3-Meter Material Processing
Great for large woodworking and acrylic projects that won’t fit on a standard laser bed.
2. Automated Material Advancement
Eliminates manual repositioning, which reduces errors and speeds up production.
3. Improves Accuracy and Repeatability
Ensures perfect alignment when engraving or cutting long designs.
4. Highly Versatile Material Support
Works with a wide range of thicknesses (0–14 mm) and materials including plywood, MDF, acrylic, EVA, felt, kraft paper, leather, and more.
5. Cost-Effective Alternative to an XL Laser
Rather than buying a giant laser system, the feeder extends your machine’s capabilities for a fraction of the cost.
What to Consider Before Buying
1. Workspace Requirements
You must have enough space in front and behind your machine to accommodate long materials.
2. Material Flatness Matters
Warped wood can affect alignment. Light sanding or flattening is recommended for best results.
3. Some Learning Curve
You’ll need to get comfortable with pinch roller pressure settings and rail spacing for the smoothest feed.
4. Additional Rails May Be Needed
For very long or flexible materials, extra conveyor rails provide better stability.
Who Should Skip It?
You may not need the conveyor feeder if:
- You only work with small or short materials
- You rarely work with wood or acrylic larger than your laser bed
- You use your machine mostly for tumblers or small crafts
Is the xTool Conveyor Feeder Worth It? (Quick Verdict)
Yes — if you want to expand into large-format projects or run production-level workloads.
The feeder dramatically increases what your xTool machine can do and pays for itself quickly for businesses producing large signs, floor art, porch boards, and long décor pieces.
How to Install the xTool Automatic Conveyor Feeder (Overview)
Assembly Instructions for the xTool S1
1. Install the Conveyor Feeder Main Unit
- Open the front and rear doors of the riser base. Ensure the xTool S1 sits on the D level.
- Slide the conveyor feeder into the front door opening and align its tabs with the mounting holes.
- Tighten the left screws first, then the right.
2. Install the Front Conveyor Rails
- Insert each conveyor rail riser into the rail groove (aligned with the second roller) and tighten.
- Repeat for the second rail.
- Slide both rail ends into the feeder’s front-side grooves.
- Adjust the spacing to fit your material width, then tighten all screws.
3. Install the Rear Conveyor Rails
- Insert rail risers so they sit between the third and fourth rollers; tighten.
- Connect the rail ends to the short rail.
- Repeat for the second rail.
- Insert both rear rails through the riser base’s back opening and slide them into the feeder’s inner grooves.
- Align the rear rails with the front rails and secure them.
4. Connect the Motor Cable
Important: Turn off the xTool S1 first
- Stick the two cable clamps inside the machine where indicated.
- Route and secure the motor cable, then plug it into the extension port on the S1’s front interior panel.
5. Organize Rear Cables
- Stick the cable-tie holder to the back of the S1.
- Run a cable tie through the holder, gather all cables and tubes, and secure them to prevent interference during feeding.
Assembly Instructions for xTool P2/P2S
For Materials 0 < H ≤ 8 mm (Thin to Medium Thickness)
1. Prepare the Machine
- Open the front and rear door panels of the xTool P2.
- Place the baseplate at level 2a to support the conveyor feeder during installation.
Important: Do not slide the baseplate all the way in—leave a 10 cm gap at the left front corner.
2. Install the Conveyor Feeder
- Prepare screws M4×20.
- Place the conveyor feeder on the baseplate.
- Tighten screw A first (not fully).
- Tighten screw B.
- Fully tighten screw A.
3. Assemble the Front Conveyor Rails
- Prepare rails, risers, riser blocks, and M4×6 screws.
- Attach the riser block to the rail riser and tighten.
- Flip the conveyor rail upside down.
- Position the rail riser on the third section (middle) of the rail.
- Tighten the screw to secure the riser.
- Assemble the second rail the same way.
4. Assemble the Rear Conveyor Rails
- Repeat the same steps for the other two rails.
- Install short rails and connect them to the conveyor rails.
- Slide both rails into the conveyor feeder grooves.
- Adjust spacing to match your material width.
- Tighten the four M4×6 screws to secure the rails.
5. Cable Management
- Stick the cable tie holder to the back right of the P2 (near the exhaust pipe).
Tip: Allow 24 hours for best adhesion. - Insert the cable tie into the holder.
- Secure the exhaust pipe so it does not interfere with conveyor rails.
6. Complete Assembly
- Install the remaining two conveyor rails on the opposite side.
Important: This side must use the rails with short rails attached. - Your installation for thin materials is complete!
For Materials 8 ≤ H ≤ 14 mm (Thicker Materials)
Assembly is nearly identical, with the addition of the level adapter.
1. Prepare the Machine
- Open the front and rear panels.
- Position the baseplate at level 2a, leaving a 10 cm gap at the front-left corner.
2. Install the Level Adapter
- Attach the level adapter to the conveyor feeder using M3×8 screws.
- Use holes 1 and 3 (counted from the left).
3. Install the Conveyor Feeder
- Place the feeder onto the baseplate.
- Tighten screw A (not fully).
- Tighten screw B.
- Fully tighten screw A.
4. Assemble Rails
5–20. Follow the same conveyor rail assembly steps as listed for thin materials.
(Instructions identical: risers, short rails, cable management, alignment tips)
5. Assembly is complete!
Using the xTool Automatic Conveyor Feeder in XCS (xTool Creative Space)
Step 1 — Connect your device
- Turn on your machine and open XCS.
- Connect via USB → then switch to Wi-Fi or IP mode if desired.
Step 2 — Choose processing mode
Select:
Use Conveyor Feeder
Step 3 — Select your material
Choose from:
- Built-in xTool material library
- Material EasySet library
- User-defined material (for third-party materials)
Step 4 — Measure material height
Use Aimed-Measure for accurate distance measurement.
Step 5 — Shoot background
Click Refresh Background or Close Shot.
Step 6 — Position objects
Important:
- Place designs in the green zone, not the red zone.
Step 7 — Start processing
Click Process → Start, then press the machine’s physical button.
xTool Automatic Conveyor Feeder Recommended Pinch Roller Pressure Levels (Quick Reference)
Pressure level depends on material thickness:
Material | Thickness | Pressure Level |
|---|---|---|
Plywood | 3–6 mm | Medium |
Plywood | 9–14 mm | High |
Acrylic | 3 mm | Medium |
Acrylic | 7–12 mm | High |
Fiberboard | 3 mm | Medium |
Fiberboard | 6–12 mm | High |
EVA | 5–10 mm | Low–Medium |
Felt | 5–9 mm | Low–Medium |
Cork | 12 mm | Medium |
Kraft Paper | 300g | Medium |
Tip: Always fully cover pinch rollers with material to prevent interference.
Best Practices When Using the xTool Automatic Conveyor Feeder
Use flat materials
Warped edges can cause misalignment.
Keep smoke exhaust routed to avoid blocking the rails
Use the provided cable ties.
Ensure both sides of the conveyor rails are symmetrical
Uneven spacing may cause skew or distortion.
For soft/thin materials, use the included material pressing rod
Helps prevent shifting during feed movement.
Support materials longer than 30 cm in the air
Add additional conveyor rails if needed.
Clean debris regularly
Turn over the feeder and brush away dust around pinch rollers.
Frequently Asked Questions
What does the xTool Automatic Conveyor Feeder do?
The conveyor feeder automatically advances long materials through your xTool P2/P2S or S1, allowing you to engrave or cut designs much longer than the machine’s normal bed size. It eliminates manual repositioning, keeps alignment accurate, and enables continuous processing up to 3 meters (or more with extra rails).
What machines is the conveyor feeder compatible with?
The feeder currently works with the following xTool models:
xTool P2 / P2S
xTool S1 (10W & 40W)
Each machine has its own installation method, but the feeder is fully supported across both product lines.
What material types and thicknesses can it handle?
The Automatic Conveyor Feeder supports materials up to 14 mm thick and works well with:
Plywood & hardwood
MDF & fiberboard
Acrylic sheets
Kraft paper & cardstock
EVA and foam boards
Cork, felt, leather, and more
Materials must be flat and not warped to feed correctly.
Do I need extra conveyor rails?
You only need extra rails if you plan to process very long materials or flexible sheets that need additional support. xTool recommends that the unsupported portion of the material (the part hanging in the air) be less than 300 mm. Adding more rails improves feeding accuracy and prevents sagging on long cuts.
How do I prevent the material from slipping or shifting during feeding?
Proper pinch-roller pressure is the key.
Increase pressure for thicker and harder materials (like plywood).
Lower pressure for thin or flexible materials (like kraft paper or felt).
xTool provides recommended pressure levels for common materials, but you can fine-tune as needed. Also ensure:
The material is aligned with the grid lines
Rails are evenly spaced
Material edges are flat and not curled
Following these steps ensures smooth feeding and perfect alignment.
Is the xTool Automatic Conveyor Feeder Worth It?
If you need to:
- Create large signage
- Produce long artwork
- Cut oversized panels
- Run batch production
- Achieve perfect alignment over long distances
…then yes, the conveyor feeder is a massive productivity boost.
It essentially transforms your P2/P2S or S1 into a large-format laser cutter.