Laser engraving and hand stamping are two popular techniques used in the creation of permanent marks on metal objects. From carving out a series of numbers and letters to etching breathtaking designs on metal, laser engraving and hand stamping will get the job done. However, these two techniques differ in so many ways.
So what is the difference between laser engraving and hand stamping?
Hand stamping is the creation of imprints on a material’s surface using metal stamps and a hammer. Laser engraving, on the other hand, uses laser beams emitted from a laser engraving machine to engrave on objects. During the laser engraving process, a laser beam heats up the material in order to either evaporate or burn it.
Although hand stamping creates an imperfect outcome, many people revel in the fact that it adds a personal touch to jewelry and other metal objects. Essentially, the hand stamping process utilizes metal stamps with numbers, letters, designs, or punctuations that are struck into the metal using a hammer.
Laser engraving is more versatile than hand stamping. Depending on the desired result, light or deep contrast is created with the result being a permanent mark. Examples of laser-engraved products include sports trophies with names of the winners, components marked with a given batch or serial number.
Table of Contents
What is Laser Engraving?
Laser engraving is a high-precision technique that uses a laser beam to remove material from a surface, creating a permanent mark. This process is controlled by software, ensuring consistency and intricate designs.
Benefits of Laser Engraving:
- Precision and Detail: Ideal for intricate patterns, fine text, and logos.
- Versatility: Works on materials such as metal, wood, glass, plastic, and leather.
- Durability: Creates deep, long-lasting engravings that resist wear.
- Automation: Suitable for mass production due to its repeatability and efficiency.
Common Applications:
- Personalizing jewelry, awards, and plaques
- Industrial part marking
- Customizing promotional products
- Engraving barcodes and serial numbers
What is Hand Stamping?
Hand stamping involves manually striking a metal stamp with a hammer to create an impression on a surface. This technique is often used for small-scale, artistic projects where a handcrafted touch is preferred.
Benefits of Hand Stamping:
- Handcrafted Appeal: Each piece has a unique, artisanal look.
- Simple Setup: Requires only a metal stamp, hammer, and surface.
- Cost-Effective: No need for complex machinery or software.
- Suitable for Small Batches: Ideal for limited production and personalized gifts.
Common Applications:
- Handmade jewelry and accessories
- Leather stamping
- Crafting personalized keychains and dog tags
- Decorative metalwork
Comparing Laser Engraving and Hand Stamping
Feature | Laser Engraving | Hand Stamping |
|---|---|---|
Precision | High | Moderate |
Speed | Fast | Slow |
Customization | Highly detailed | Limited design capability |
Material Versatility | Works on various materials | Best for metals and leather |
Durability | Permanent and wear-resistant | Can fade over time |
Production Scale | Ideal for mass production | Best for small-scale work |
Choosing the Right Method
- Use Laser Engraving if you need high detail, precision, and scalability.
- Choose Hand Stamping if you want a rustic, handmade look with minimal equipment.
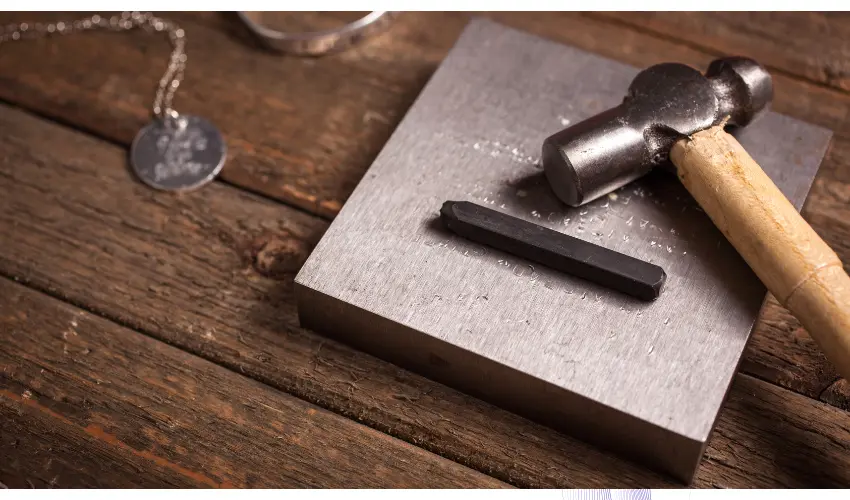
How Hand Stamping Works
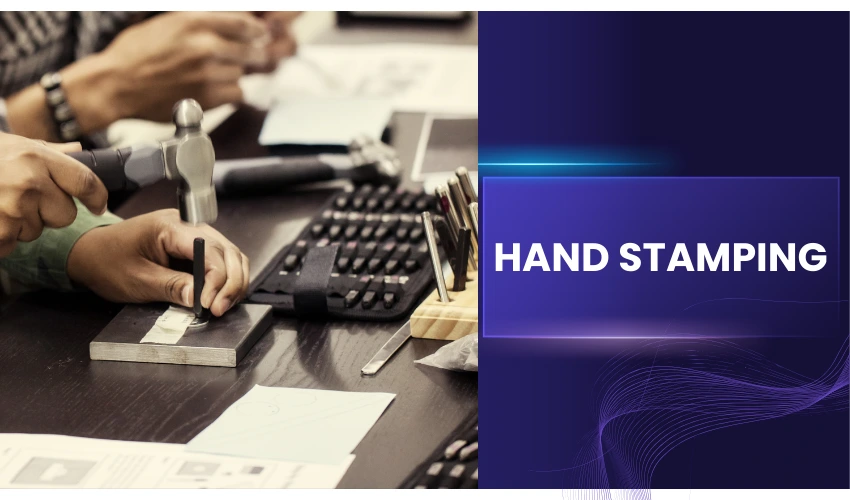
Although hand stamping can be done on a number of hard surfaces, metal is the most ideal material. Jewelry stores especially love engraving letters and designs on their products using this strategy.
This is because it personalizes their necklaces, rings, bracelets, and other products better than laser engraving does.
Unlike laser engraving, hand stamping doesn’t necessarily get rid of any metal from the product but rather a raised symbol or letter. The material is bent to create the shape of the design.
In essence, the characters or designs are impressed on the material to give the impression of an organic look.
Most metal stamps are made of stainless steel with the hammer being a softer metal such as brass to avoid damage during stamping.
The end result largely depends on the hand-to-eye coordination coupled with the hammer strike. As a consequence, hand-stamped products tend to have variations in the spacing, depth, and alignment of characters.
For instance, within a series of characters, one letter will be positioned away from the center while another will be deeper than the next. In the end, however, the hand-stamped piece will be a magnificent work of art that adds a personal touch and uniqueness to a given metal.
Which materials are ideal for hand stamping?
Just like laser engraving, not every material is ideal for hand stamping. Here is a list of the most ideal materials for hand stamping.
- Aluminum
This is by far the best metal for any DIY or commercial hand-stamping project. For starters, it looks like silver but it is way cheaper. It is also soft and lightweight making it a good material for large pendants and earrings.
However, the fact that aluminum is soft and malleable also makes it more susceptible to scratches and bends. You may have seen dog or cat tags that have been hand stamped which is a great business idea if you are looking at making some extra cash from your creativity.
- Copper
Like aluminum, copper is soft and inexpensive which is why it is a beginner’s number one choice. It is also readily available and shows a clear stamp impression. The main disadvantage is that copper is at risk of rapid tarnishing. Thankfully, it makes a great product when mixed with other metal designs.
- Solid gold
Gold may be one of the niftiest metals but it also comes with a handsome price tag. Gold blanks are primarily made in thinner gauges meaning you need practice and skill to effectively stamp on them without bending or denting unwanted areas of the blank. Because of this, solid gold is often a reserve for the experienced stamper in search of high-end personalized options for their clients.
- Gold-filled metals
Gold-filled metal is more affordable compared to solid gold. It is also quite easy to hand-stamp and exudes the same beauty as yellow gold. Before you mess up with solid gold, it is always a good idea to start with gold-filled metals and then work your way up once you are sure of your skills.
- Brass
Brass is harder than the aforementioned metals and therefore presents the highest challenge when it comes to stamping. You’ll need a firm and powerful strike to achieve good results. Before stamping on brass, it is recommended to practice with scrap metal of the same gauge. This will help you to minimize waste.
- Fine silver
Fine silver is quite pricey but has all the qualities of a perfect hand-stamped metal. It is soft which makes it ideal for necklaces. If you don’t mind splashing some cash for a valuable metal, go for fine silver. Unfortunately, like aluminum, fine silver is less-durable and is prone to scratching and bending.
- Sterling silver
Sterling is a common metal in the world of stamping. It is easy to stamp on and easy to find in the market. It is also durable compared to a number of other metals on this list. For great results, you need to stamp sterling silver harder than copper but not as hard as brass.
- Pewter
Pewter is made from thicker sheet metal blanks making stamping relatively easy to carry out. With this metal, you can get clear, defined impressions. Additionally, it won’t tarnish unless added with a silver plate.
Our Top 3 Hand Stamping Kits For Beginners
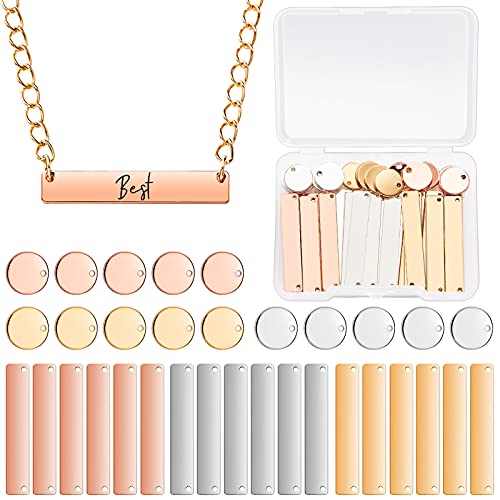
1. Owden 167 Pcs Hand Stamping Kit

- Owden 167 Pcs Jewelry Diy Stamping kit , Let’s make works that are truly our own and let ourselves show our own style. Each necklace, pendant, keychain, and pet tag can be written with the name, date, birthday and other phrases you want on it. It is a lovely work. Add more popular elements to you.
The Owden 167 Pcs DIY Hand Stamping Kit is an excellent starter set for anyone interested in hand stamping jewelry and personalized metal crafts. Designed with beginners in mind, this comprehensive kit includes everything you need to start creating custom bracelets, pendants, pet tags, and keychains right out of the box.
One of the best features of this kit is the large selection of tools and blanks. It includes letter and number stamps, a hammer, metal stamping block, bracelet bending bar, enamel markers, sanding pads, and multiple aluminum blanks in different shapes and sizes. This variety makes it easy to experiment with different designs and projects.
The kit is also great for DIY gift-making, allowing users to personalize jewelry with names, dates, or meaningful messages. Whether you’re making gifts for friends and family or exploring a new creative hobby, the Owden kit offers a simple way to get started with metal stamping.
Pros
- Complete 167-piece starter kit with tools and blanks
- Includes letter and number stamp sets for customization
- Great for making personalized jewelry and gifts
- Beginner-friendly with simple tools and instructions
- Good value for the number of included accessories
Cons
- Stamp impressions may require practice for consistent results
- Aluminum blanks are softer and may scratch easily
The Owden 167-piece kit is one of the best hand stamping kits for beginners, offering a wide range of tools and materials to start creating personalized jewelry and metal crafts without a large upfront investment.
2. Bestnule Metal Stamping Kit

- 1. 3-IN-1 Stamp Set : 38 PIECE SET INCLUDE (1) 26 Uppercase Letters (A through Z), 10 Numbers ( 0-9, use 6 as 9) and “&”, “Love” symbol; (2) 4 pieces of tags (2 pieces commonly used, 2 pieces for lovely pets); (3) 1 Simple Strike Metal Stamping Jig and an industrial grade wipe.
The Bestnule Metal Stamping Kit Letter and Number Set is a solid beginner-friendly kit designed for anyone interested in DIY jewelry stamping, metal tags, and personalized crafts.
With a complete set of A–Z uppercase letters, numbers (0–9), and symbols like “&” and a love icon, it provides the essential tools needed to start imprinting names, dates, or short phrases on various materials.
The stamps are made from industrial-grade hardened carbon steel, designed to withstand thousands of strikes without wearing down. This durability makes the set suitable for stamping aluminum, brass, leather, plastic, and even some harder metals.
A helpful addition is the Simple Strike stamping jig, which keeps the stamp aligned and improves accuracy—something beginners often struggle with.
The kit also includes four aluminum tag blanks, allowing users to begin practicing or creating projects immediately. Everything comes in a hard plastic storage case, which keeps the stamps organized and easy to access.
Pros
- Complete 38-piece stamp set with letters, numbers, and symbols
- Durable hardened carbon steel stamps rated for thousands of strikes
- Includes Simple Strike jig for better alignment and cleaner impressions
- Works on metal, leather, wood, and plastic
- Comes with practice blanks and storage case
Cons
- Only includes uppercase letters (no lowercase options)
- Requires a separate hammer and stamping block for best results
The Bestnule Metal Stamping Kit is one of the best hand stamping kits for beginners, offering durable stamps, useful accessories, and an alignment jig that makes it easier to achieve clean, professional-looking impressions.
3. Amazon Basics Metal Stamping Kit
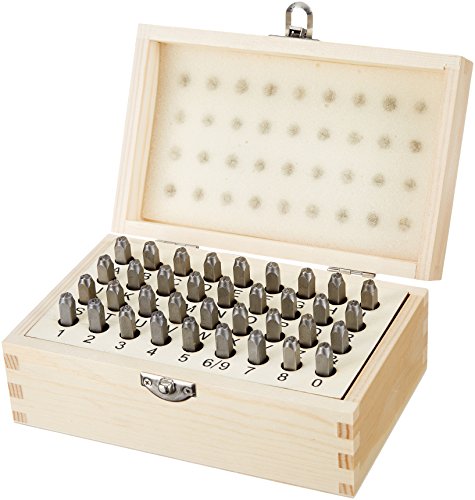
- Stamp kit for creating permanent hand-stamped imprints; 4/25-inch character height
The Amazon Basics Metal Stamping Kit Alphabet and Number Stamps 36‑Piece Set is a simple and affordable option for beginners who want to try hand stamping for crafts, jewelry, or DIY projects.
The set includes 36 stamps featuring uppercase letters (A–Z), numbers (0–9), and an “&” symbol, making it versatile enough for basic personalization such as names, dates, or short phrases.
Each stamp is made from durable alloy steel with a sand-blasted finish, which helps produce clear impressions and improves long-term durability. The 4/25-inch character height offers a readable size for tags, leather goods, and small craft projects.
Another nice touch is the included wooden storage case, which keeps the stamps neatly organized and protected when not in use.
This kit works on leather, wood, clay, and softer metals, making it suitable for hobbyists exploring different crafting materials.
Pros
- Complete 36-piece alphabet and number stamp set
- Durable alloy steel construction for long-lasting use
- Works on leather, wood, clay, and soft metals
- Wooden storage case keeps stamps organized
- Affordable and beginner-friendly
Cons
- Only uppercase characters included
- Requires a separate hammer and stamping block
- Not ideal for harder metals like thick stainless steel
The Amazon Basics Metal Stamping Kit is one of the best hand stamping kits for beginners, offering a straightforward alphabet and number set with durable construction and convenient storage at a very accessible price.
How To Metal Stamp for Beginners (Step-by-Step Guide)
To start metal stamping, you only need a few simple tools:
1. Alphabet Stamp Set
A stamp set includes letters, numbers, or symbols used to imprint designs into metal.
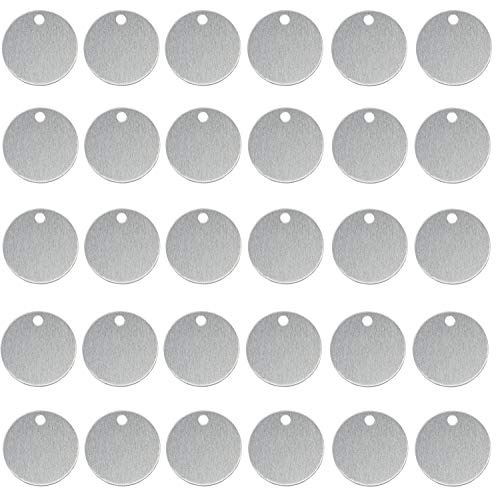
2. Metal Blanks
These are flat metal pieces used for stamping. Common materials include aluminum, brass, copper, and stainless steel.
Some great metal blanks perfect for hand stamping are available on Amazon:

3. Hammer
A small metal hammer is used to strike the stamp and create the impression.
4. Metal Stamping Block or Hard Surface
A solid surface ensures clean and crisp stamp impressions.
5. Needle Nose Pliers
Useful for attaching jump rings or shaping jewelry.
6. Marker and Clean Cloth or Paper Towel
A permanent marker helps darken or color fill stamped letters, and a clean cloth removes excess ink.
Step-by-Step: How to Metal Stamp
Step 1: Secure Your Metal Blank
Place the metal blank on a steel block or solid surface. Tape the blank down if needed to prevent it from moving.
Step 2: Align the Stamp
Position the letter or symbol stamp exactly where you want the impression. Hold it straight and steady.
Step 3: Strike with a Hammer
Hit the top of the stamp firmly one time with the hammer. A single strong strike usually produces the cleanest result.
Step 4: Repeat the Process
Continue stamping each letter or symbol one at a time until your design or message is complete.
Step 5: Color Fill the Letters
Use a permanent marker to color fill the stamped letters. We recommend these Metal Stamp Markers from Owden:

- Owden 6-Pieces enamel marker pen and water-base acrylic ink for metal stamping diy making.Filling in your impressions for more perfect jewelry diy works.
Step 6: Clean the Surface
Wipe away the extra ink with a clean cloth or a paper towel. The ink will remain in the stamped grooves, making the design stand out.
Step 7: Assemble Your Jewelry
Attach jump rings, chains, or clasps to turn your stamped piece into a necklace, bracelet, or keychain.
Beginner Tips for Better Metal Stamping
Practice first
Use scrap metal blanks to practice your stamping technique before working on your final project.
Use a hard surface
A solid metal block or concrete surface helps create sharper impressions.
Strike the stamp once
Multiple hits can create double impressions or blurry letters.
Keep stamps straight
Holding the stamp perfectly vertical ensures even pressure and cleaner results.
Once you master the basics, you can experiment with different metals, shapes, symbols, and designs to create truly unique projects.
How Laser Engraving Works

Laser engraving is a precise and versatile technology used to create permanent markings on various materials.
Whether for industrial applications, artistic endeavors, or personal projects, laser engraving provides a fast, clean, and detailed way to add text, designs, or logos to a surface.
- The Laser Beam
Laser engraving uses a concentrated beam of light to remove material from a surface. The laser’s energy vaporizes the material upon contact, creating a permanent mark. This process involves intense heat but is highly precise, ensuring clean edges and intricate details.
- Computer-Controlled Design
Modern laser engravers are computer-controlled. Users upload designs or text into specialized software, which then directs the laser’s movement, intensity, and speed. This automation allows for highly accurate and repeatable engraving results.
- Depth and Speed Control
The depth of engraving is determined by adjusting the laser’s power and speed settings:
- Higher power and slower speed create deeper engravings.
- Lower power and faster speed produce lighter, surface-level marks.
Which Materials are ideal for Laser Engraving?

Different materials respond differently to laser engraving. Here’s a list of materials that work best:
Wood
- Why It’s Great: Wood is highly versatile, allowing for deep engraving or surface etching. It creates a natural contrast with burnt edges.
- Popular Types: Birch, maple, cherry, and MDF.
Acrylic
- Why It’s Great: Produces a smooth, polished finish with crisp edges. Clear acrylic creates a frosted effect when engraved.
- Best Uses: Signage, awards, and decorative items.
Glass
- Why It’s Great: Laser engraving on glass creates a frosted appearance that adds a touch of elegance.
- Best Uses: Glassware, mirrors, and windows.
Metal
- Why It’s Great: Metals like stainless steel and aluminum are excellent for engraving when coated or treated. Fiber lasers are best for uncoated metals.
- Best Uses: Industrial tools, plaques, jewelry, and nameplates.
Leather
- Why It’s Great: Laser engraving produces a clean, burned look that stands out on leather surfaces.
- Best Uses: Wallets, belts, bags, and journals.
Stone and Ceramic
- Why It’s Great: Offers a smooth, high-contrast engraving effect on surfaces like marble, granite, or tiles.
- Best Uses: Memorial plaques, coasters, and home décor.
Paper and Cardboard
- Why It’s Great: Delivers intricate designs without burning through the material. Ideal for light engraving.
- Best Uses: Invitations, packaging, and art projects.
I have written a more detailed post on the best materials for laser engraving. You can check it out here.
Tips for Successful Laser Engraving
- Choose the Right Laser: CO2 and Diode lasers are ideal for non-metal materials, while fiber lasers work best for metals.
- Test Settings: Always test power and speed settings on scrap material to avoid mistakes.
- Clean the Material: Ensure surfaces are free of dust or debris for optimal results.
- Ventilation: Use proper ventilation to remove smoke and fumes, especially when engraving wood or acrylic.
Laser engraving is a powerful tool for creating customized designs on a wide range of materials. Understanding how the process works and selecting the right material can make all the difference in achieving professional results. From wood and acrylic to metals and leather, the possibilities with laser engraving are virtually endless.
With the right equipment, materials, and creativity, you can turn ordinary objects into personalized masterpieces or functional tools.
Conclusion
Both laser engraving and hand stamping are useful when marking metals and other materials. In fact, the jewelry industry heavily relies on both techniques. The difference between the two is in the technique used and the final output.
If you are in need of a more traditional and personal look, then you will want to go with hand stamping. But if you are looking for a finer and more polished look, laser engraving is the way to go.
Frequently Asked Questions
Is laser engraving better than hand stamping?
It depends on your needs—laser engraving offers precision, speed, and durability, while hand stamping provides a handmade, rustic look and is more cost-effective for small projects.
What is the difference between laser engraved and hand stamped?
Laser engraving uses a high-powered laser to create precise, permanent markings, while hand stamping involves manually striking metal with a stamp to imprint a design, resulting in a more rustic and varied appearance.
What is the best metal for hand stamping?
The best metals for hand stamping are soft metals like aluminum, copper, brass, and sterling silver, as they are easier to imprint without excessive force.