Laser engraving metal can produce professional-looking results, from personalized gifts and industrial markings to custom jewelry and branded products.
However, not all metals, lasers, and engraving methods are the same. Understanding the key factors before you start can help you avoid costly mistakes, improve engraving quality, and protect your equipment.
Table of Contents
In this article, we’ll guide you through the essential considerations you need to keep in mind before laser engraving metals.
1. Understanding the Difference Between Marking and Engraving
One of the biggest misconceptions among beginners is assuming that all lasers can deeply engrave metal.
Many desktop diode lasers can mark certain metals by creating a color change or surface oxidation, but they often cannot engrave deeply into bare metal.
True metal engraving typically requires higher-powered fiber lasers or specialized infrared (IR) laser modules.
Before purchasing a laser machine, determine whether you need:
- Surface marking
- Color marking
- Deep engraving
- Metal cutting
Each application requires different laser capabilities.
2. Choose the Right Type of Laser
Different laser technologies interact with metal differently.
Fiber Lasers
Fiber lasers are considered the gold standard for metal engraving. They can engrave stainless steel, aluminum, brass, copper, titanium, and many other metals with excellent speed and precision.
Best for:
- Deep engraving
- Industrial marking
- Jewelry customization
- Serial numbers and QR codes
The fiber laser we recommend for engraving metals: Gweike G2 Max 50W Fiber Laser

- INDUSTRIAL-GRADE ENGRAVING SPEED: The GWEIKE G2 Max 50W Fiber Laser Engraving Machine Is Equipped With A High-Speed Precision Galvanometer, Achieving An Engraving Speed Of Up To 15000 mm/s And An Accuracy Of 0.001 mm. Its Powerful Performance Significantly Enhances Work Efficiency. Supporting HD 8K Engraving Resolution, It Precisely Captures Every Detail, Delivering An Exceptional Engraving Experience.
If your primary goal is laser engraving metal, the Gweike G2 Max 50W Fiber Laser is an excellent option currently available for small businesses, makers, and serious hobbyists.
Unlike diode lasers that are often limited to marking coated metals, a 50W fiber laser is specifically designed to engrave and mark bare metals quickly, accurately, and consistently.
One of the biggest advantages of the G2 Max is its 50W fiber laser source, which provides enough power for deep engraving, high-speed marking, and detailed designs on a wide range of metals.
It works exceptionally well on stainless steel, aluminum, brass, copper, titanium, silver, and gold, making it suitable for everything from industrial part marking to custom jewelry and personalized gifts.
The machine also excels at engraving speed. Compared to lower-powered fiber lasers, the 50W source can complete jobs faster while maintaining sharp detail.
This is particularly valuable for businesses producing batches of tumblers, tools, tags, nameplates, and other personalized products.
Another reason we recommend the G2 Max is its ability to create deep engravings and high-contrast marks.
Whether you’re engraving serial numbers, logos, QR codes, or decorative artwork, the laser produces clean, professional-looking results that are difficult to achieve with most desktop diode systems.
The G2 Max is also a versatile machine. Beyond standard metal engraving, it can handle:
- Stainless steel tumblers
- Metal business cards
- Jewelry and watches
- Industrial identification plates
- Firearm accessories (where legally permitted)
- Tools and equipment
- Personalized gifts
- Custom branding products
For users interested in cylindrical objects, the machine supports rotary engraving, allowing detailed work on cups, bottles, rings, and curved surfaces.
Software compatibility is another major advantage. The G2 Max supports industry-standard laser software, giving users access to advanced design controls, batch processing features, and precise engraving settings.
This flexibility makes it suitable for both beginners and experienced laser users.
Perhaps most importantly, the G2 Max offers a balance of performance, speed, and affordability.
While industrial fiber laser systems can cost tens of thousands of dollars, the G2 Max delivers professional metal engraving capabilities at a price point that remains accessible to small businesses and serious makers.
Infrared (IR) Lasers
IR lasers are increasingly popular in desktop systems because they provide better metal marking performance than standard diode lasers.
Best for:
- Jewelry
- Metal business cards
- Tumblers
- Personalized gifts
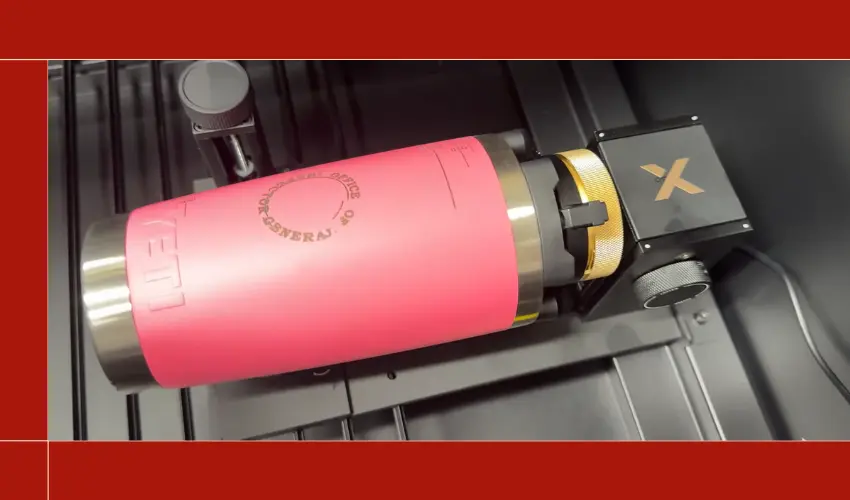
The IR laser we recommend for engraving metals: xTool F2 5W IR & 15W Diode Portable Dual Laser

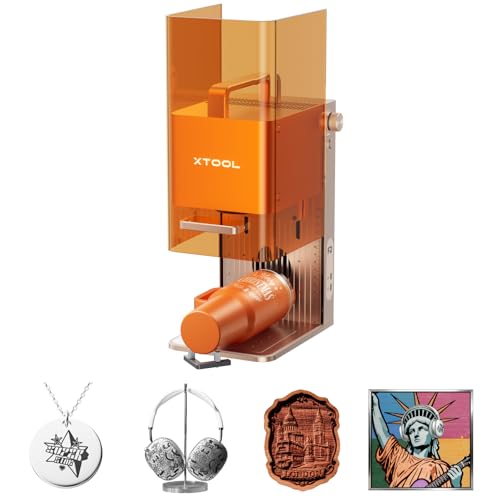
- Dual-Laser Versatility, Endless Creation: Our 15W Diode & 5W IR dual-laser combo makes this laser engraver truly versatile, unlocking more possibilities on 300+ materials. The 5W IR delivers deep, dark, vivid color marking on metal, while the 15W diode expertly handles 3D embossing and cutting through thick materials.
The xTool F2 5W IR & 15W Diode Portable Dual Laser is a great option because it combines two laser technologies in a compact, portable machine.
While many desktop lasers force users to choose between working with metal or organic materials, the F2 is designed to handle both.
The key feature for metal engraving is the 5W infrared (IR) laser.
Unlike standard blue diode lasers, which struggle with bare metals, the IR laser is specifically designed for engraving and marking materials such as stainless steel, aluminum, brass, gold, silver, platinum, and titanium.
This allows users to create detailed logos, serial numbers, personalized text, jewelry engravings, and custom metal products without needing a dedicated fiber laser.
The second laser, a 15W diode laser, expands the machine’s capabilities beyond metal.
It can engrave and cut wood, leather, acrylic, paper, and many other materials, making the F2 a versatile solution for creators who work across multiple product categories.
Another reason we recommend the F2 is its portability. Traditional metal engraving systems are often large, heavy, and designed for permanent workshop installations.
The F2 is compact enough to transport to craft fairs, trade shows, pop-up events, retail locations, or customer sites. For businesses offering on-the-spot personalization, this can be a major advantage.
The machine also features a fully enclosed design, making it more approachable for home users and small businesses.
Combined with xTool’s user-friendly software, camera-assisted positioning, and guided workflows, the F2 offers a much lower learning curve than many industrial engraving systems.
The F2 is particularly well-suited for:
- Personalized jewelry
- Metal business cards
- Stainless steel tumblers
- Keychains and tags
- Custom gifts
- Small business branding products
- Event and on-site engraving services
- Mixed-material craft projects
While a dedicated fiber laser will still be the better choice for deep metal engraving and high-volume production, the xTool F2 offers a compelling balance of versatility, portability, and ease of use.
It gives users the ability to engrave metal with the IR laser while also cutting and engraving non-metal materials with the diode laser, all in a single machine.
CO2 & Diode Lasers
CO2 and standard blue diode lasers struggle with bare metals. They can often mark coated, painted, anodized, or treated metals, but are generally not ideal for deep metal engraving.
Best for:
- Anodized aluminum
- Painted metals
- Powder-coated surfaces
Materials such as stainless steel, aluminum, brass, and other reflective metals typically do not absorb the CO2 and blue laser wavelength well enough to produce a permanent mark.
This is where xTool Black Marking Spray can help.

The spray creates a special coating on the metal surface that reacts to the laser’s energy during engraving.
When the laser passes over the coated area, the spray bonds to the metal and creates a durable, high-contrast black mark. After engraving, any remaining spray can be cleaned off, leaving only the engraved design behind.
How It Works
The process is relatively simple:
- Clean the metal surface.
- Apply a thin, even layer of xTool Black Marking Spray.
- Allow the coating to dry completely.
- Run the engraving job using your CO2 or diode laser.
- Wash or wipe away the excess spray.
The result is a sharp black marking that stands out clearly against the metal surface.
3. Know Your Metal Type

Different metals react differently to laser energy.
Metal Type | Engraving Difficulty | Notes |
|---|---|---|
Stainless Steel | Easy | Excellent results with fiber and IR lasers |
Aluminum | Easy to Moderate | Anodized aluminum engraves especially well |
Brass | Moderate | Requires higher power for deeper results |
Copper | Difficult | Highly reflective material |
Titanium | Easy | Produces attractive color markings |
Gold | Easy | Common in jewelry applications |
Silver | Easy | Requires careful settings for detail |
Mild Steel | Moderate | Often benefits from marking compounds |
Always test on scrap material before engraving valuable items.
4. Surface Finish Matters
The condition of the metal surface can significantly impact engraving quality.
Polished surfaces may reflect more laser energy, while brushed or matte finishes often produce cleaner results.
Before engraving:
- Remove oils and fingerprints
- Clean the surface thoroughly
- Ensure the material is flat and secure
- Test settings on a similar piece
Proper preparation helps improve consistency and detail.
5. Consider Material Thickness
For most engraving projects, thickness is less important than laser compatibility. However, thicker metals can dissipate heat differently than thin sheets.
When engraving thin materials:
- Use lower power settings
- Avoid excessive heat buildup
- Watch for warping
When working with thicker metals:
- Multiple passes may be required
- Higher power settings may improve depth
6. Ventilation and Safety Are Essential
Laser engraving metal can generate fumes, particles, and debris.
Eye Protection Is Critical
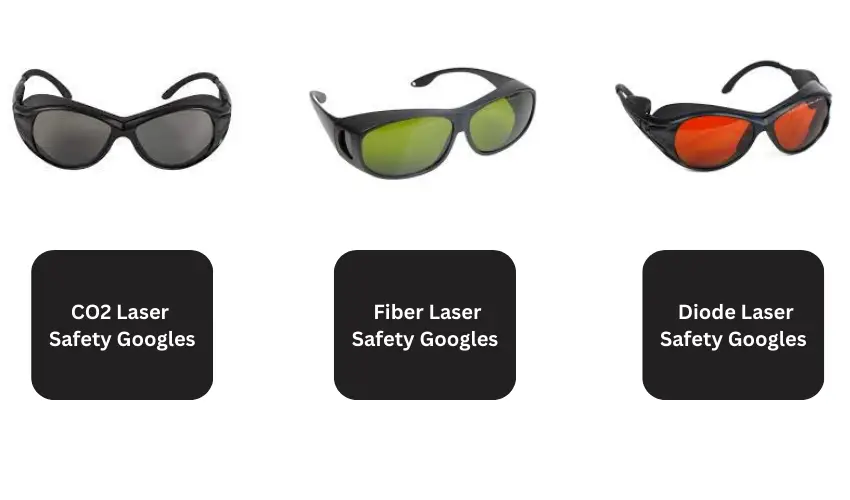
- Laser beams, especially from fiber lasers, can be extremely dangerous to your eyes.
- Always wear laser safety goggles rated for your laser’s wavelength (e.g., 1064nm for fiber, 355nm for UV).
- Diode lasers with IR modules also require protection from both visible and infrared radiation.
Even with enclosed machines, goggles are essential during setup and testing phases
Proper Ventilation and Fume Extraction
- Metal engraving can produce toxic fumes, especially when:
- Engraving coated or anodized metals (e.g., paint, powder-coat)
- Using laser marking sprays (like xTool Black Laser Marking Spray)
- Use a fume extractor with HEPA and activated carbon filters or vent outdoors through a sealed exhaust hose.
Never engrave galvanized steel or PVC—they release extremely hazardous fumes
Avoid Reflective Surface Hazards
- Polished metals like stainless steel, aluminum, and chrome can reflect the laser beam, creating a risk of eye damage or fire.
- Use matte finishes or apply marking sprays to reduce reflectivity.
- Ensure beam enclosures are properly shielded—especially with open-frame lasers.
Fire Risk and Thermal Management
- Although metals themselves don’t burn easily, surrounding components (coatings, adhesives, masking tape) can ignite.
- Keep a fire extinguisher (Class C) available on Amazon.
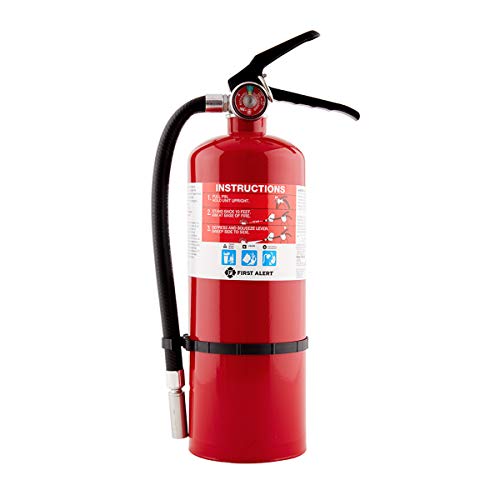
- The First Alert HOME2PRO Fire Extinguisher is UL rated 2-A: 10-B:C and meets minimum 2-A: 10-B:C code requirements; It features durable all-metal construction with a commercial-grade metal valve and trigger
- Do not leave the laser unattended—especially during long or deep engraving jobs.
Tip: Run test passes first and avoid excessive passes that build up too much heat
Electrical and Equipment Safety
- Laser engravers use high-voltage components and cooling systems (especially fiber lasers and CO2 machines).
- Use a grounded outlet and a surge protector.
- Inspect wires, cooling lines, and ventilation regularly for wear or leaks.
Machine and Workspace Setup
- Place the machine on a stable, non-flammable surface.
- Keep clutter away from the laser path and beam window.
- Use proper rotary attachments for cylindrical objects like tumblers to prevent slipping and misalignment.
Material-Specific Hazards
Metal Type | Caution |
|---|---|
Anodized Aluminum | Can release metal oxide dust—use ventilation |
Coated/painted metals | Release toxic chemicals—wear gloves, ventilate |
Stainless Steel | May reflect beam—use matte or pre-treated surface |
Brass or Chrome | Very reflective—ensure proper shielding and PPE |
Laser Marking Spray | Flammable when aerosolized—never spray near the operating machine |
Quick Safety Checklist for Metal Engraving
- Laser goggles for correct wavelength
- Proper fume extraction or external venting
- Fire extinguisher within reach
- No unattended operation
- Pre-clean materials to remove flammable or toxic coatings
- Work in a well-lit, uncluttered area
- Use appropriate rotary attachments for curved objects
7. Optimize Focus and Settings
Even the best laser machine can produce poor results if improperly focused.
Key settings to test include:
- Power
- Speed
- Frequency (where applicable)
- Number of passes
- Focus height
Creating a test grid is one of the fastest ways to find optimal settings for a new material.
8. Rotary Attachments Expand Your Options
If you plan to engrave tumblers, bottles, rings, or cylindrical objects, a rotary attachment can dramatically expand your capabilities.
Many modern laser systems support rotary accessories that allow precise engraving around curved surfaces.
Popular projects include:
- Stainless steel tumblers
- Wedding rings
- Wine glasses
- Metal water bottles
- Custom mugs
8. Software Matters More Than Most People Realize
Good software can make laser engraving much easier.
Look for features such as:
- Material presets
- Camera positioning
- Batch processing
- Image tracing
- Rotary setup tools
- Design libraries
User-friendly software can significantly reduce the learning curve for beginners.
9. Design Considerations
Use High-Contrast, Vector-Based Designs
- Vector graphics (SVG, AI, DXF) are ideal because they provide clean, scalable lines for precise engraving.
- Avoid low-res raster images unless you’re doing photo engraving with dithering or grayscale (and your laser supports it).
- Black = engraved / white = skipped: Stick to bold, simple contrast.
Pro Tip: Convert text to outlines or paths to avoid font issues across machines
We recommend using Vecteezy for thousands of free, pre-made laser-engraving vector designs.

Optimize Font Choice and Size
- Use bold, sans-serif fonts for the best visibility and readability on metal.
- Avoid thin or overly decorative fonts—they may not engrave well or may look blurry on reflective surfaces.
- Minimum font size: Aim for at least 6–8 pt for metal parts, larger for high-speed engraving.
Engraving Depth and Fill Type
- Hatch fill (crosshatch or parallel lines) works best for filling shapes with consistent marking.
- Consider engrave vs. mark: You don’t always need to etch deeply into metal—light surface marks may suffice and preserve strength.
- Avoid excessive depth on thin or coated metals to prevent warping or damage.
Consider Heat Effects and Material Reaction
- Metals conduct heat, which can distort fine details or discolor the surface if the power is too high.
- Design around this by limiting large solid fills (these cause more heat buildup).
- Use dot matrix or low-density hatching for better contrast without overheating.
Test for Surface Finish Compatibility
Design appearance will vary based on metal type:
Metal Type | Best Design Style |
|---|---|
Stainless Steel | High-contrast, line work, filled logos |
Anodized Aluminum | Negative space, reverse engraving |
Brass/Copper | Light line engravings (high reflectivity = risk) |
Titanium | Color marking with tight focus, low power |
Coated Metals | Use coating to get dark, crisp marks |
Consider Object Shape & Layout
- Curved or cylindrical items (tumblers, rings) need designs that account for curvature—especially if using rotary attachments.
- Use wrap-around templates for tumblers and jigs to position parts consistently.
Engraving Alignment & Registration
- Always include center marks or guide shapes in your design to help with alignment on the machine.
- Use the “framing” or “outline” feature in your software to preview placement before engraving.
Summary Table: Metal Laser Engraving Design Tips
Consideration | What to Do |
|---|---|
Design type | Use high-contrast vectors; avoid low-res images |
Fonts | Bold, simple, and legible fonts; avoid overly decorative ones |
Fill method | Use hatch or dot fills for efficient marking |
Heat control | Limit large solid fills; adjust design to avoid warping |
Metal type compatibility | Match design style to the metal surface and finish |
Curved object design | Wrap designs accurately for tumblers, rings, etc. |
Placement & alignment | Use guides or test outlines to ensure correct positioning |
Designing with the material in mind ensures professional-grade laser results on metal—no matter the laser type or project scale.
10. Understand the Difference Between Hobby and Production Use
A hobbyist creating occasional gifts has very different needs than a business producing hundreds of engraved items each week.
For occasional use, a desktop laser with IR capability may be sufficient.
For commercial production, a dedicated fiber laser often provides:
- Faster speeds
- Better consistency
- Greater engraving depth
- Higher throughput
Choosing the right machine for your workload can save money in the long run.
Final Thoughts
Laser engraving metal can be incredibly rewarding, but success depends on choosing the right combination of laser technology, metal type, settings, and workflow.
Understanding the differences between marking and engraving, selecting compatible materials, and following proper safety procedures will help you achieve better results from day one.
Whether you’re personalizing jewelry, creating custom gifts, marking industrial parts, or launching a small business, taking the time to understand these important considerations before laser engraving metal will lead to cleaner engravings, fewer mistakes, and a much smoother experience overall.
Frequently Asked Questions
What type of laser is best for engraving metal?
The best laser types for metal engraving are:
Fiber lasers (1064nm): Ideal for deep engraving, marking, and etching all bare metals (stainless steel, brass, aluminum, titanium, etc.). Fast, precise, and durable.
Diode lasers with IR (1064nm) modules: Cost-effective and versatile for engraving coated or anodized metals, especially powder-coated stainless steel.
CO₂ lasers (10,600nm) + Blue Diode Lasers: Cannot engrave bare metals directly but can mark anodized, painted, or coated metals with proper settings or laser marking spray.
Can I engrave stainless steel tumblers with a diode laser?
Yes, but with limitations. Standard diode lasers (blue light) can’t engrave bare stainless steel directly. However, you can:
Use laser marking spray (e.g., xTool Black Laser Marking Spray, OmTech) to create a permanent mark.
Upgrade to a diode + 1064nm IR module, which allows marking without spray.
For best results and speed, use a fiber laser.
Is laser engraving on metal permanent?
Yes. Laser engraving creates permanent marks by either:
Removing material (deep engraving or etching)
Oxidizing the surface (color change)
Fusing a marking spray (if using non-metal-specific lasers)
The permanence depends on the laser power, material, and engraving depth. Fiber lasers deliver the most durable results, often resistant to abrasion, corrosion, and heat.