
The xTool RA2 Pro Rotary Attachment is one of the most versatile add-ons you can buy for your laser engraver.
It allows you to engrave tumblers, mugs, glasses, ornaments, and other cylindrical objects with precision and detail.
Table of Contents
If you’ve just unboxed your RA2 Pro or you’re still on the fence about getting one, this beginner-friendly guide will walk you through everything you need to know—from setup and calibration to practical project tips.
Why Use the xTool RA2 Pro Rotary Attachment?

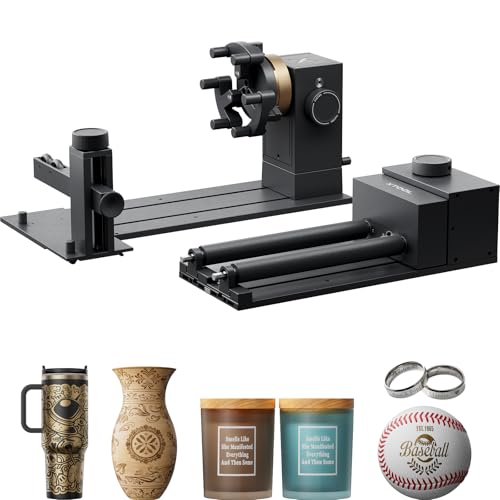
- Suitable for 90% Daily Use Cylindrical Objects - xTool RA2 Pro is the WORLD'S FIRST 4-in-1 laser rotary attachment, including Roller Rotary, Chuck Rotary, Sphere-Engraving Module and Ring-Engraving Stud. You can unleash your creativity on almost all cylinders by changing accessories, such as wine glass, yeti tumbler, baseball bat, ring, ball, or mug with handle
Normally, laser engravers are designed for flat surfaces like wood, acrylic, or leather. But what happens when you want to engrave on a cup, bottle, or ornament?
That’s where the RA2 Pro comes in. With its adjustable roller and chuck system, you can rotate objects while the laser engraves around their curved surfaces. This dramatically expands your creative possibilities.
xTool RA2 Pro Features

The xTool RA2 Pro is great because it combines multiple rotary functions into one accessory.
4-in-1 Rotary Design
One of the biggest advantages of the RA2 Pro is that it supports different engraving applications without requiring multiple attachments.
It can work with:
Roller Rotary Mode
The roller mode is ideal for larger cylindrical objects like:
- Tumblers
- Bottles
- Cups
- Glasses
The object sits between rotating rollers while the attachment spins it during engraving.
This is the most common setup for beginners.
Chuck Rotary Mode
The chuck mode uses adjustable jaws to hold smaller or irregular round objects.
It is useful for:
- Rings
- Small metal parts
- Jewelry
- Small cylinders
The chuck provides a more secure grip compared with a simple roller system.
Sphere Rotary Mode
The RA2 Pro can also help engrave spherical objects.
Examples include:
- Balls
- Round decorations
- Specialty gifts
This expands the types of products you can create.
Ring Rotary Mode
For jewelry makers, the ring rotary setup allows engraving on:
- Wedding bands
- Bracelets
- Small circular items
This is especially useful with fiber lasers or precision engraving machines.
Quick Setup Guide: How to Use the xTool RA2 Pro Rotary Attachment
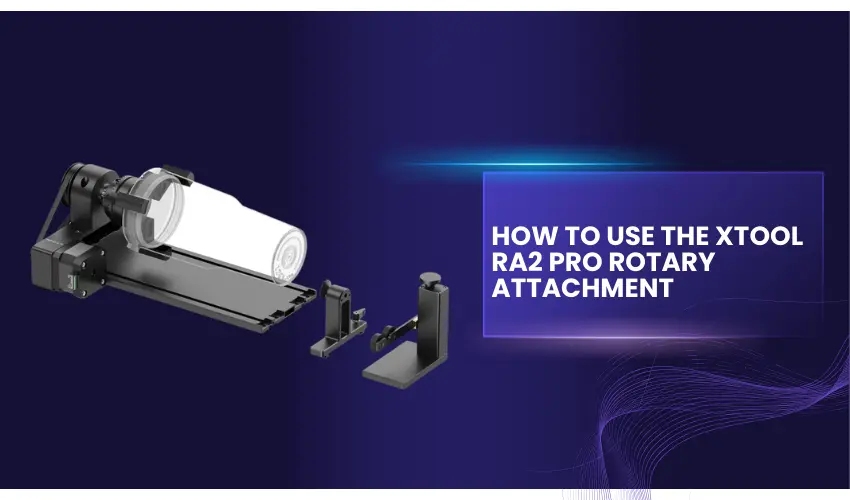
Here’s a step-by-step guide to get you engraving your first tumbler with the RA2 Pro Rotary Attachment.
Step 1. Assemble the RA2 Pro
- Choose the right configuration (rollers for straight tumblers, chuck for tapered items).
- Place it on the laser bed.
Step 2. Connect to Your xTool Machine
- Use the correct cord for your model (S1, P2S, M1, or D1).
- Plug into the USB port to power the attachment.
Step 3. Adjust Roller Position
- A Position: 3–50mm objects
- B Position: 45–60mm objects
- C Position: 60mm+ objects
Step 4. Secure Your Object
- Place your tumbler, mug, or ornament on the rollers/chuck.
- Ensure smooth rotation.
Step 5. Measure & Focus
- Measure diameter and height in xTool Creative Space (XCS).
- Use auto-measure for proper laser focus.
Step 6. Upload & Align Your Design
- Import your design into XCS.
- Rotate and align it with the tumbler orientation.
Step 7. Frame the Design
- Click Framing to preview the engraving area.
- Adjust placement before engraving.
Step 8. Start Engraving
- Click Process → Start in XCS.
- Vent your machine and turn on air assist if available.
- Let the RA2 Pro work its magic!
Pro Tip: After engraving, clean residue with a magic eraser + water for crisp, polished results
How to Set Up the xTool RA2 Pro Rotary Attachment in LightBurn
Setting up an xTool rotary attachment in LightBurn is fairly straightforward once the correct settings are applied. Below are the recommended configurations for setting up your rotary in LightBurn.
xTool RA2 Pro Chuck Rotary Setup in LightBurn
When configuring the RA2 Pro Chuck rotary, the most important settings are the steps per rotation, object measurement, and rotary axis selection.
The Steps per rotation value should remain at the fixed setting of 128mm. This value does not normally need to be adjusted.
The Diameter or Circumference setting should match the measurement of the object you plan to engrave. Measure your item carefully before entering this value, as an incorrect measurement can cause stretched or distorted artwork.
For the Rotary Axis setting, use:
- Z-Axis when using an xTool D1 (non-Pro)
- Y-Axis when using an xTool D1 Pro
If your rotary motor is positioned toward the left rail of your xTool machine, you will also need to enable Mirror Output to Rotary so the engraving orientation displays correctly.
xTool RA2 Pro Roller Rotary Setup in LightBurn
The roller rotary configuration is slightly different from the chuck setup.
For the RA2 Pro, the Steps per rotation value should remain fixed at 32mm and does not need adjustment.
The Roller Diameter should stay at the default value of 17mm.
Just like the chuck rotary setup, the Diameter or Circumference value should be set based on the actual measurement of the object you are engraving.
For the Rotary Axis setting, use:
- Z-Axis with the xTool D1
- Y-Axis with the xTool D1 Pro
Make sure your object measurement is accurate because this setting controls how your design wraps around the curved surface.
Important Tips Before Engraving With Your xTool Rotary
Before engraving an expensive tumbler, glass, or other blank, it is always a good idea to run a test first.
A simple method is to place a sheet of paper with aluminum foil underneath over your object and run a low-power test engraving.
Using a very low power setting, such as 15% or less on a 10W laser, allows you to check the engraving direction and confirm that your mirroring settings are correct without damaging the material.
LightBurn can occasionally experience issues where rotary mirroring stops working even though the settings appear correct.
Because of this, always check the Preview window in LightBurn before starting your final engraving job. The preview will show the actual orientation of your design and help catch mistakes before they happen.
Always double-check your object measurements, especially the diameter or circumference. Even a small measurement error can affect how your design wraps around the object.
Finally, make sure your item is positioned perfectly level with the laser. An uneven object can cause inconsistent focus and lead to uneven engraving results.
With the correct LightBurn settings and careful setup, the xTool RA2 Pro rotary attachment can produce clean, professional engravings on tumblers, glasses, bottles, rings, and other curved products.
xTool RA2 Pro Rotary Attachment: RA2 Pro vs RA3

What We Know
Product | Key Description |
|---|---|
RA2 Pro | xTool’s 4-in-1 rotary engraving accessory. Includes rollers, chucks, spheres, and rings. Works with many xTool lasers: P2S, S1, F1, M1, D1 Pro, etc. |
RA3 | Newer “smart” rotary for xTool Lasers. Adds features such as MagSwap™ attachments, LiDAR mapping, auto-recognition of rotary mode, improved jaws, and more. Works with the xTool P3, F2 Ultra, F1 Ultra, and F2. |
Feature-by-Feature Comparison: RA2 Pro vs RA3
Feature | RA2 Pro | RA3 |
|---|---|---|
Attachment Types / Multi-Functionality | 4-in-1: rollers, chucks, spheres, rings. | Also supports multiple modes (rollers, chuck, etc.), but with quicker swap-out via MagSwap™ design. |
Software Features / Smart Automation | Basic rotary modes, no built-in LiDAR, manual setup. | Includes 360° LiDAR Mapping™, auto-recognition of rotary mode, previews in software, mismatch warnings if wrong mode selected. |
Compatibility (Machines) | Compatible with many xTool models: P2S, S1, F1, M1, D1 Pro. | xTool P3, F2 Ultra, F1 Ultra and F2 primarily. |
Ease of Use / Setup Speed | Decent, but swapping attachments and aligning takes manual work. | Faster: MagSwap™ design reduces time to switch modes or attachments. Auto features help reduce errors and alignment work. |
Gripping Capability / Size of Objects | Good for a variety of shapes thanks to chuck, rings etc. But gripping may require manual adjustment. | Improved jaws like T-type jaws, larger gripping range, easier clamp swaps. Better support for larger diameters or more complex shapes. |
Batch / Workflow Features | Works for small batch engraving. But lacks automation or preview tools. | Designed for better workflow: batch processing support, preview tools, faster mode switching. |
What It Means for Users / Which One to Choose
- If you’re a beginner or occasional engraver, mainly doing straight-sided tumblers, mugs, etc., the RA2 Pro gives you what you need without overpaying for features you may rarely use.
- Suppose you frequently work on tapered items, decorative rings, vases, or batch jobs, or want the fastest and most streamlined workflow with fewer manual adjustments, and own the xTool P3, F2 Ultra, F1 Ultra, or F2. In that case, the RA3 is likely the better investment.
- If software previews, mode auto-recognition, LiDAR mapping, and faster swapping of attachments matter to you, RA3 offers those smart enhancements that reduce setup mistakes and wasted materials.
Can the xTool RA2 Pro Rotary Work With Other Laser Engravers?
Yes — the xTool RA2 Pro Rotary can work with other laser engravers, but it’s not always plug-and-play. Compatibility depends on your machine’s design and controller.
When It Does Work
The RA2 Pro is compatible with many open-frame diode laser engravers, such as:
- Ortur
- Atomstack
- NEJE
- Other GRBL-based machines
These engravers typically allow you to:
- Disconnect the Y-axis motor
- Plug in the rotary attachment instead
This lets the rotary take over movement for engraving cylindrical objects like tumblers or bottles.
What You Need for Compatibility
To use the RA2 Pro with a non-xTool machine, make sure:
- GRBL controller support (most diode lasers use this)
- Standard motor port connection (usually a 4-pin cable)
- Rotary settings available in software (like LightBurn or LaserGRBL)
You may also need:
- A compatible adapter cable (often included with the RA2 Pro)
- To manually configure steps per rotation in your software
When It Might NOT Work
The RA2 Pro may not be compatible with:
- Fully enclosed machines with proprietary systems
- Some CO₂ lasers (like Glowforge)
- Machines without accessible motor ports
- Non-GRBL controllers
Setup Overview
Typical setup involves:
- Unplugging the Y-axis motor
- Connecting the RA2 Pro to that port
- Enabling rotary mode in your software
- Adjusting settings (roller diameter, steps, etc.)
Bottom Line
- Works with many third-party diode engravers
- Requires manual setup and compatibility checks
- Not universal across all laser types
Final Thoughts: Is the RA2 Pro Worth It?
If you’re serious about laser engraving, the xTool RA2 Pro Rotary Attachment is a must-have. Whether you’re creating personalized tumblers for gifts, custom mugs for a small business, or experimenting with ornaments and rings, this tool unlocks endless project opportunities.
Beginners may feel intimidated at first, but once you run your first project, you’ll realize how easy—and rewarding—it is to use.
Our Recommendation: Start with a simple straight-sided tumbler project, then expand to tapered and more complex items as you get comfortable.
Frequently Asked Questions
Do I need the RA2 Pro or will the RA3 work for me?
If you mostly engrave straight-sided tumblers, mugs, or simple cylindrical objects, the RA2 Pro is more than enough. If you want faster setup, smarter features (like auto-recognition and LiDAR mapping), own a xTool P3, F2 Ultra, F1 Ultra, or F2, and plan to engrave tapered or complex shapes regularly, the RA3 is the better choice.
Can the xTool RA2 Pro Rotary Attachment engrave on glass tumblers and mugs?
Yes! The RA2 Pro, depending on the type of laser you have, works on glass, stainless steel, coated metals, and even wood cylinders.
Do I need risers to use the xTool RA2 Pro rotary attachment?
Yes, for taller objects like tumblers or mugs, you’ll need the xTool riser base to give your machine extra clearance. Without it, the laser head may not fit above your object.
How do I keep the tumbler from slipping on the rollers?
Slipping is common with smooth surfaces. You can add painter’s tape, rubber bands, or grip tape on the rollers to increase friction and keep your tumbler steady during engraving.