
Metal is one of the most rewarding materials to laser engrave, but it is also one of the easiest to ruin with incorrect settings. Using too much power can melt fine details, while too little power may leave marks that are barely visible.
The ideal settings depend on the type of laser, the metal being engraved, and whether your goal is surface marking, deep engraving, or color engraving.
Table of Contents
In this guide, you’ll learn the recommended laser settings for the most common metals, how different laser types affect engraving performance, and how to fine-tune your machine for professional results.
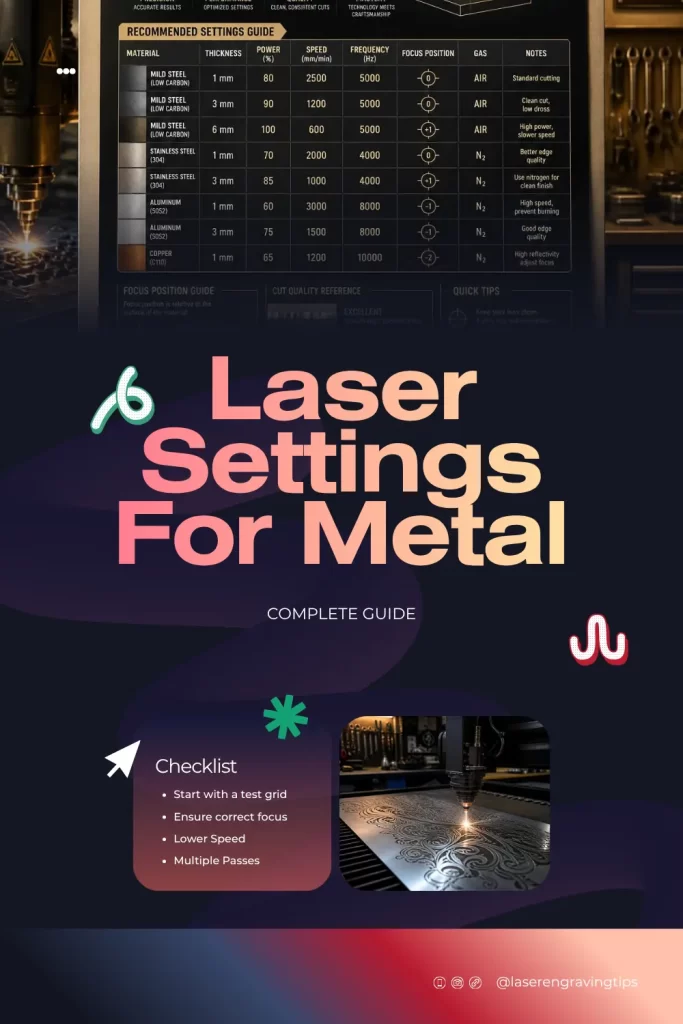
Why Laser Settings For Metal Matter
Unlike wood or acrylic, metals respond differently to laser energy depending on their reflectivity, hardness, and thermal conductivity.
Stainless steel absorbs laser energy well, while polished aluminum and copper reflect much of the beam. Because of these differences, the same settings that work perfectly on one metal may produce poor results on another.
Factors That Affect Laser Settings For Metal
Getting the settings right improves engraving quality while reducing production time, minimizing heat distortion, and extending the life of your laser.
Several variables influence the ideal engraving settings.
Laser type is the biggest factor. Fiber lasers are designed specifically for metals, while CO₂ and diode lasers usually require marking sprays or coated surfaces.
Laser power determines how much energy reaches the material. Higher-powered machines can engrave faster or produce deeper marks with fewer passes.
Speed controls how quickly the laser moves across the surface. Slower speeds generally create deeper engravings, while faster speeds are better for surface marking.
Frequency affects pulse density. Lower frequencies are often used for deep engraving, while higher frequencies help create smoother marks or color engraving.
Focus is equally important. Even perfect settings won’t compensate for poor focus, especially on curved or uneven surfaces.
Best Laser Types for Metal
Before adjusting settings, it’s important to understand which laser works best.
Fiber lasers operating at 1064 nm are the industry standard for engraving stainless steel, mild steel, titanium, aluminum, brass, and many other metals.
MOPA fiber lasers provide additional pulse-width control, making them ideal for color engraving on stainless steel and delicate marking applications.
CO₂ lasers generally cannot engrave bare metal directly. Instead, they rely on marking sprays like OMTech Laser Marking Spray to produce permanent black markings.
Diode lasers work well on anodized aluminum, painted metals, and coated surfaces but struggle with bare reflective metals unless an infrared module is used.
Recommended Fiber Laser Settings For Metal
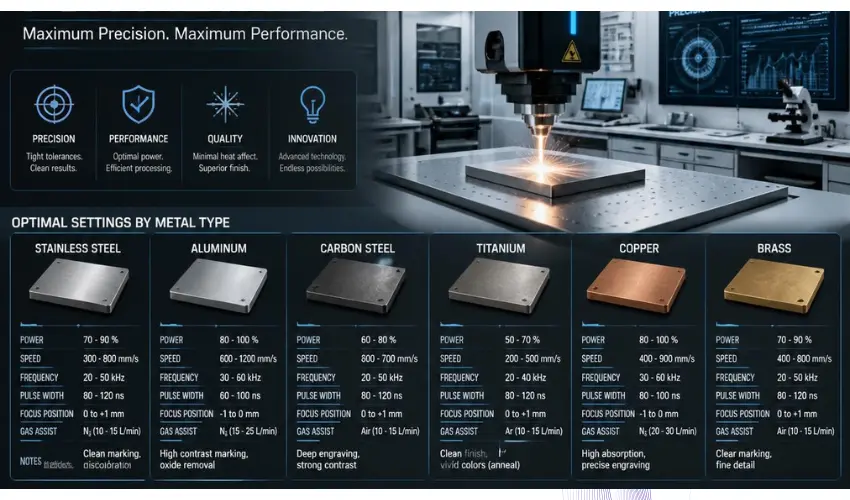
Below are recommended starting settings for common metals using 20W, 30W, 50W, and 100W fiber lasers. These settings are intended as a baseline for standard galvo fiber lasers with a 110 × 110 mm lens.
Actual settings may vary depending on your laser source (Raycus, JPT, Max, IPG), lens, focus, and desired engraving depth.
Material | Laser Power | Power (%) | Speed (mm/s) | Frequency (kHz) | Passes | Result |
|---|---|---|---|---|---|---|
Stainless Steel | 20W | 90–100 | 200–400 | 30–50 | 2–4 | Deep engraving |
Stainless Steel | 30W | 60–80 | 300–600 | 30–50 | 1–3 | Deep engraving |
Stainless Steel | 50W | 40–60 | 600–1000 | 30–60 | 1–2 | Deep engraving |
Stainless Steel | 100W | 20–40 | 1200–2000 | 40–80 | 1 | Fast production engraving |
Mild Steel | 20W | 100 | 200–350 | 30–45 | 3–5 | Deep engraving |
Mild Steel | 30W | 70–90 | 300–600 | 30–45 | 2–3 | Deep engraving |
Mild Steel | 50W | 50–70 | 600–1000 | 30–50 | 1–2 | Industrial engraving |
Mild Steel | 100W | 25–45 | 1200–1800 | 40–60 | 1 | Production marking |
Anodized Aluminum | 20W | 40–60 | 1500–2500 | 30–50 | 1 | White engraving |
Anodized Aluminum | 30W | 30–50 | 2000–3000 | 30–50 | 1 | Crisp white engraving |
Anodized Aluminum | 50W | 20–40 | 2500–4000 | 30–60 | 1 | Fast engraving |
Anodized Aluminum | 100W | 10–20 | 3500–5000 | 40–70 | 1 | High-speed production |
Bare Aluminum | 20W | 100 | 500–900 | 40–60 | 3–5 | Frosted engraving |
Bare Aluminum | 30W | 100 | 800–1200 | 45–60 | 2–3 | Surface engraving |
Bare Aluminum | 50W | 70–90 | 1200–1800 | 45–60 | 1–2 | Bright engraving |
Bare Aluminum | 100W | 40–60 | 1800–3000 | 50–70 | 1 | Fast marking |
Brass | 20W | 100 | 150–300 | 30–40 | 3–5 | Deep engraving |
Brass | 30W | 90–100 | 250–450 | 30–45 | 2–4 | Clean engraving |
Brass | 50W | 60–80 | 500–800 | 30–50 | 1–2 | Production engraving |
Brass | 100W | 35–50 | 1000–1600 | 40–60 | 1 | High-speed engraving |
Copper | 20W | 100 | 100–200 | 20–30 | 4–6 | Light engraving |
Copper | 30W | 100 | 150–300 | 20–30 | 3–5 | Better penetration |
Copper | 50W | 80–100 | 300–600 | 20–35 | 2–3 | Recommended minimum |
Copper | 100W | 50–70 | 600–1000 | 20–40 | 1–2 | Industrial engraving |
Titanium | 20W | 60–80 | 400–800 | 25–40 | 1–2 | Dark engraving |
Titanium | 30W | 50–70 | 600–1000 | 25–40 | 1–2 | Dark engraving |
Titanium | 50W | 35–50 | 1000–1500 | 30–50 | 1 | Clean engraving |
Titanium | 100W | 20–35 | 1800–2500 | 30–60 | 1 | Fast engraving |
Color Marking on Stainless Steel (MOPA Fiber Lasers)
These settings apply only to MOPA fiber lasers, which allow pulse-width adjustment for producing colored engravings.
Laser Power | Power (%) | Speed (mm/s) | Frequency (kHz) | Pulse Width | Typical Result |
|---|---|---|---|---|---|
20W MOPA | 35–50 | 700–1000 | 250–400 | Short | Gold, blue, purple |
30W MOPA | 25–45 | 800–1200 | 300–500 | Short | Full-color marking |
50W MOPA | 20–35 | 1200–1800 | 350–600 | Short | Bright colors |
100W MOPA | 10–25 | 2000–3000 | 400–700 | Short | High-speed color engraving |
Tips for Best Results
- Always start with a test grid on scrap material before engraving your final piece.
- Keep the workpiece perfectly focused, as even a small focus error can reduce engraving quality.
- Lower speeds and multiple passes generally produce deeper engravings than a single high-power pass.
- Reflective metals such as copper, brass, silver, and gold may require slower speeds or a MOPA/green laser for the best results.
- A 50W or 100W fiber laser doesn’t necessarily require 100% power. In many cases, reducing power and increasing speed produces cleaner results with less heat buildup.
Best Settings for Stainless Steel
Stainless steel is one of the easiest metals to engrave because it absorbs fiber laser energy efficiently.
For deep engraving, use moderate speed with higher power and multiple passes. For surface marking, increase speed while reducing power.
MOPA fiber lasers also allow beautiful color engraving by adjusting pulse width and frequency without removing material.
Best Settings for Aluminum
Aluminum behaves differently depending on whether it is bare or anodized.
Bare aluminum reflects much of the laser energy and typically requires maximum power for visible engraving.
Anodized aluminum engraves much more easily because the laser removes dye from the oxide layer rather than cutting deeply into the metal.
Typical settings for anodized aluminum include lower power and higher speeds, while bare aluminum usually benefits from full power and slower movement.
Best Settings for Brass
Brass is more reflective than stainless steel, making it slightly more difficult to engrave.
Deep engraving generally requires high power, slower speeds, and multiple passes.
If your machine includes a MOPA fiber source, shorter pulse widths often produce cleaner results with less heat buildup.
Best Settings for Copper
Copper is one of the most challenging metals for laser engraving because it reflects much of the laser beam.
Many professionals prefer green lasers or MOPA fiber lasers when engraving copper, although standard fiber lasers can still achieve good results using slower speeds and multiple passes.
Always perform a test grid before beginning production work.
Best Settings for Titanium
Titanium engraves exceptionally well with fiber lasers.
Besides deep engraving, titanium also produces attractive oxide colors by carefully adjusting power and pulse settings.
This makes it popular for medical devices, aerospace components, jewelry, and custom knives.
Recommended CO₂ Laser Settings For Metal
CO₂ lasers generally require marking spray when working with bare metals.
The laser bonds the marking compound to the surface instead of engraving the metal itself. We recommend using OMTech Laser Marking Spray with your CO₂ Laser.

- Laser Marking Spray: OMTech's laser marking spray’s innovative formula allows creation of high contrast, permanent black designs on bare metals with your 25W and above CO2 laser engraver, or more vivid designs with your fiber laser. Please note that the spray initially appears white but turns black after laser engraving
OMTech Laser Marking Spray is an excellent solution for anyone using a CO₂ laser to permanently mark bare metals. Since CO₂ lasers cannot effectively engrave untreated metal on their own, the spray creates a heat-reactive coating that bonds to the surface during engraving, producing sharp, high-contrast black markings.
After engraving, it leaves behind a rich black mark that offers excellent contrast on stainless steel, aluminum, brass, and other compatible metals. This makes it a popular choice for customizing tumblers, jewelry, tools, nameplates, signage, and promotional products.
The spray is also easy to apply, even for beginners. Its clog-resistant aerosol nozzle delivers a smooth, consistent coating, which is essential for achieving crisp details and clean edges, especially when engraving fine text or intricate logos.
Another advantage is its quick drying time. The coating naturally dries in less than five minutes, or in approximately two minutes with gentle heat, allowing users to move quickly from preparation to engraving. This can significantly improve productivity when working on multiple projects or batch orders.
Cleanup is straightforward as well. Once engraving is complete, simply rinse or wipe away the unused coating with water, leaving only the permanently bonded black design behind. This minimizes post-processing and helps produce professional-looking results with minimal effort.
For hobbyists, makers, and small businesses using a CO₂ laser, OMTech Laser Marking Spray offers a cost-effective alternative to purchasing a fiber laser for occasional metal marking projects.
Recommended CO₂ Laser Settings
The ideal settings will vary depending on your laser’s wattage and optics, but the following values provide a good starting point for most CO₂ laser engravers:
Setting | Recommended Range |
|---|---|
Speed | 200–400 mm/min |
Power | 70–90% |
Passes | 1–2 |
As with any new material or coating, it’s always best to perform a few test engravings on scrap metal before engraving your final project. This allows you to fine-tune your settings and achieve the best possible results.
Recommended Diode Laser Settings For Metal
Diode lasers work best on anodized aluminum and painted metals.
Typical starting settings include:
Material | Power | Speed | Passes |
|---|---|---|---|
Anodized Aluminum | 80–100% | 1500–3000 mm/min | 1 |
Painted Metal | 70–100% | 1000–2500 mm/min | 1 |
Stainless Steel (with marking spray) | 100% | 300–800 mm/min | 1–2 |
Bare polished metals generally require either marking spray or an infrared laser module. We recommend using CRC 3084 Dry Moly Lube with your Diode Laser.

- CRC INDUSTRIES: A market leader that offers impeccably designed chemical solutions to maintain, protect and repair different marine, heavy-duty motor vehicles, industrial-grade engines, household tools and electrical equipment.

CRC 3084 Dry Moly Lube has become a favorite among diode laser users looking for an affordable way to permanently mark bare metals.
Although it was originally developed as a dry-film lubricant, makers quickly discovered that it performs surprisingly well as a laser marking coating, making it a popular alternative to more expensive commercial marking sprays.
One of its biggest advantages is its price. Professional laser marking products such as CerMark and TherMark can be costly, particularly for beginners or hobbyists experimenting with metal engraving.
CRC Dry Moly Lube offers a much more budget-friendly option while still producing durable, high-contrast markings when used with the proper diode laser settings.
Applying the coating is simple. The spray dries quickly, allowing you to prepare multiple items at the same time, which is especially useful for batch production.
For the best results, apply two thin, even coats rather than a single heavy layer. This creates a smoother surface and helps produce darker, more consistent engravings.
Many users also appreciate the appearance of the finished engraving. Rather than leaving a glossy black mark, CRC Dry Moly typically creates a dark gray, etched-looking finish that gives stainless steel a clean, industrial appearance.
This style works particularly well on tumblers, flasks, knives, tools, metal tags, keychains, and other personalized products.
Cleanup is straightforward once the engraving is complete. Most of the remaining coating can be removed with isopropyl alcohol and a soft cloth or paper towel.
A final wipe with fresh alcohol removes any remaining residue, leaving the metal clean while revealing the permanent engraved design underneath.
For anyone using a diode laser, CRC 3084 Dry Moly Lube is one of the best low-cost alternatives for marking bare metals without having to invest in a fiber laser or premium laser-marking sprays.
Tips for Finding the Perfect Laser Settings For Metal
Every laser engraver performs slightly differently, even when comparing identical models.
Instead of relying solely on published settings, create a test grid by varying power and speed across a scrap piece of the same material. This allows you to identify the sharpest and darkest engraving before beginning production.
Keep detailed notes of successful settings so they can be reused for future projects.
Cleaning the lens regularly, maintaining accurate focus, and using proper air assist also have a noticeable impact on engraving quality.
Common Laser Setting For Metal Mistakes
Many beginners immediately increase power when engraving quality is poor. In reality, excessive power often melts fine details and creates rough edges.
Other common mistakes include engraving reflective metals with the wrong laser type, using incorrect focus, skipping material tests, and attempting deep engraving in a single pass instead of multiple lighter passes.
Small adjustments usually produce better results than dramatic changes.
Final Thoughts
Finding the best laser settings for metal takes experimentation, but understanding the relationship between power, speed, frequency, and material characteristics dramatically shortens the learning process.
Fiber lasers remain the best choice for most metal engraving applications, while MOPA lasers offer unmatched flexibility for color marking. CO₂ and diode lasers can still produce excellent results on coated metals or when paired with marking sprays, making them useful for hobbyists and small businesses.
No matter which machine you use, always begin with conservative settings, perform test engravings on scrap material, and adjust one setting at a time. With careful tuning, you’ll achieve crisp, consistent, and professional-quality engravings on virtually any metal.
Frequently Asked Questions
What laser settings should I use for stainless steel?
A good starting point for a 30W fiber laser is 50–70% power, 300–800 mm/s speed, and 30–50 kHz frequency. Fine-tune these settings based on the depth and finish you want.
Can a diode laser engrave bare metal?
Most diode lasers cannot deeply engrave bare reflective metals. They perform much better on anodized aluminum, painted metals, or when used with laser marking spray.
What frequency should I use for metal engraving?
Lower frequencies generally produce deeper engravings, while higher frequencies create smoother marks and are often used for color engraving with MOPA fiber lasers.
Why does my engraving look faded?
Faded engravings are usually caused by insufficient power, excessive speed, poor focus, or a dirty lens. Running a material test grid is the fastest way to identify the correct settings.
Should I use multiple passes?
Yes. Multiple lighter passes usually produce cleaner and deeper engravings than attempting maximum depth in a single pass.