Laser marking on ceramics is one of the most popular ways to create durable, high-contrast designs on mugs, tiles, and decorative items. But the process isn’t the same as cutting wood or engraving metal.
You’re working with a hard, often glazed surface, which means the method and laser type matter a lot.
This guide covers everything you need to know about laser marking ceramics, including the best laser types, marking sprays, applications, and our top recommended machines.
Table of Contents
What Is Laser Marking Ceramics?

Ceramics are known for their hardness, durability, and heat resistance. These properties make them excellent materials for products ranging from mugs and tiles to medical implants and electronic components.
But those same traits also make ceramics difficult to mark using traditional methods like printing, painting, or etching with chemicals.
Laser marking solves this problem by using a focused beam of light to alter the ceramic surface.
Why Ceramics Are Difficult to Mark
Ceramics don’t absorb all laser wavelengths equally. Some lasers pass right over them without much effect. Others generate too much heat, which risks cracking.
That’s why choosing the right laser is crucial to achieve clean, permanent, high-contrast marks.
Types of Ceramic Laser Marking
Direct Engraving (Glaze Etching)
This is the most common method with CO₂ and UV lasers.
- The laser removes or alters the glaze
- Creates a light, frosted mark
- Permanent and durable
Best for:
- Mugs
- Tiles
- Signage
Coating Method (Bonded Marking)
Used mainly with diode lasers like the xTool S1 Diode Laser.
Process:
- Apply coating (paint or marking spray)
- Laser bonds it to the ceramic
- Clean off excess
Best for:
- High-contrast black marks
- DIY and budget setups
UV Surface Marking
High-end option using machines like the xTool F2 Ultra UV Laser.
- Minimal heat impact
- Extremely fine detail
- Works directly on many surfaces
Best for:
- Photo engraving
- Detailed artwork
- Premium products
Best Lasers for Ceramic Marking
Ceramic marking depends heavily on the type of laser you use. Some lasers mark directly, while others require coatings to create visible marks.
This guide compares three practical options:
- UV laser → high precision, premium results
- CO₂ laser → best all-around choice
- Diode laser → budget-friendly option
Quick Comparison Table
Laser Type | Works on Ceramic | Mark Quality | Ease of Use | Cost | Best For |
|---|---|---|---|---|---|
UV Laser | Yes (direct) | Excellent (high detail) | Easy–Medium | High | Photos, fine detail, premium work |
CO₂ Laser | Yes (direct) | Excellent | Medium | Medium–High | Mugs, tiles, production |
Diode Laser | Yes (with coating) | Good | Easy | Low | DIY, small projects |
1. UV Laser (Best for Detail & Premium Results)

- Master of Glass Engraver: xTool F2 Ultra UV laser engraver machine delivers the simplest solution for 3D engraving inside glass and crystal with flawless results. This versatile UV laser engraver excels at surface engraving, embossing, cutting, and rotary engraving with premium results. Perfect for creating custom wine bottles, 3D crystal trophies, and personalized glass gifts for any occasion
The xTool F2 Ultra UV Laser is designed for high-precision marking, especially on delicate materials like ceramic.
How it works:
- Marks directly on ceramic surfaces
- Minimal heat impact
- Produces very fine, sharp details
Pros:
- Extremely detailed engraving (great for photos)
- Little to no chipping or cracking
- Works on a wide range of surfaces
Cons:
- Higher cost
- Smaller working area compared to some CO₂ machines
- May require color filling for white ceramics
Best for:
- Photo engraving on ceramic tiles
- High-end custom products
- Fine logos and detailed artwork
2. CO₂ Laser (Best Overall Choice)

- Enhanced Performance: The xTool P2S provides stronger airflow with more powerful exhaust fans and a dual-cylinder air pump, delivering sharper, cleaner cuts and engravings. It offers optical path indicators, and easier daily maintenance. With upgraded hardware and software, making the best desktop CO2 laser cutter become better.
The xTool P2S CO2 Laser Cutter is one of the most versatile options for ceramic marking.
How it works:
- Directly engraves glazed ceramic
- Creates a frosted or etched effect
- For darker marking, use Brilliance Laser Marking Spray
Pros:
- Clean, permanent marks
- No coating required (on most glazed ceramics)
- Faster than diode lasers
Cons:
- Requires ventilation and cooling
- Slight learning curve
Best for:
- Coffee mugs
- Ceramic tiles
- Batch production and business use
3. Diode Laser (Best Budget Option)

- [Ultra-Fine Details & Productivity] This advanced 10W (10000mW) laser engravers, with an ultra-fine 0.06 x 0.04mm spot, delivers precise 1:1 photo-realistic engravings. The spacious 23.93" x 15.16" bed size makes it ideal for large projects like door signs or engraving up to 119 dog tags in one go. Perfect for engraving on wood, leather, craft paper, stone, and glass.
The xTool S1 Diode Laser can mark ceramic, but it requires an extra step.
How it works:
- Apply a coating (paint or marking spray)
- Laser bonds the coating to the ceramic surface
Pros:
- Affordable and beginner-friendly
- Works well with proper setup
- Flexible for multiple materials
Cons:
- Requires coating
- Slightly less detailed
Best for:
- DIY mugs and tiles
- Occasional projects
- Entry-level users
Types of Ceramics for Laser Marking
Laser marking on ceramics is widely used across industries — from custom gifts and décor to medical devices and electronics. Not all ceramics behave the same under a laser, though.
The composition, finish, and color of the ceramic play a huge role in how well it marks.
Here are the main types of ceramics you’ll encounter when laser marking:
Glazed Ceramics
Glazed ceramics (like mugs, tiles, and plates) have a glass-like surface coating.
- Laser Marking Effect: Lasers typically produce light gray or white marks directly on the glaze. For high-contrast black marks, coatings such as Brilliance Laser Inks are recommended.
- Best Use Cases: Custom mugs, tiles, awards, and promotional items.
Unglazed Ceramics
These are raw ceramics without a glossy coating, often matte and porous.
- Laser Marking Effect: The surface absorbs laser energy better, creating a permanent mark that’s usually dark gray or brown.
- Best Use Cases: Industrial labels, prototypes, and rustic-style decorative tiles.
Technical Ceramics
Includes advanced materials like alumina (Al₂O₃), zirconia, and silicon carbide, used in medical, aerospace, and electronics industries.
- Laser Marking Effect: UV lasers can produce precise, permanent, and high-contrast marks on technical ceramics.
- Best Use Cases: Medical implants, electronic components, semiconductors, aerospace parts.
Porcelain
Porcelain is a dense, white ceramic often used in fine dishes, decorative tiles, and bathroom fixtures.
- Laser Marking Effect: Can be laser etched for light gray results, but usually benefits from laser marking sprays or inks for darker, high-contrast designs.
- Best Use Cases: Engraved dishware, photo tiles, decorative plaques.
Stoneware
Heavier and less refined than porcelain, stoneware has a natural, earthy finish.
- Laser Marking Effect: Laser marks typically appear darker than on porcelain, with a rustic look.
- Best Use Cases: Personalized pottery, artisan crafts, rustic décor.
Ceramic-Coated Metals (Cerakote, Anodized Surfaces)
These aren’t pure ceramics but ceramic-based coatings applied to metals.
- Laser Marking Effect: Lasers can ablate the ceramic coating to reveal sharp, contrasting designs.
- Best Use Cases: Custom knives, firearms, tools, and high-end metal products.
Best Ceramic Blanks for Laser Marking
Choosing the right ceramic blank is just as important as your laser. The wrong surface can give you faded marks, uneven engraving, or poor contrast, no matter how good your machine is.
This guide breaks down the best ceramic blanks for laser marking, what to look for, and what to avoid.
Quick Comparison Table
Ceramic Blank Type | Best Laser Type | Mark Quality | Difficulty | Best Use Case |
|---|---|---|---|---|
White Glazed Mugs | CO₂ / UV / Diode (with coating) | Excellent | Easy | Custom mugs, gifts |
Ceramic Tiles (Glossy) | CO₂ / UV | Excellent | Easy | Photos, wall art |
Porcelain Blanks | CO₂ / UV | Excellent | Easy | Premium products |
Colored/Black Ceramics | Diode (coated) / UV | High contrast | Medium | Logos, bold designs |
1. White Glazed Ceramic Mugs (Most Popular)
These are the easiest and most reliable blanks.
Why they work:
- Smooth glaze reacts well to lasers
- Produces a clean frosted mark (CO₂/UV)
- High contrast with coatings (diode)
Best for:
- Personalized mugs
- Business branding
- Gifts
Works great with:
- xTool P2S CO2 Laser Cutter
- xTool F2 Ultra UV Laser
- xTool S1 Diode Laser (with coating)
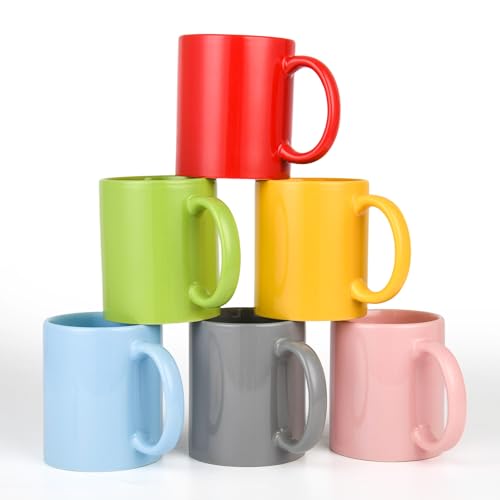
Our recommendation:
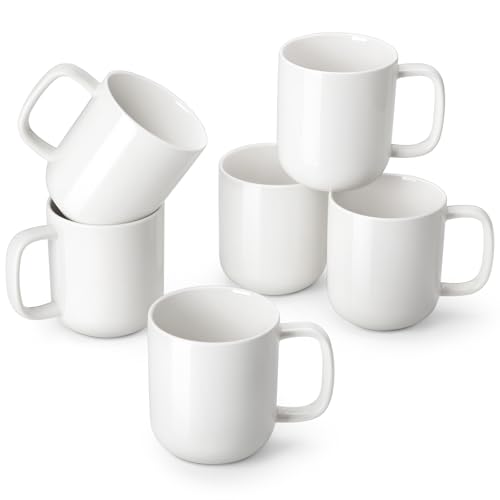
- This set of 6 coffee mugs (16oz full / 14oz practical) is ideal for:Americano, Iced Coffee, Cold Brew, Tea, whether it’s an extra-foamy latte, a steeped herbal tea, or a creamy iced brew. More space for your cravings, more room to relish.
2. Glossy Ceramic Tiles (Best for Photos)
If you want detailed images, this is your best option.
Why they work:
- Smooth surface allows fine detail
- Even laser interaction
- Great for grayscale engraving
Best for:
- Photo engraving
- Decorative wall art
- Custom signage
Our recommendation:

- 🎨 VALUE PACK: 12 high-quality glossy white ceramic bisque tiles, perfect for a variety of decorating techniques including overglazes, ceramic decals, enamel paints, alcohol inks, and glass markers.
3. Porcelain Blanks (Premium Option)
Porcelain behaves similarly to ceramic but often gives cleaner results.
Why it’s a great option:
- More refined surface
- Consistent engraving
- High-end feel
Best for:
- Premium products
- Fine detail engraving
Our recommendation:
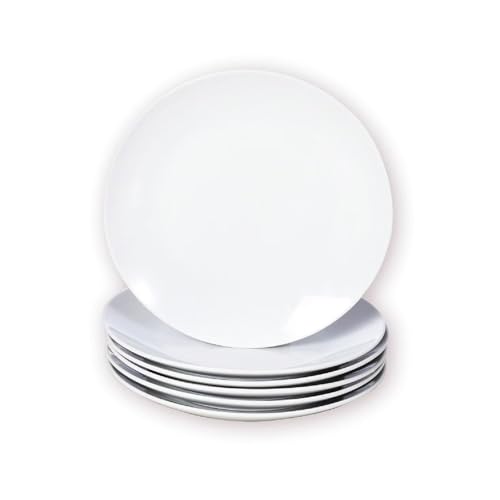
- Multipurpose Small Dessert Plates: Each set includes 6 small porcelain plates(Diameter:Φ6 Inch), suitable for desserts, appetizers, snacks, chips, sandwiches, cheese, sushi, fruit, snacks, bread, cheese, biscuits, etc. The practical plate set can be used in various occasions such as home, restaurant, cafe, office, buffet, party, dinner and so on
4. Colored or Black Ceramic
These can create striking contrast.
How they work:
- Laser removes or alters the surface layer
- Reveals lighter material underneath (or vice versa)
Best for:
- Logos
- Bold graphics
- High-contrast designs
Often paired with:
- UV lasers for precision
- Diode lasers with coating for stronger contrast
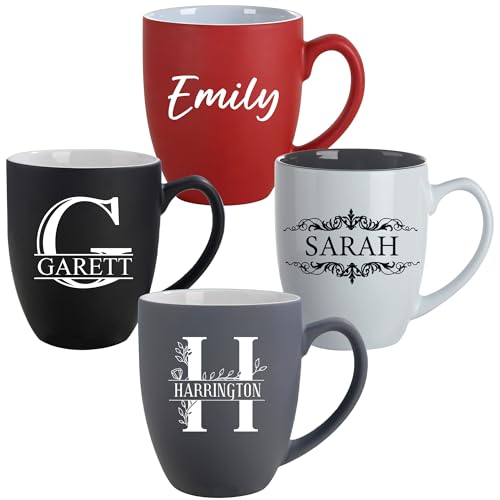
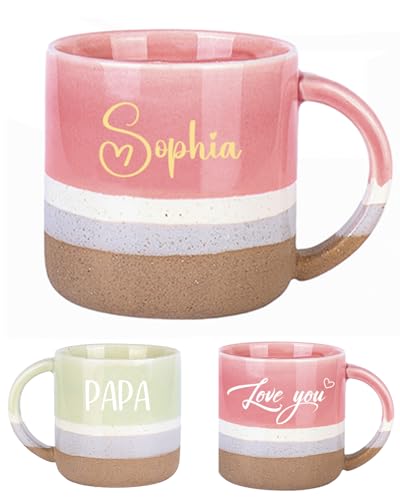
Our recommendation:
- 12oz ceramic mug high Quality, Wide Mouth and Large Handles, There’s plenty of room between the handle and cup itself, so you will have a comfortable grip to hold you beverage without burning your hands. our Mugs are Extremely Durable because they are made from professional grade porcelain. Dishwasher
What to Look for in a Good Ceramic Blank
Before buying, check for:
- Smooth, even glaze → consistent engraving
- Flat surface → better focus and accuracy
- High-quality coating → prevents patchy marks
- Uniform color → better visual results
What to Avoid
Some blanks cause problems:
- Rough or textured surfaces
- Uneven glaze coating
- Cheap ceramics with inconsistent finishes
- Cracked or warped items
These lead to uneven engraving and wasted materials.
Pro Tips for Better Results
- Stick with white or light-colored ceramics for best contrast
- Always test one blank before batch work
- Clean surfaces before engraving
- Use high-resolution images for photo engraving
Laser Marking Ceramics Using a Marking Spray
Ceramic marking can be tricky. Unlike metals or plastics, most ceramics don’t absorb laser wavelengths efficiently. The result? Low contrast, faint marks, or surface etching that wears down over time. That’s where Brilliance Laser Inks comes in — a simple, effective solution for creating dark, permanent marks on ceramic surfaces.
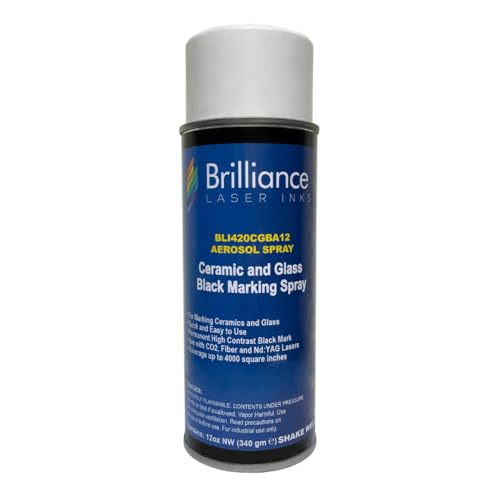
- 𝐂𝐎𝐌𝐏𝐀𝐓𝐈𝐁𝐈𝐋𝐈𝐓𝐘: Our laser marking spray is formulated to revolutionize marking on Ceramics and Glass.
Why Use Brilliance Laser Inks on Ceramics?
Brilliance Laser Inks are spray-on coatings designed specifically for laser marking hard-to-mark materials like ceramics and glass.
Key advantages:
- Dark, permanent marks — true black finish with high contrast.
- Durable results — resistant to scratches, fading, and heat.
- Easy to use — just spray, dry, and engrave.
- Versatile — works with CO₂ lasers and Diode lasers.
This makes them especially valuable for creating professional-quality ceramic engravings without industrial equipment.
How It Works
Brilliance Laser Inks act as a laser bonding agent. When the laser beam passes over the coated surface:
- The laser heats the ink.
- The ink bonds at a molecular level to the ceramic surface.
- The result is a dark, high-contrast mark that is more durable than surface etching alone.
Unlike engraving alone, which often produces a light gray finish on ceramics, laser inks create a jet-black contrast that looks professional and lasts.

Step-by-Step: Using Brilliance Laser Inks for Laser Marking Ceramics
1. Prepare the Surface
- Clean the ceramic with alcohol or acetone to remove dust, oils, or fingerprints.
- Make sure the surface is dry before applying the ink.
2. Apply Brilliance Laser Ink
- Shake the can well.
- Spray a thin, even coat onto the ceramic tile or object.
- Let it dry completely (air drying usually works, but heat can speed it up).
3. Laser Mark the Ceramic
- Place the ceramic in your laser engraver.
- Adjust settings for your specific laser type.
- Run the engraving job over the coated area.
4. Clean the Surface

- After engraving, wash or wipe away any excess ink.
- The black mark will remain permanently bonded to the ceramic.
Laser marking ceramics using Brilliance Laser Inks is one of the easiest and most effective ways to get dark, permanent, and professional-quality results. Unlike direct engraving, which often produces light or inconsistent marks, laser inks give you crisp contrast and durability every time.
If you’re engraving mugs, tiles, plates, or decorative pieces, Brilliance Inks are worth the investment — especially for those who want to offer premium laser marking services.
Laser Marking Ceramics using Brilliance Laser Inks Settings Guide
CO₂ Laser

Diode Laser

Applications for Laser Marked Ceramics
Using Brilliance Laser Inks opens up a wide range of possibilities:
- Custom mugs and plates
- Ceramic photo tiles
- Decorative garden plaques
- Industrial labels and tags
- Personalized gifts and crafts
Whether you’re running a small engraving business or experimenting with creative projects, Brilliance Inks expand what your laser machine can do.
Tips for Best Results
- Use thin coats — multiple light passes are better than one heavy coat.
- Test different laser power and speed settings on scrap tiles first.
- Work in a well-ventilated area when spraying the ink.
- Allow coatings to fully dry before engraving to avoid smudging.
Common Problems When Laser Marking Ceramics (and How to Fix Them)
Laser marking ceramics can produce great results, but it’s easy to run into issues if your settings, material, or method aren’t dialed in. Most problems come down to heat control, contrast, and surface quality.
Here’s a clear breakdown of the most common problems and how to fix them.
1. Mark Is Too Faint or Invisible
Why it happens:
- Power too low
- Speed too fast
- Low contrast (especially on white ceramic)
Fix:
- Increase power slightly
- Reduce speed
- Add contrast (marker or coating method)
With UV machines like the xTool F2 Ultra UV Laser, faint marks are often a visibility issue, not a power issue. White-on-white is the problem.
Options:
- Use a black fill method (like a Sharpie or paint)
- Switch to colored ceramic
- Use pre-coated ceramic blanks
Quick trick:
- Color over the engraving with a marker
- Let it sit for ~30–60 seconds
- Wipe it off
The ink stays in the engraved areas and makes the design visible.
2. No Mark at All
Why it happens:
- Using the wrong method for your laser
- Poor focus
- Ceramic glaze not reacting
Fix:
- For diode lasers like the xTool S1 Diode Laser, use a coating (paint or spray)
- Refocus carefully
- Test on a different ceramic piece
3. Yellowing or Burn Marks
Why it happens:
- Too much heat
- Slow speed
- Poor airflow
Fix:
- Reduce power
- Increase speed
- Improve ventilation
CO₂ machines like the xTool P2S CO2 Laser Cutter can cause this if settings are too aggressive.
4. Cracking or Chipping
Why it happens:
- Excessive heat buildup
- Power too high
- Multiple passes in the same area
Fix:
- Lower power immediately
- Use a single controlled pass
- Avoid overheating
5. Patchy or Uneven Marking
Why it happens:
- Uneven glaze
- Dirty surface
- Inconsistent coating
Fix:
- Clean the surface before marking
- Apply coating evenly (if used)
- Use higher-quality ceramic blanks
6. Blurry or Low-Detail Engraving
Why it happens:
- Incorrect focus
- Low resolution (DPI)
- Movement during engraving
Fix:
- Refocus precisely
- Increase DPI
- Secure the material firmly
UV lasers like the xTool F2 Ultra UV Laser are best for fine detail when properly focused.
7. Coating Not Sticking (Diode Laser Issue)
Why it happens:
- Wrong coating type
- Surface not clean
- Insufficient heat
Fix:
- Use proper marking spray or matte paint
- Clean with alcohol before applying
- Adjust power slightly
8. Residue or Smudging After Engraving
Why it happens:
- Smoke buildup
- Excess coating
Fix:
- Wipe with a damp cloth
- Clean gently after marking
- Improve airflow
9. Inconsistent Results Between Pieces
Why it happens:
- Different ceramic quality
- Variations in glaze thickness
- Settings not adjusted
Fix:
- Test each batch
- Keep a record of settings
- Use consistent suppliers
10. Design Lacks Contrast
Why it happens:
- Light engraving on light surface
- Poor design optimization
Fix:
- Use bold, high-contrast artwork
- Add coating or fill method
- Adjust settings for deeper marking
Quick Troubleshooting Guide
- Faint mark? Increase power or slow down
- No mark? Check method and focus
- Cracking? Reduce power immediately
- Patchy? Fix surface prep
- Low contrast? Add coating or fill
Final Thoughts
Ceramics may be tough, but the right laser makes them fully customizable.
- CO₂ lasers are best for hobbyists and decorative engraving.
- UV lasers excel in precision industrial marking.
- Diode lasers work with coatings or sprays, but aren’t ideal for bare ceramics.
Add a marking spray when you need bold, dark results, and always fine-tune your settings to prevent cracking.
If you’re looking for a reliable way to engrave mugs, tiles, medical devices, or industrial parts, laser marking ceramics is the permanent, professional solution you need.
Frequently Asked Questions
Can you laser engrave ceramics without a spray?
Yes — but only with a UV laser or CO₂ and diode lasers usually need a marking spray or ink (like Brilliance Laser Inks) to achieve dark, high-contrast marks on ceramics.
What is the best laser for ceramic mugs or tiles?
For casual engraving on mugs or tiles, a CO₂ laser (like the xTool P2S) is effective. For professional, permanent dark marks, a UV laser is the best choice.
Is laser marking on ceramics permanent?
Yes. Laser marks on ceramics are permanent, heat-resistant, and chemical-resistant, making them ideal for long-term industrial and decorative use.
Do I need special software to laser engrave ceramics?
Most lasers come with built-in software that supports ceramic engraving. Popular options include LightBurn and xTool Creative Space, which let you adjust speed, power, and marking depth.