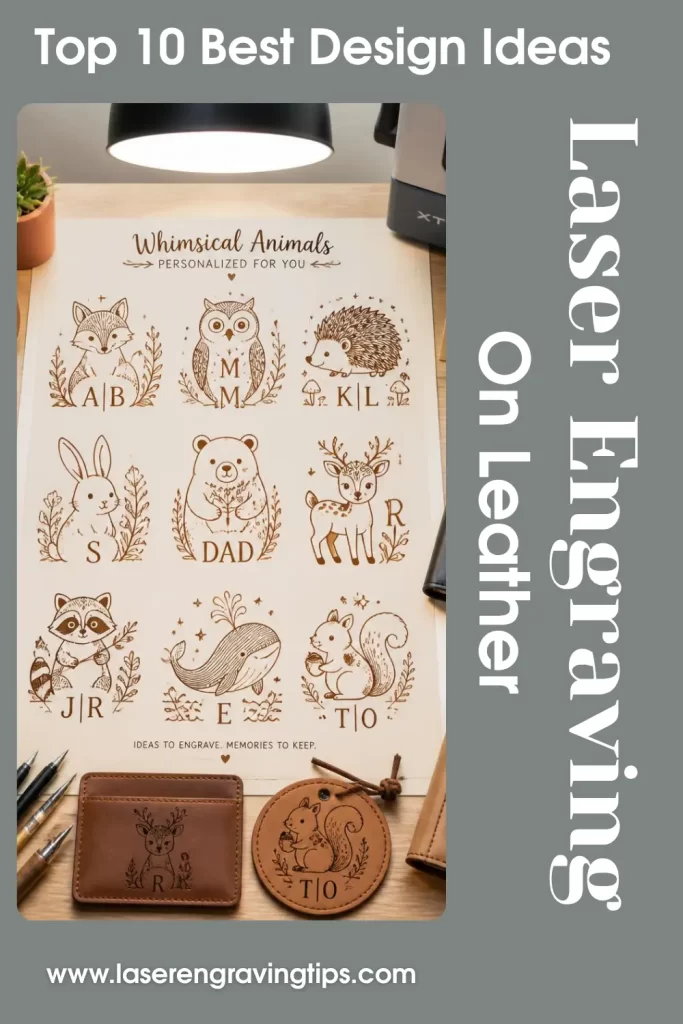
Leather is one of the most rewarding materials to laser engrave. It produces rich contrast, a premium appearance, and durable results that customers love. Whether you’re making personalized gifts or selling products online, leather offers countless creative opportunities.
From custom wallets and journals to engraved patches and pet accessories, the right design can transform an ordinary piece of leather into a high-value product.
Table of Contents
In this guide, we’ll explore the best laser engraving design ideas for leather, along with tips for choosing designs that sell.
Why Leather Is Perfect for Laser Engraving
Leather is one of the best materials for laser engraving because it naturally develops a rich, dark contrast without the need for inks, paints, or additional finishing.
The result is a permanent engraving that highlights fine details while preserving the leather’s premium appearance.
This combination of durability and visual appeal makes engraved leather ideal for personalized gifts, custom accessories, promotional products, and business branding.
For the best results, vegetable-tanned leather is generally the preferred choice, as it produces the cleanest engravings with excellent contrast.
However, many genuine leather and full-grain leather products also engrave beautifully and can deliver professional-quality results.
1. Personalized Leather Wallets
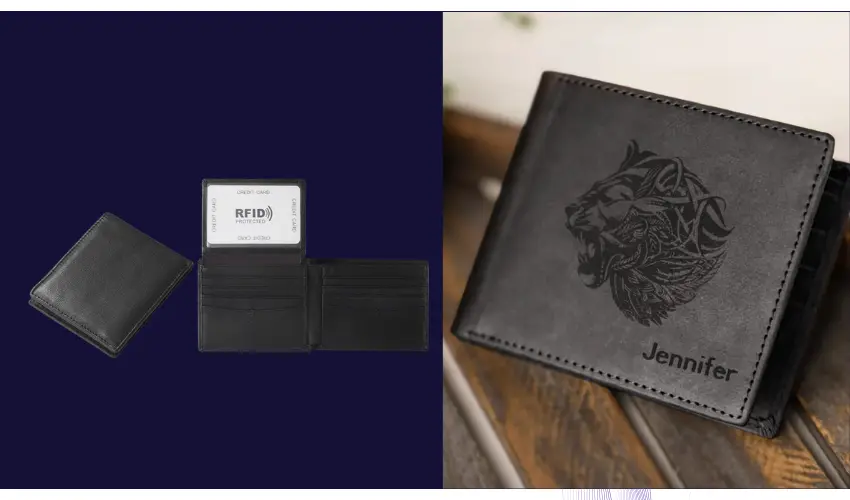
Custom wallets remain one of the best-selling laser engraved leather products.
Popular engraving ideas include:
- Initials
- Family names
- Coordinates
- Monograms
- Meaningful quotes
- Company logos
Minimalist designs tend to perform best because they complement the natural beauty of the leather.
2. Leather Keychains
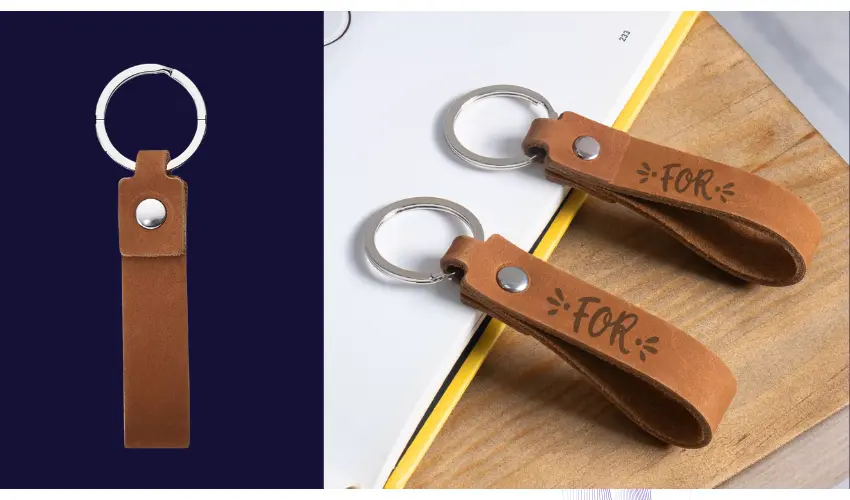
Leather keychains require very little material but can sell for surprisingly high prices.
Popular designs include:
- Names
- Initials
- Pet names
- QR codes
- Business logos
- Inspirational phrases
They’re ideal for craft fairs, Etsy shops, and promotional giveaways.
3. Leather Journals and Notebook Covers
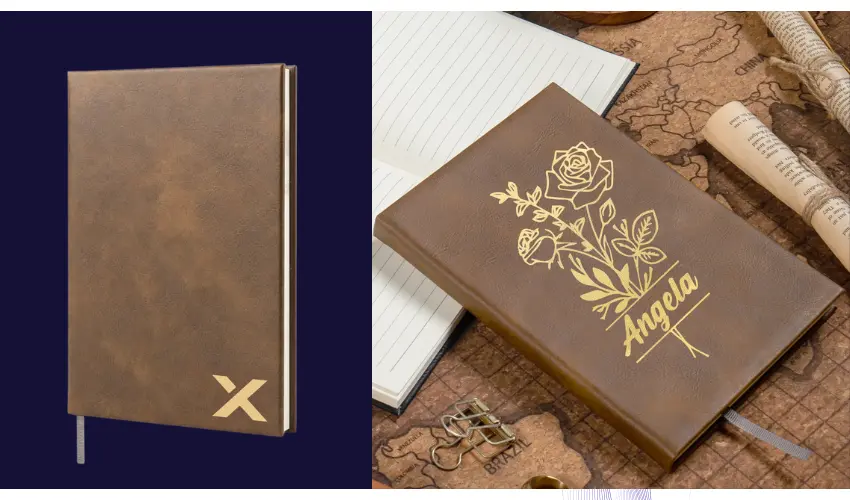
Personalized journals are popular gifts for students, professionals, and writers.
Popular engraving ideas include:
- Custom names
- Mountain landscapes
- Floral artwork
- Compass designs
- Mandalas
- Inspirational quotes
Adding a custom name instantly increases the perceived value.
4. Leather Patches
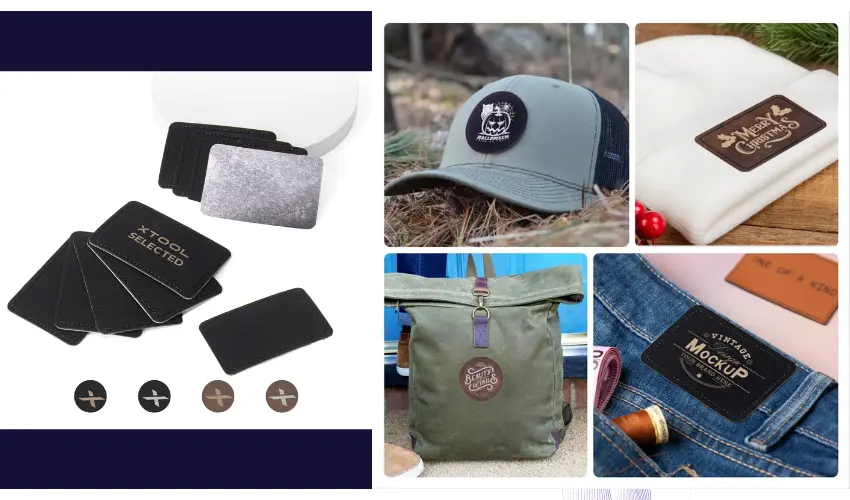
Laser engraved leather patches have exploded in popularity.
They’re commonly sewn or heat-pressed onto:
- Hats
- Jackets
- Backpacks
- Beanies
- Aprons
- Tote bags
Businesses also order custom patches featuring their logos for branded merchandise.
5. Custom Belts
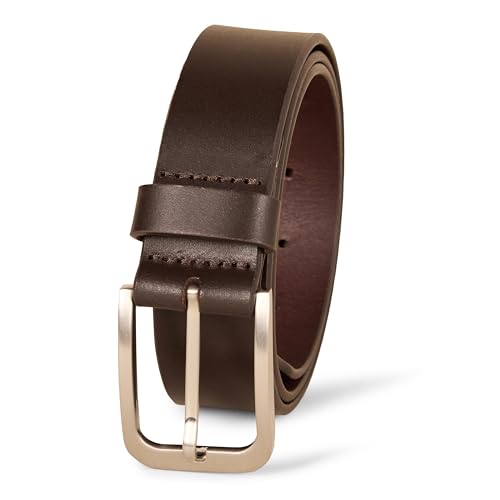
- COMFORT AND FIT: This leather belt has 7 holes for a flexible fit. Order a size that is 2 inches larger than your pant size. For example, if your pant size is 34, order belt size 36.
Leather belts offer a large engraving area for decorative artwork.
Popular engraving styles include:
- Western patterns
- Celtic knots
- Floral scrollwork
- Wildlife scenes
- Initials
- Personalized messages
Premium engraved belts make excellent Father’s Day and anniversary gifts.
6. Pet Collars and Accessories
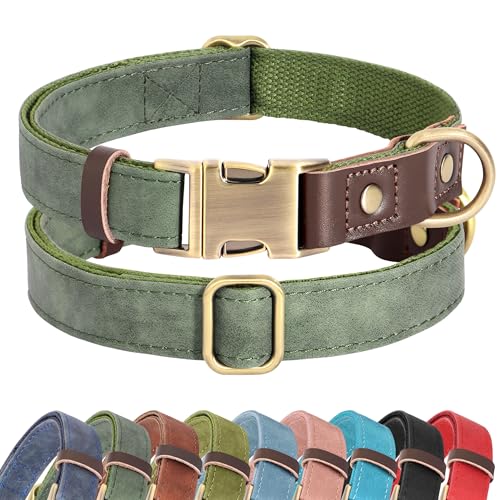
- Stylish and Classic: This green dog collar is available for many kinds of occasions, such as daily walking, birthday parties, running, jogging, traveling,Christmas or other activities. The wonderful color and unique material is both suitable for boys and girls, will let your pets be eye-catching,fashionable and modern
Pet owners love personalized accessories.
Laser engraving can add:
- Pet names
- Phone numbers
- Addresses
- Paw prints
- Breed artwork
- Custom graphics
Matching leashes and tags can also increase average order value.
7. Leather Coasters
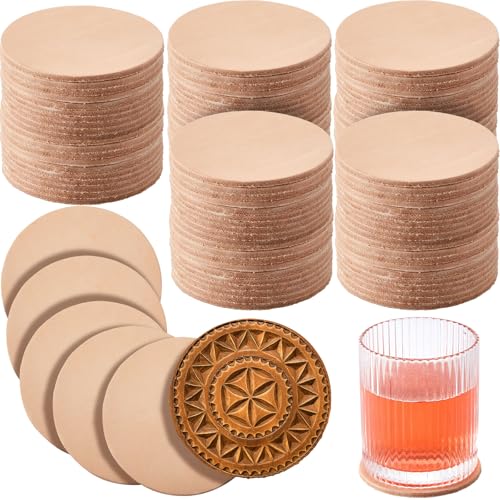
- Product Package: this package includes 25 circular vegetable tan leathers, suitable for sharing with friends or working collaboratively on projects; Whether you're engaged in professional work or just exploring a hobby, this set will meet all your needs
Leather coasters are easy to produce and popular year-round.
Great design ideas include:
- Family monograms
- Bar logos
- Camping themes
- Wildlife artwork
- Sports teams
- Wedding gifts
Businesses often order coaster sets for restaurants, breweries, and corporate events.
8. Knife Sheaths

- DURABLE LEATHER CONSTRUCTION - Our leather knife sheaths are expertly crafted from durable leather, ensuring exceptional durability, flexibility, and scratch-resistance. The fine stitching and smooth surface provide a sleek, fade-resistant design that's built to last.
Outdoor enthusiasts appreciate personalized leather knife sheaths.
Common engraving ideas include:
- Initials
- Hunting scenes
- Mountains
- Wildlife silhouettes
- Military insignias
- Custom logos
These products command premium pricing because of their craftsmanship.
9. Bracelets and Wristbands

- Package & Size--You will receive 12pcs leather bracelet blanks, the size is about 25mm wide, 221mm long, 2~5mm thick. Sufficient quantity is enough for your daily needs.
Leather bracelets remain popular for both fashion and personalized gifts.
Popular engravings include:
- Coordinates
- Dates
- Names
- Roman numerals
- Quotes
- Symbols
Many sellers offer matching couples’ bracelets.
10. Business Products
Leather isn’t just for gifts.
Businesses regularly purchase engraved leather products like:
- Portfolio covers
- Business card holders
- Mouse pads
- Desk mats
- Promotional gifts
- Employee appreciation gifts
Adding a company logo creates professional branding that lasts for years.
Best Design Styles for Laser Engraving on Leather
Certain artwork consistently produces better engraving results.
Some of the most popular styles include:
Minimalist Designs
Simple line art engraves cleanly and complements the natural texture of leather.
Monograms
Monograms remain one of the most requested personalization options for gifts.
Floral Artwork
Floral engravings are especially popular on journals, wallets, and notebook covers.
Wildlife Designs
Deer, bears, wolves, fish, and mountain scenes are favorites among outdoor enthusiasts.
Geometric Patterns
Modern geometric artwork creates a clean, contemporary appearance.
Vintage Artwork
Vintage maps, compasses, and antique-style illustrations work particularly well on natural leather.
Best Fonts for Leather Engraving on Leather
The font you choose can have a significant impact on the overall appearance of your finished leather engraving. Classic serif fonts offer a timeless, professional look, while script and handwritten fonts create a more elegant and personalized feel.
Monogram fonts are perfect for initials and custom gifts, and Western-style fonts work especially well on rustic or outdoor-themed projects.
Sans-serif fonts provide a clean, modern aesthetic that is ideal for logos and business branding.
Regardless of the style you choose, it’s best to avoid overly thin fonts, as fine details can be lost on textured leather surfaces, reducing the clarity of the engraving.
Laser Ready Design Files For Laser Engraving on Leather (Free + Paid Options)
The quality of your artwork has a major impact on the final engraving. While there are countless websites offering laser-ready designs, using high-quality SVG files ensures cleaner lines, smoother curves, and more professional-looking results.
One of the best places to find these files is Vecteezy. Vecteezy offers thousands of professionally designed SVG files that work well with laser engraving software like LightBurn and xTool Creative Space.
Leather projects tend to look best with simple, bold artwork rather than overly detailed designs.
Popular SVG categories include floral patterns, mandalas, wildlife silhouettes, mountain landscapes, monograms, Western-themed artwork, Celtic knots, vintage badges, geometric patterns, and decorative borders.
These designs engrave cleanly while complementing the natural texture of leather.
If you’re creating products to sell, Vecteezy is also a great source for commercial-use graphics, provided you follow the licensing terms for each file.
Whether you’re making personalized wallets, leather patches, journals, belts, or keychains, starting with a professionally designed SVG can save time and produce noticeably better engraving results.
Final Thoughts
Leather remains one of the most profitable and versatile materials for laser engraving. Its natural texture, premium appearance, and ability to produce rich, permanent engravings make it ideal for both hobbyists and professional makers.
Whether you’re creating personalized wallets, custom patches, engraved journals, or branded corporate gifts, focusing on clean designs and high-quality leather can help you produce products that stand out in a competitive market.
With the right materials, settings, and creativity, laser engraved leather projects can become some of the best-selling items in your collection.
Frequently Asked Questions
What types of designs engrave best on leather?
Leather takes engraving extremely well, especially designs with clean lines, bold shapes, and high contrast.
The best-performing design styles include:
Monograms and initials
Geometric patterns
Line art and silhouettes
Mandalas and botanical motifs
Logos and badge-style graphics
Vegetable-tanned leather provides the sharpest detail and deepest contrast for all of these.
Can I engrave detailed artwork like portraits on leather?
Yes — but results vary by leather type and laser power.
Vegetable-tanned leather is best for fine detail because it burns more evenly and produces a darker, richer contrast.
Tips for portrait engraving:
Use high-resolution images
Convert to grayscale and adjust contrast
Use a test tile to fine-tune DPI and power settings
For best results, CO₂ lasers and high-power diode lasers provide the most definition.
What are the most popular leather engraving designs for selling online?
Trending, high-demand designs include:
Personalized wallets (names, coordinates, quotes)
Leather patch hats with logo badges
Keychains with minimalist icons
Pet collars with engraved names
Leather journals with mandalas or nature scenes
Meaningful quote bookmarks
These designs sell especially well on Etsy, craft fairs, and custom gift shops.
Do different leather colors affect how the engraving looks?
Yes — the leather color dramatically affects engraving contrast.
Light brown or natural veg-tan leather → darkest burns, best detail
Medium brown leather → great contrast, rich tone
Black leather → subtle engraving, often appears gray
Dyed or painted leather → engraving may reveal lighter layers beneath
Always run a small test to see how the burn reacts before committing to a full design.
What file formats should I use for leather engraving designs?
Most lasers accept common vector and image formats.
Best formats for engraving:
SVG → clean vector lines; ideal for logos, monograms, patterns
DXF → compatible with CAD-style designs
PNG (high-resolution) → excellent for photos and textured artwork
JPG → works fine for images but less sharp than PNG
Vector files (SVG) produce the cleanest, sharpest engravings on leather.