Laser engraving a mirror creates a unique frosted design that looks clean, modern, and professional.
Whether you are creating custom home décor, personalized gifts, business signs, or decorative artwork, engraved mirrors are one of the most impressive laser projects you can make.
However, a plain engraved mirror can sometimes feel incomplete. Adding color is a simple way to make your design stand out and create a more eye-catching finished product.
The good news is that adding color to a laser engraved mirror is easier than many people think.
Because the laser removes the reflective coating on the back of the mirror, the engraved areas become transparent or frosted sections that allow colors and light to show through.
Table of Contents
In this guide, we will cover three easy ways to add color to a laser engraved mirror:
- Adding acrylic paint to the engraving
- Using a colored backing behind the mirror
- Adding LED lighting for a glowing effect
Each method creates a different style, so you can choose the best option depending on your project.

How Does Laser Engraving a Mirror Work?
Before adding color, it helps to understand what happens during the engraving process.
A mirror is usually made from:
- A glass surface
- A reflective metal coating (usually aluminum or silver)
- A protective backing layer
When you laser engrave a mirror, the laser removes the reflective coating from specific areas. The glass underneath becomes exposed, creating a frosted engraving effect.
The laser does not actually carve deep into the glass in most cases. Instead, it removes the reflective layer and changes how light passes through the surface.
This is what makes adding color possible.
The engraved areas act like small windows where paint, backing materials, or LED light can appear.
Method 1: Add Acrylic Paint to the Back of the Engraving
The easiest and most popular way to add color to a laser engraved mirror is using acrylic paint.
This method works because the engraved areas have already removed the mirror coating. The paint fills these areas and becomes visible through the glass when viewed from the front.
This technique is especially popular for:
- Custom logos
- Names and lettering
- Decorative artwork
- Personalized gifts
- Business signs
What You Need
Materials:
- Acrylic paint
- Small paint brush or sponge
- Paper towel or microfiber cloth
- Laser engraved mirror
Optional:
- Paint markers for detailed designs
- Multiple paint colors for layered effects
We recommend the Colorful Acrylic Glass Paint Set with 6 Brushes because it is an affordable option that delivers great results. It provides vibrant colors, easy application, and includes brushes that make it simple to add detail and fill engraved areas.
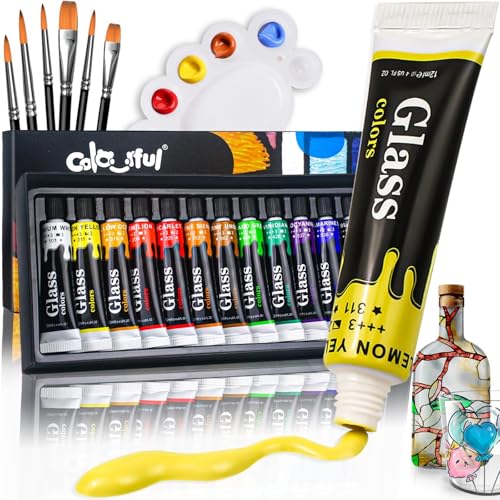
- ✔【Wide Range of Applications】The COLORFUL stain glass paints set can be used on various transparent surfaces, including but not limited to glass, wine glasses, porcelain, ceramics, gallery, glassware, enamel, and windows etc.
Step-by-Step Process
1. Prepare the Engraved Mirror
After engraving, clean the mirror surface carefully.
Remove:
- Dust
- Smoke residue
- Loose particles
A clean surface helps prevent unwanted paint marks.
2. Apply Acrylic Paint
Turn the mirror over so the engraved side is facing upward.
Apply acrylic paint directly over the engraved areas.
Do not worry if paint covers areas outside the design. You can clean the excess afterward.
For larger designs:
- Use a sponge for even coverage
- Apply thin layers
- Allow each layer to dry
3. Remove Excess Paint
Once the paint has dried, gently clean the surrounding mirror surface.
Use:
- A microfiber cloth
- Soft paper towel
- Glass cleaner if needed
The goal is to leave paint only inside the engraved sections.
Tips for Best Results
Use Bright Colors
Because the color is viewed through glass, lighter colors often create better visibility.
Good options include:
- White
- Red
- Blue
- Yellow
- Green
- Metallic acrylic paints
Avoid Very Thick Paint Layers
Too much paint can reduce clarity.
A few thin layers usually look better than one heavy layer.
Use Multiple Colors
For detailed designs, you can paint different sections separately.
This works well for:
- Company logos
- Cartoon designs
- Artwork
- Holiday decorations
Method 2: Use a Colored Backing Behind the Mirror
A second method is using a colored material behind the engraved mirror.
Instead of filling the engraving with paint, the color comes from something placed behind the glass.
The engraved areas allow the backing color to show through.
This method is great because it is:
- Easy to change
- Non-permanent
- Fast for testing different designs
Materials You Can Use as a Backing
Popular options include:
Colored Cardstock
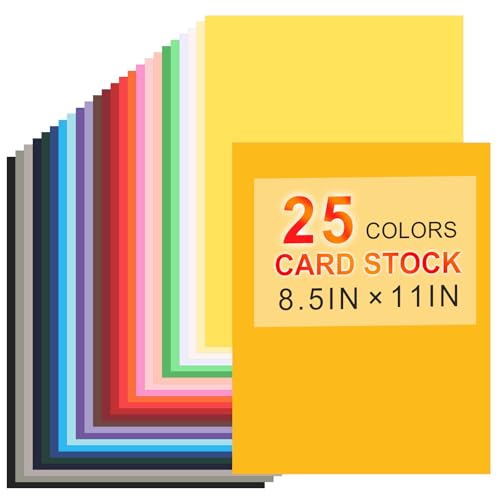
- Ample Quantity and Standard Size: Each pack contains 25 sheets of 8.5" x 11" colored cardstock in a variety of colors, including red, orange, pink, yellow, white, purple, blue, green, dark green, navy, black, brown, and more. This colored construction paper meets your diverse creative needs, whether you're creating a small craft or a large-scale printing project
One of the easiest choices.
Advantages:
- Cheap
- Available in many colors
- Easy to replace
Great for:
- Seasonal designs
- Event decorations
- Display pieces
Painted Wood or MDF
A wooden backing creates a more premium appearance.
This works well for:
- Wall signs
- Home décor
- Business displays
You can paint the wood any color before attaching it behind the mirror.
Adhesive Vinyl

- Clear PET Backing - Much Easier Weed: Stop using cheap paper backing. Make sure no longer need to clean your mat or worry about separating from the vinyl in the cutting process. Sooez permanent vinyl with PET backing, never ruin your projects or cut through the backing. Effectively reduce your time and frustration
Vinyl is another useful option.
Benefits:
- Smooth finish
- Many color choices
- Easy application
You can also create patterns by layering different vinyl colors.
How to Add a Colored Backing
- Measure your mirror
- Cut your backing material to size
- Place it behind the engraved mirror
- Secure it with adhesive or a frame
When viewed from the front, the engraving will display the backing color.
Why Use a Colored Backing?
This method is ideal when you want flexibility.
For example:
A restaurant could change branding colors.
A holiday decoration could switch between:
- Red
- Green
- Gold
A home décor piece could match different rooms.
Instead of creating a new mirror, you simply change the backing.
Method 3: Add LEDs for a Backlit Glow Effect
If you want the most impressive result, adding LED lighting behind your engraved mirror creates a professional backlit effect.
The engraved areas scatter the light, causing the design to glow.
This is similar to the look of:
- LED signs
- Custom wall displays
- Luxury bathroom mirrors
What You Need
Materials:
- LED strip lights
- Mirror frame
- Back panel or spacer
- Power supply
Optional:
- RGB color-changing LEDs
- Remote controller
- Smart lighting system
How to Add LED Lighting
1. Create Space Behind the Mirror
LEDs need room behind the mirror to spread light.
You can use:
- A deep frame
- Wooden spacer
- Custom laser-cut backing
2. Install LED Strips
Attach LED strips around the inside edge of the frame.
Position the lights so they shine toward the mirror.
Avoid placing LEDs directly against the glass because the light may look uneven.
3. Test the Lighting
Turn on the LEDs and adjust the placement.
You may need to:
- Move lights farther away
- Add a diffuser
- Adjust brightness
Best Uses for LED Engraved Mirrors
LED lighting works especially well for:
Bathroom Mirrors
Create:
- Modern vanity mirrors
- Custom designs
- Personalized names
Business Displays
Great for:
- Store signs
- Restaurant logos
- Reception areas
Gaming Rooms
RGB lighting can create:
- Color-changing effects
- Custom artwork
- Ambient lighting
Combining Color Methods
You do not have to choose only one technique.
Combining methods can create unique effects.
Examples:
Paint + LEDs
Paint the engraving and add lighting behind the mirror.
Result:
A colored design with a glowing effect.
Colored Backing + LEDs
Use a bright backing color and add LED lighting.
Result:
A vibrant illuminated display.
Multi-Color Paint
Use several acrylic colors inside one engraving.
Result:
A detailed, artistic mirror design.
Common Mistakes When Adding Color to Engraved Mirrors

Using the Wrong Paint
Some paints do not stick well to glass.
Acrylic paint is usually the easiest option.
Not Cleaning the Engraving
Smoke residue can prevent paint from filling the engraved areas properly.
Always clean after engraving.
Applying Too Much Paint
Heavy paint layers can make the design look messy.
Thin coats usually work better.
Skipping a Test Piece
Before engraving an expensive mirror:
Test on:
- Small mirror pieces
- Scrap glass
- Sample materials
This helps you find the right settings.
Final Thoughts
Adding color to a laser engraved mirror is one of the easiest ways to transform a simple engraving into a professional-looking project.
The three main methods are:
Acrylic paint: Best for beginners and colorful designs.
Colored backing: Best for flexibility and easy changes.
LED lighting: Best for premium displays and standout projects.
Whether you are creating personalized gifts, home décor, or products to sell, adding color can make your laser engraved mirrors look more creative and valuable.
Start with a small test project, experiment with different colors, and you will quickly discover endless possibilities for custom mirror engraving.