Metal engraving with a CO₂ laser is a popular topic among makers, small businesses, and laser enthusiasts—but it often comes with confusion. Since CO₂ lasers can’t directly engrave bare metal like fiber or IR lasers, understanding what is possible and how to do it correctly is the key to success.
In this complete guide, you’ll learn how CO₂ lasers work on metal, the best methods for engraving, recommended materials and settings, and when a CO₂ laser makes sense for metal projects.
Table of Contents
Can You Engrave Metal with a CO₂ Laser?
Yes—but with limitations.
A CO₂ laser (10.6 μm wavelength) cannot directly engrave raw metals like stainless steel or aluminum because metal reflects this wavelength. However, CO₂ lasers can engrave metal surfaces indirectly using:
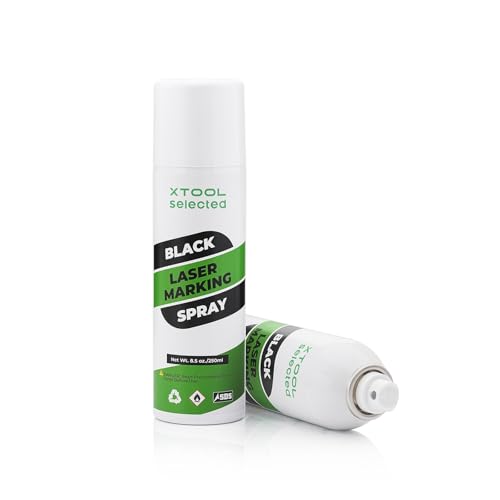
- Marking compounds (xTool Black Laser Marking Spray, Brilliance Laser Inks)
- Coated or anodized metals
- Painted or powder-coated metals
These methods allow you to create permanent, high-contrast marks suitable for signage, tags, branding, and decorative applications.
Best Metals for CO₂ Laser Engraving
Anodized Aluminum
- Direct engraving
- Laser removes the anodized layer
- Reveals bright silver aluminum underneath
- Ideal for nameplates, tags, and plaques
Painted or Powder-Coated Metals
- Laser burns away paint or coating
- Creates sharp, high-contrast designs
- Common for tumblers, signage, and panels
Coated Brass & Steel
- Works well if surface coating is laser-safe
- Engraving removes coating, not the base metal
How Metal Engraving with a CO2 Laser Works

CO2 lasers primarily emit infrared light and are more suited for cutting or engraving organic materials like wood, leather, and acrylic. However, by using specific marking sprays or pastes, CO2 lasers can also engrave metals like stainless steel, brass, aluminum, and titanium.
Here’s how it works:
- Laser and Marking Agent Combination: When engraving metal, a marking agent (such as a ceramic-based spray or paste) is applied to the surface. This agent reacts with the laser, bonding to the metal and leaving a permanent, high-contrast mark.
- Heat Reaction: The heat from the CO2 laser causes the marking agent to fuse with the metal surface, resulting in a durable mark.
- Post-Engraving Cleaning: After engraving, the excess marking agent is washed off, leaving behind the engraved design.
Steps for metal engraving with a CO2 Laser Engraver
- Choose the Right Metal and Marking Agent: For most metals, you’ll need to apply a marking agent. Choose an agent suitable for the metal type you’re working with, whether it’s stainless steel, aluminum, or other metal alloys.
- Clean the Metal Surface: Ensure the metal surface is clean and free of any oils or debris. A clean surface allows the marking agent to bond properly to the metal during the engraving process.
- Apply the Marking Agent: Apply an even coat of the marking agent (such as xTool Black Marking Spray, or Brilliance Laser Inks) to the metal. Follow the product’s instructions for drying time before engraving.
- Set Up Your CO2 Laser Engraver: Load your design file into the laser software. Set the appropriate power, speed, and resolution settings according to the metal type and thickness. Metal engraving typically requires high power and slower speeds to ensure the laser properly reacts with the marking agent.
- Engrave the Metal: Run the engraving process. The laser will bond the marking agent to the metal’s surface, creating a permanent, visible mark.
- Remove Excess Marking Agent: Once the engraving is complete, wash off any excess marking agent using water and a soft cloth. The final result will be a crisp, clear engraving on the metal surface.
Best Practices for Metal Engraving with a CO2 Laser Engraver
- Use Appropriate Power Settings: Metal engraving generally requires high-power laser settings. CO2 lasers typically work best with 25W or higher power outputs for metal engraving.
- Ensure Even Marking Agent Application: Apply a uniform coat of the marking agent to prevent streaking or uneven marks during engraving.
- Test on Scrap Metal First: Always run a test engraving on a spare piece of metal to fine-tune your settings and ensure a perfect result on your final project.
- Consider Using Multiple Passes: If your mark isn’t deep enough, try increasing the number of passes rather than boosting the laser’s power to avoid overheating the material.
Best CO₂ Laser Settings for Metal Engraving
Settings vary by machine power, optics, and material—always test first
Typical Starting Settings (40–60W CO₂ Laser)
Method | Power | Speed | Passes |
|---|---|---|---|
Anodized Aluminum | 20–40% | Medium–Fast | 1 |
Painted Metal | 30–60% | Medium | 1 |
Marking Compound | 90–100% | Slow | 1 |
Tips:
- Use slightly defocused passes for marking compounds
- Increase DPI (300–600) for crisp text
- Air assist ON for cleaner results
Best Marking Spray for Metal Engraving with a CO2 Laser – Comparison Table
Feature | xTool Black Laser Marking Spray 2.0 | Brilliance Laser Inks BLI101 | OMTech Laser Marking Spray |
|---|---|---|---|
Can Size | 8.5 oz | 12 oz | 13 oz |
CO₂ Laser Requirement | ≥ 25W | ≥ 25W | ≥ 25W |
Other Laser Compatibility | Fiber (≥10W), Diode (≥10W) | Fiber, YAG, Diode | Fiber |
Marking Color | Deep black | Deep black | Black (turns black after engraving) |
Marking Durability | Permanent, fade- & corrosion-resistant | Permanent, scratch- & fade-resistant | Permanent, heat-resistant |
Best Metals | Stainless steel, aluminum, copper | Stainless steel, brass, copper, aluminum | Aluminum, stainless steel, brass |
Application Quality | Fine mist, clog-proof nozzle | Thin coat, anti-clog technology | Smooth, even coating |
Drying Time | ~10–15 minutes | A few minutes | <5 minutes (≈2 min with heat) |
Cleanup After Engraving | Rinse with water | Rinse and wipe | Simple rinse |
Ease of Use | Moderate (technique-sensitive) | Easy | Very easy |
Coverage Efficiency | High | Very high (≈25% more coverage) | High |
Best For | Multi-laser users & professional branding | Best overall CO₂ metal marking | Fast, budget-friendly CO₂ marking |
Overall Rating | ⭐⭐⭐⭐⭐ | ⭐⭐⭐⭐⭐ | ⭐⭐⭐⭐½ |

Quick Recommendation
- Best Overall CO₂ Marking Spray: Brilliance Laser Inks BLI101
- Best Multi-Laser Compatibility: xTool Black Laser Marking Spray 2.0
- Best Value & Fast Workflow: OMTech Laser Marking Spray
The Best Marking Spray For Metal Engraving
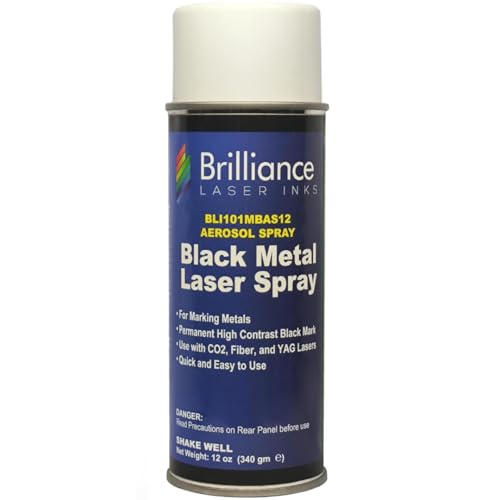
1. Brilliance Laser Inks 12 Oz Laser Marking Spray – Black (BLI101)
Brilliance Laser Inks BLI101 is widely considered one of the best marking sprays for metal engraving with a CO2 laser, delivering bold, permanent black markings on uncoated metals like stainless steel, brass, copper, and pewter.
Its patented nano-particle formula bonds deeply with the metal during engraving, producing high-contrast, heat-resistant, and extremely durable results.
The spray has excellent laser compatibility, working reliably with CO₂ lasers (25W+), fiber/YAG (10W+), and diode lasers (10W+).
Application is straightforward—clean, spray, engrave, and rinse—making it friendly for both professionals and serious hobbyists. The anti-clog nozzle and thinner coating provide about 25% more coverage, reducing waste while maintaining consistent results.
With fast drying, easy cleanup, and professional-grade performance, Brilliance Laser Inks BLI101 is an excellent choice for anyone engraving metal, especially if you rely on a CO₂ laser for high-quality, permanent markings.
2. xTool Black Laser Marking Spray 2.0?
xTool Black Laser Marking Spray 2.0 is an excellent choice for anyone looking to achieve deep, permanent black markings on metal using a CO₂ laser.
The upgraded formula delivers high-contrast, fade-resistant, and non-corrosive results, making engravings look clean, sharp, and professional. It also performs well on ceramics and glass, adding to its versatility.
One of its biggest strengths is broad laser compatibility. It works reliably with CO₂ lasers (25W+), fiber lasers (10W+), and diode lasers (10W+), making it a flexible option for users with different machines. The clog-proof nozzle and strong spray provide an even, consistent coating, which is critical for achieving uniform marking quality.
Proper application is important—shake gently side to side until the bead moves, avoid vertical shaking, and keep the can out of direct sunlight. When used correctly, this spray consistently produces professional-grade results.

xTool Black Laser Marking Spray 2.0 is one of the best marking sprays for metal engraving with a CO₂ laser, offering excellent contrast, durability, and cross-laser compatibility for both hobbyists and professionals.
3. OMTech Laser Marking Spray
OMTech Laser Marking Spray is an excellent choice for metal engraving with a CO2 laser, producing high-contrast, permanent black marks on bare metals such as aluminum, stainless steel, and brass.
Although the spray applies white, it turns deep black after laser engraving, delivering clean, professional-looking results ideal for product branding, jewelry, tumblers, and tool marking.
Designed for CO₂ lasers 25W and above, it also performs well with fiber lasers for even more vivid markings. The clog-proof nozzle ensures a thin, even coating, which is key to consistent engraving quality.
With fast drying times (under 5 minutes, or just 2 minutes with heat) and easy rinse-off cleanup, OMTech’s spray is well suited for both one-off projects and batch production.
Overall, OMTech Laser Marking Spray offers great coverage, ease of use, and reliable durability, making it a strong contender as one of the best marking sprays for metal engraving with a CO₂ laser.
Metal Engraving with a CO2 Laser Using Brilliance Laser Inks

Engraving metal with a CO2 laser typically requires a marking agent, as CO2 lasers are not directly absorbed by bare metal surfaces. Brilliance Laser Inks provide an effective solution, allowing users to create high-contrast, durable marks on metals like stainless steel, copper, brass, and aluminum.
This guide will walk you through the process of engraving these metals using a CO2 laser engraver.
Materials You Will Need:
- CO2 Laser Engraver (Minimum of 25 watts, ideally 50watts and above)
- Brilliance Laser Inks (12 Oz Black Aerosol)
- Metal Substrates (Stainless Steel, Copper, Brass, Aluminum)
- Cleaning Supplies (Isopropyl alcohol, lint-free cloth)
- Safety Gear (Goggles, gloves)
Step-by-Step Guide to Metal Engraving with a CO2 Laser
Step 1: Prepare Your Metal Surface
Before applying the marking agent, it’s important to thoroughly clean the metal surface. This ensures that the engraving process goes smoothly and that the markings adhere properly.
Use isopropyl alcohol and a lint-free cloth to wipe away any dirt, grease, or residue from the metal surface. Allow the metal to dry completely before moving to the next step.
Step 2: Apply Brilliance Laser Inks Marking Agent
Shake the Brilliance Laser Inks aerosol can for about 1-2 minutes to ensure the ink is well-mixed. Holding the can approximately 6-8 inches away from the stainless steel surface, apply an even coat of the ink.
Make sure the surface is fully covered with a thin layer. Avoid over-spraying or creating thick, uneven coats, as this can affect the quality of the engraving.
Let the marking agent dry completely. This may take a few minutes, depending on your workspace conditions.
Step 3: Set Up Your CO2 Laser Engraver
After applying the marking agent, set up your CO2 laser engraver. Since metals are reflective, CO2 lasers cannot engrave them directly. However, the marking agent allows the laser to bond with the metal surface, producing a dark, high-contrast engraving.
To achieve the best results:
- Laser Power: Start with a lower power setting and gradually increase if needed.
- Speed: Adjust the engraving speed depending on the detail of the design. A slower speed allows for deeper marking.
- Resolution: A resolution setting of 300 to 500 DPI typically yields clear and precise engravings.
Step 4: Create A Material Test Grid
A material test grid is an essential tool for determining the optimal laser settings for engraving metals with a CO2 laser engraver. Since CO2 lasers require marking agents like Brilliance Laser Inks to engrave metals such as stainless steel, copper, brass, and aluminum, testing different settings ensures high-quality results.
Why Use a Material Test Grid?
A material test grid helps:
- Identify the best combination of power, speed, and frequency for metal engraving.
- Optimize engraving depth and contrast.
- Reduce material waste by minimizing trial and error.
- Improve consistency in engraving results.

Step-by-Step Guide to Creating a Material Test Grid
Step 1: Design the Test Grid
- Create a Grid Layout – Use design software like LightBurn, Adobe Illustrator, or CorelDRAW to create a matrix of squares (e.g., 5×5 or 10×10 grid).
- Assign Variable Settings:
- Power Levels: Increase incrementally (e.g., 10%, 20%, 30%, etc.).
- Speed Settings: Adjust from slow to fast (e.g., 50mm/s, 100mm/s, etc.).
- Frequency (DPI): Modify resolution settings for clarity (e.g., 250 DPI to 1000 DPI).
Step 2: Configure Laser Settings
- Set the Focal Distance – Adjust the focus precisely for accurate engraving.
- Import the Test Grid File – Load your grid into the laser software.
- Assign Engraving Parameters – Match power, speed, and frequency to each square.
Step 3: Perform the Test Engraving
- Secure the Metal Sheet – Ensure it lies flat and does not shift.
- Engrave the Grid – Run the test with the pre-set parameters.
- Evaluate Results:
- Check contrast and depth.
- Identify which settings produce the clearest, most durable marks.
- Adjust as needed for better results.
Step 5: Clean and Finalize Settings
- Remove Excess Marking Agent – Rinse the metal with water or wipe it with a damp cloth.
- Document the Best Settings – Note down the most effective power, speed, and DPI for future reference.
Creating a material test grid is crucial for optimizing metal engraving with a CO2 laser engraver and Brilliance Laser Inks.
By systematically testing various settings, you can achieve precise, high-contrast, and durable engravings on stainless steel, copper, brass, and aluminum. This process ensures efficiency and consistency in all your metal engraving projects.
Tips for Achieving the Best Results:
- Use a Test Piece: Always test your laser settings on a scrap piece of metal before engraving the final piece.
- Ensure Even Application: Apply Brilliance Laser Inks evenly to avoid patchy or inconsistent engravings.
- Optimize Your Laser Settings: Adjust the power, speed, and resolution based on the complexity and size of your design.
Limitations of CO₂ Lasers for Metal
While versatile, CO₂ lasers are not ideal for deep metal engraving.
What CO₂ Lasers Cannot Do
- Deep engraving into bare metal
- True metal cutting
- High-speed metal marking without compounds
If you need deep, fast, or color metal engraving, a fiber or IR laser is a better choice.
CO₂ Laser vs Fiber Laser for Metal Engraving
Feature | CO₂ Laser | Fiber Laser |
|---|---|---|
Bare Metal Engraving | No | Yes |
Marking Compounds | Yes | Not needed |
Anodized Aluminum | Excellent | Excellent |
Cost | Lower | Higher |
Best For | Coated metals, signage | Industrial metal engraving |
Safety Tips for Metal Engraving
- Use proper ventilation when engraving coatings or compounds
- Never engrave unknown finishes
- Avoid zinc-coated (galvanized) metals
- Wear eye protection when handling marking sprays
- Follow manufacturer material safety guidelines
Final Thoughts
Metal engraving with a CO2 laser offers an efficient and effective way to mark metals when using the proper tools and techniques.
While fiber lasers are generally more suited for metal engraving, CO2 lasers, when paired with a marking spray, provide an excellent alternative for adding personalized designs or durable markings to metal surfaces.
By following the steps outlined in this guide and paying close attention to laser settings, you can achieve professional-quality engravings on a variety of metals.
Frequently Asked Questions
Can a CO₂ laser engrave metal directly?
No, a CO₂ laser cannot engrave bare metal directly because its wavelength is not readily absorbed by metal surfaces. Instead, a laser marking spray or compound (such as Brilliance Laser Inks, or xTool Black Marking Spray) is required to create permanent marks.
What is the best marking spray for metal engraving with a CO2 laser?
Popular and proven options include Brilliance Laser Inks BLI101, xTool Black Laser Marking Spray 2.0, and OMTech Laser Marking Spray. These sprays chemically bond to the metal when heated by the laser, producing durable, high-contrast black markings.
What CO₂ laser wattage is needed for metal marking spray?
Most metal marking sprays require a minimum of 25W CO₂ laser power. Higher wattage machines (40W–60W+) generally produce darker, more consistent results and allow for faster engraving speeds.
Do I need to prepare the metal before engraving?
Yes. Proper surface preparation is critical. Clean the metal thoroughly with isopropyl alcohol or acetone to remove oils, dirt, and coatings. A clean surface ensures strong bonding and prevents patchy or faded markings.
How do I remove excess marking spray after engraving?
After engraving, allow the piece to cool and rinse with water. Light wiping with a soft cloth is usually enough to remove unbonded spray. Avoid scrubbing aggressively, as this can damage the freshly bonded mark.