Making custom rubber stamps with a laser engraver is one of the easiest ways to turn simple designs into something practical and sellable.
Whether you’re crafting for fun or building a small business, the process is straightforward once you understand the basics.
Table of Contents
This guide walks you through everything you need, from materials and settings to step-by-step instructions and common mistakes to avoid.
Why Use a Laser Engraver for Rubber Stamps?

Laser engraving gives you clean edges, consistent depth, and fine detail that’s hard to achieve by hand. It also speeds things up. Once your design is ready, you can produce multiple stamps quickly with the same quality every time.
What You Need to Get Started
You don’t need a complicated setup. Here’s the basic list:
- Laser engraver (CO2 or High Power Diode)
- Laser-safe rubber sheets (2–4 mm, 1/16-1/8″ thick)
- Design software (LightBurn, Inkscape, Illustrator)
- Mounting material (wood blocks or acrylic handles)
- Adhesive (double-sided tape or glue)
- Brush or compressed air for cleaning
Choosing the Right Rubber
Not all rubber works well with lasers. Using the wrong type can lead to poor detail or even harmful fumes.
What to look for:
- Laser-safe rubber specifically made for engraving
- Medium firmness for clean impressions
- Dark-colored sheets for better laser absorption
Thickness tip:
2-4 mm is a good starting point. It gives enough depth for clean stamping without weakening the design.
We recommend using these Tondiamo Rubber Stamp Sheets for excellent results.
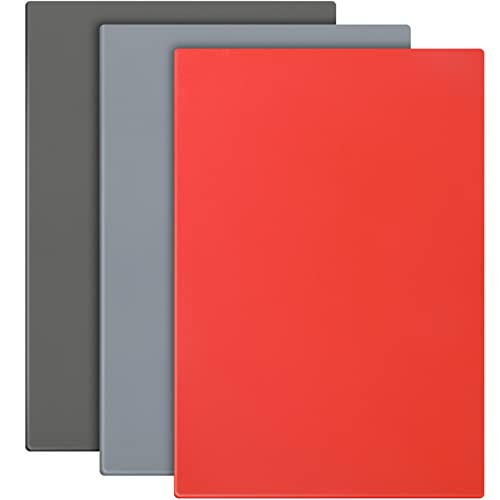
- Easy to Cut and Engrave: the rubber sheets are made of quality rubber material, soft in texture and easy to engrave, with fine ink loading, pressing clear and delicate patterns for a long time, bringing you a smooth experience
The Tondiamo 3-piece rubber stamp sheet set is a great choice if you’re making stamps with a laser engraver. The 2.3 mm thickness hits a sweet spot, deep enough for clean impressions but still easy to engrave without excessive power.
The material is soft and consistent, which helps produce sharp details and smooth cuts, even on smaller designs.
The A4 size sheets give you plenty of room to experiment or batch multiple stamps at once, and the mix of red, dark gray, and light gray makes it easier to see your design while working. Ink transfer is reliable too, with clear, crisp prints once mounted.
Pros:
- Easy to engrave with clean, detailed results
- Good thickness for durability and depth
- Large A4 size for multiple projects
- Consistent material across all sheets
Cons:
- Slight rubber odor during engraving (normal but noticeable)
- May require a bit of testing to dial in perfect settings
Overall, it’s a dependable, beginner-friendly option that also holds up well for small business use.
Choosing The Right Mounting Material To Make Rubber Stamps With a Laser Engraver
Choosing the right mounting material for your rubber stamps makes a bigger difference than most people expect. It affects how clean your impressions look, how comfortable the stamp feels, and how long it lasts.
Here’s how to pick the right option based on how you plan to use your stamps.
What a Good Mount Should Do
A proper mount should:
- Keep the stamp flat and stable
- Distribute pressure evenly
- Be comfortable to hold
- Match your workflow (occasional use vs batch production)
Most Common Mounting Options
1. Wood Blocks (Classic Choice)
Wood is the traditional option, and for good reason. It’s sturdy, easy to handle, and gives consistent pressure.
Best for:
- Beginners
- Simple stamps
- Craft projects
Pros:
- Durable and long-lasting
- Easy to glue rubber onto
- Comfortable grip
Cons:
- You can’t see through it for precise placement
- Bulkier for storage
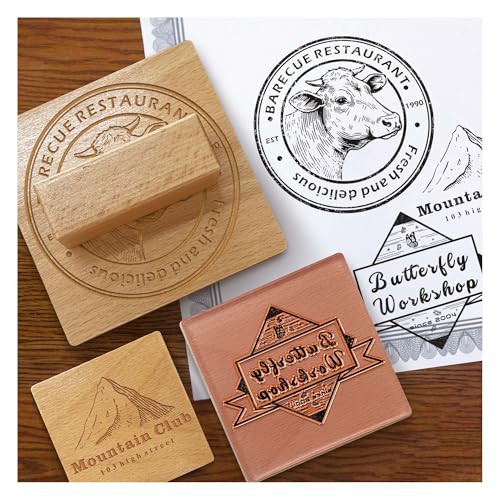
We recommend using these Patikil Blank Wood Rubber Stamp Mounts.

- Color: Wood Color; Material: Wood; Size: 40 x 40 x 20mm / 1.6 x 1.6 x 0.8 inch(L*W*H); Packing List: 10 x Wooden Stamp Mounts
These 40x40mm (1.6×1.6″) wooden stamp mounts from Patikil are a simple, reliable option if you’re making your own rubber stamps. The size is practical for small to medium designs, and the solid wood construction feels sturdy without being too heavy.
They’re easy to work with. Just cut your rubber to size, glue it on, and you’re ready to go. The flat surface helps keep your stamp aligned, and the thickness gives you a comfortable grip, which makes a difference when applying even pressure.
Pros:
- Solid, durable wood that holds up over time
- Comfortable size and grip for consistent stamping
- Smooth surface makes mounting easy
- Good value for a 10-pack
Cons:
- No pre-applied adhesive (you’ll need your own glue)
- Not transparent, so alignment can take practice
Overall, a dependable choice for beginners and anyone making custom stamps in batches.
2. Acrylic Blocks (Clear and Precise)
Acrylic mounts are transparent, which makes alignment much easier.
Best for:
- Detailed designs
- Scrapbooking
- Precise placement
Pros:
- Clear visibility for accurate stamping
- Lightweight and reusable
- Great for positioning text or patterns
Cons:
- Requires cling foam or temporary adhesive
- Can feel less sturdy than wood
3. Self-Inking Mounts (High Efficiency)
These come with a built-in ink pad, so you don’t need a separate one.
Best for:
- Repetitive stamping
- Business use (logos, packaging)
Pros:
- Fast and consistent
- Clean and convenient
- Great for batch work
Cons:
- More expensive upfront
- Limited flexibility for design changes
4. Foam + Cling Mount (Flexible Setup)
This involves adding a foam layer with a cling backing to your stamp so it sticks to acrylic blocks.
Best for:
- Modular stamp systems
- People who switch designs often
Pros:
- Reusable and interchangeable
- Easy to store
- Works with acrylic blocks
Cons:
- Extra step during setup
- Slightly less rigid than solid mounts
5. Custom Laser-Cut Mounts
Laser cut your own mounts from wood or acrylic.
Best for:
- Custom shapes
- Branding or product lines
Pros:
- Fully customizable
- Professional look
- Perfect fit for your design
Cons:
- Takes extra time to produce
- Requires precise alignment
Adhesives That Work Best
No matter what mount you choose, the adhesive matters.
- Double-sided tape: quick and clean for small stamps
- Rubber cement: flexible and reliable
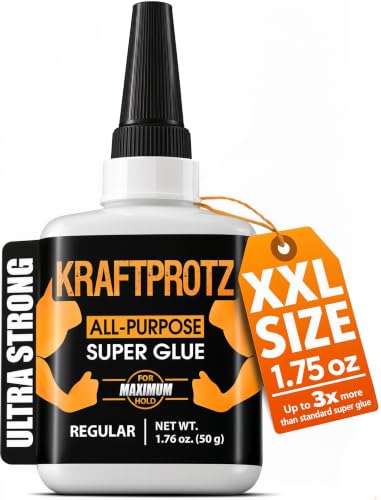
- Super glue: strong but permanent
Our best rubber stamp adhesives recommendations can be found below:


Step-by-Step: How to Make Rubber Stamps With a Laser Engraver
Making your own rubber stamps with a laser engraver is straightforward once you know the process. Here’s a clear step-by-step routine you can follow every time.
Step 1: Prepare Your Design
Start by creating your artwork in design software like LightBurn, Inkscape, or Illustrator.
- Convert the design to black and white
- Mirror (flip) it horizontally
- Keep lines at least 1 mm thick for clean results
Step 2: Choose and Prep the Rubber
Use laser-safe rubber sheets, ideally around 2–4 mm, 1/16-1/8″ thick.
- Wipe off dust or debris
- Make sure the sheet is flat
- Secure it on the laser bed if needed
Step 3: Set Up Your Laser
Dial in your basic settings before running anything.
- Low power (start around 10–20%)
- Slow speed (around 100–300 mm/min. 3.9-11.8″/min)
- Enable air assist if available
Always run a small test first to avoid wasting material
Step 4: Focus the Laser
Proper focus is critical.
- Use auto-focus or manual focus tools
- Double-check before engraving
Bad focus leads to uneven depth and blurry details
Step 5: Run a Test Engraving
Before committing to the full design:
- Engrave a small section or test grid
- Check depth and edge quality
- Adjust power and speed if needed
Step 6: Engrave the Full Design
Once your settings look good:
- Run the full engraving job
- Keep an eye on the process
- Avoid opening the lid mid-job
The laser will remove material around your design, leaving raised areas for stamping
Step 7: Clean the Stamp
After engraving:
- Use a soft brush or compressed air
- Remove loose debris and residue
- Check for small rubber bits stuck in the design
Clean details = cleaner prints
Step 8: Cut and Shape the Stamp
Trim your stamp to size.
- Use scissors for simple shapes
- Use the laser for precise outlines
Step 9: Mount the Stamp
Attach your rubber to a handle or backing.
- Wood blocks for durability
- Acrylic blocks for precision
- Use strong adhesive or double-sided tape
Step 10: Test Your Stamp
Before final use:
- Apply ink lightly
- Press evenly
- Check for clarity and missing details
Make small adjustments if needed.
Make Rubber Stamps With a Laser Engraver: Engraving Methods Explained

When making rubber stamps with a laser engraver, the method you choose affects how your stamp prints, how clean the edges look, and how easy it is to set up. There are a few main approaches, each with its own use case.
Negative Space Engraving (Most Common)
This is the go-to method for most stamp makers.
How it works:
The laser engraves away the background, leaving your design raised.
Why it works well:
Raised areas pick up ink, while the engraved areas stay clean. This gives you sharp, professional-looking prints.
Best for:
- Text and logos
- Clean, bold designs
- Business stamps
Things to watch:
- Requires more engraving time since you’re removing more material
- Needs proper depth to avoid smudging
Direct Engraving (Positive Engraving)
This method engraves the design itself instead of the background.
How it works:
Your design is cut or etched into the rubber rather than left raised.
Best for:
- Decorative textures
- Specialty effects
- Non-traditional stamping
Limitations:
- Doesn’t work well for standard stamping
- Ink won’t transfer the same way as raised designs
This is more of a creative technique than a practical one for everyday stamps.
Outline Cut + Engrave Method
This combines engraving with a clean cut around the design.
How it works:
You engrave the design (usually negative space), then use the laser to cut the outer shape.
Best for:
- Custom-shaped stamps
- Clean edges and professional finish
- Product-ready stamps
Benefits:
- Saves time on manual trimming
- Gives consistent results
Raster Engraving
Raster engraving is used for filled areas and detailed designs.
How it works:
The laser moves back and forth, engraving line by line (like printing an image).
Best for:
- Filled text and logos
- Images converted to black and white
- Detailed artwork
Things to watch:
- Takes longer than vector cuts
- Needs proper DPI and contrast settings
Vector Engraving (Line Engraving)
This method follows paths instead of filling areas.
How it works:
The laser traces lines instead of engraving full surfaces.
Best for:
- Fine outlines
- Simple line art
- Light detailing
Limitations:
- Not suitable for full stamp designs on its own
- Often combined with raster engraving
Which Method Should You Use?
If you’re making standard rubber stamps, stick with:
- Negative space engraving + raster fill → best overall results
- Add vector cutting → for shaping the stamp
That combination gives you clean prints, good durability, and a professional finish.
Making Rubber Stamps With a Laser Engraver: Common Problems and Fixes

Even with the right setup, things don’t always come out perfect on the first try. Most issues come down to settings, material, or design choices. Here’s how to troubleshoot the most common problems.
Blurry or Smudged Stamp Prints
What’s happening:
Your stamp isn’t transferring cleanly, and details look soft or smeared.
Fix it:
- Increase engraving depth slightly
- Use less ink when testing
- Apply more even pressure when stamping
- Make sure raised areas are clearly defined
Shallow Engraving (Weak Impressions)
What’s happening:
The stamp looks fine, but it barely prints.
Fix it:
- Increase power or reduce speed
- Add a second pass if needed
- Aim for ~40–60% depth of the rubber thickness
Burnt or Melted Edges
What’s happening:
Edges look rough, sticky, or overly dark.
Fix it:
- Lower laser power
- Increase speed
- Turn on air assist to reduce heat buildup
- Clean your lens for better beam quality
Missing Fine Details
What’s happening:
Small text or thin lines don’t show up well.
Fix it:
- Thicken design elements (at least 1 mm)
- Slow down the engraving speed slightly
- Double-check focus
- Use higher resolution (DPI) in your settings
Rubber Warping or Lifting
What’s happening:
The material shifts or curls during engraving.
Fix it:
- Secure the rubber with magnets or tape
- Use a flat honeycomb or solid bed
- Avoid overheating with lower power settings
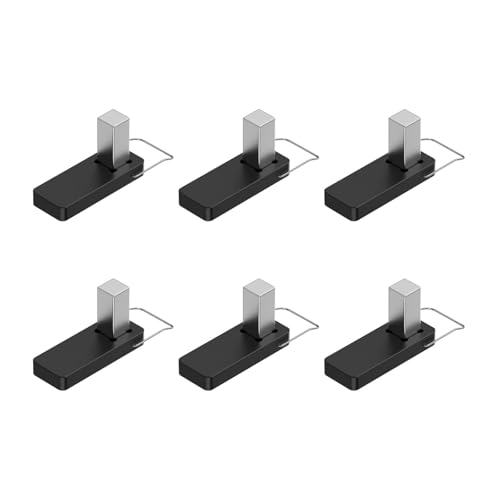
- It is made of strong plastic and magnets that press down on the wood for a clean and consistent cut on warped boards
These honeycomb material pins are made from durable plastic with strong magnets. The pins hold rubber firmly in place for cleaner, more consistent engraving and cutting.
They’re designed to fit xTool beds and work just as well with most standard honeycomb beds.
Uneven Engraving Depth
What’s happening:
Some areas are deeper than others.
Fix it:
- Recheck laser focus across the surface
- Make sure the material is perfectly flat
- Clean mirrors and lens
- Check for bed leveling issues
Strong Odor or Excess Smoke
What’s happening:
Too much smoke during engraving.
Fix it:
- Confirm you’re using laser-safe rubber
- Improve ventilation or use a fume extractor
- Reduce power if it’s too high
- Enable air assist
Stamp Prints Backwards
What’s happening:
Your design looks reversed when stamped.
Fix it:
- Always mirror your design before engraving
This is one of the most common beginner mistakes.
Rubber Residue Stuck in Details
What’s happening:
Small bits of rubber remain in engraved areas.
Fix it:
- Use a soft brush or compressed air
- Clean gently with a cloth
- Avoid over-melting by lowering power
Edges Not Cutting Cleanly
What’s happening:
Your stamp outline looks rough or incomplete.
Fix it:
- Increase power slightly for cutting
- Slow down cutting speed
- Use multiple passes instead of one heavy pass
- Ensure proper focus
Final Thoughts
Making rubber stamps with a laser engraver is simple once you understand the setup. Focus on good materials, correct settings, and clean design. Start small, test often, and improve as you go.
With a bit of practice, you can create sharp, professional stamps for personal use or even turn it into a steady income stream.
Frequently Asked Questions
What type of laser is best for making rubber stamps?
A CO2 or high-power diode laser is the best choice. It cuts and engraves rubber cleanly and efficiently.
Do I need special rubber for laser engraving?
Yes. Always use rubber labeled as laser-safe. Regular rubber can produce harmful fumes and won’t engrave as cleanly.
How deep should I engrave the rubber stamp?
Aim for about 40–60% of the rubber’s thickness. This creates enough contrast between raised and recessed areas for a clear print without weakening the design.
Why does my rubber stamp print look blurry or smudged?
This usually comes down to shallow engraving, too much ink, or uneven pressure. Try increasing depth slightly and using less ink when testing.
Do I need to mirror my design before engraving?
Yes, always mirror (flip) your design horizontally. If you skip this step, your stamp will print backwards.