
Burn marks are one of the most common frustrations in laser cutting. Even with a good machine and a well-prepared design, excessive heat can leave wood, leather, acrylic, and other materials with dark edges, smoke stains, or unwanted discoloration.
Fortunately, most laser-cutting burns can be reduced with the right setup. The key is to control how much heat reaches the material and how effectively smoke and debris are removed.
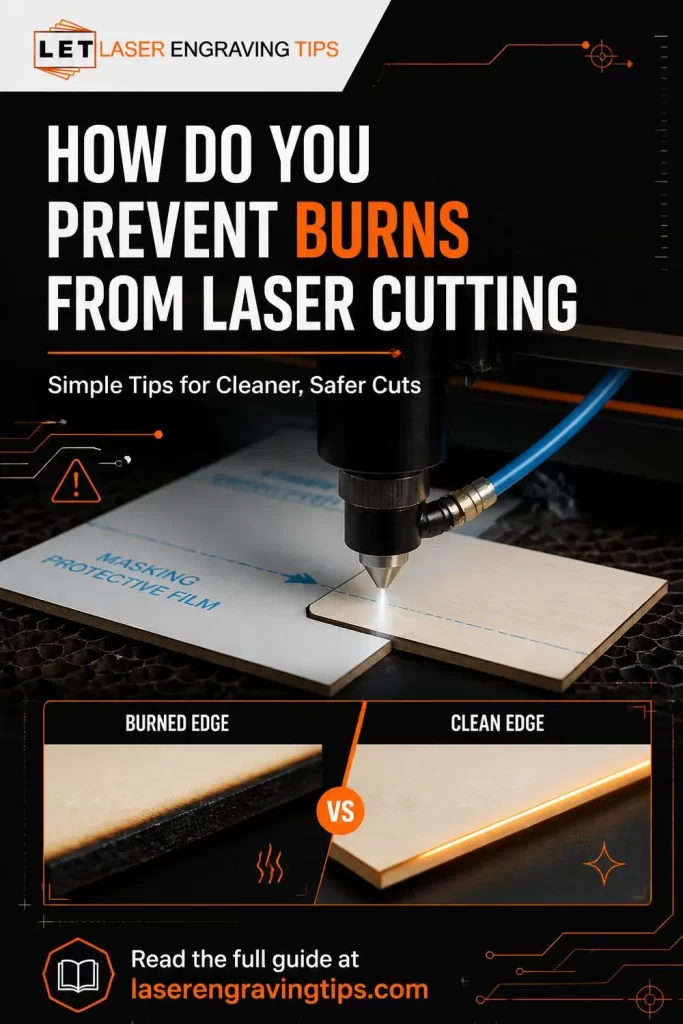
In this guide, you’ll learn how to prevent burns from laser cutting, what causes scorch marks, and how to get cleaner results from your laser engraver.
Why Does Laser Cutting Cause Burns?
A laser concentrates intense energy into a small area to cut through material. When too much energy is delivered, the material can become excessively hot, causing charring, melting, discoloration, or smoke stains.
Common signs of excessive heat include:
- Black or brown edges
- Smoke stains around the cut
- Excessive charring
- Melted edges
- Warped material
- Discoloration around the cutting area
The goal isn’t to eliminate heat completely. You need enough energy to make a clean cut while avoiding unnecessary heat buildup.
The Best Ways to Prevent Burns From Laser Cutting
Use the Right Power and Speed
Laser power and cutting speed are two of the biggest factors affecting burn marks.
A laser moving too slowly spends more time heating the same area, while excessive power can deliver more energy than the material needs.
A good starting point is to use the fastest practical speed with enough power to cut completely through the material.
Because every laser and material combination is different, don’t assume settings from another machine will produce the same results.
Run a Laser Test Grid
A test grid is one of the easiest ways to find cleaner cutting settings.
Test several combinations of power and speed on scrap material before starting your final project. Look for the setting that produces a complete cut with the least amount of scorching.
A test can also reveal whether using multiple passes is better than increasing power or slowing the machine down.
Keep the Laser Properly Focused
Correct focus allows the laser to concentrate its energy efficiently.
If the material is too far from the focal point, the laser spot can become larger and less effective. This may result in incomplete cuts and increased heat around the cutting area.
Before cutting, make sure the material is at the correct focal distance for your machine. If your laser has automatic focus, use it when appropriate.
Use Appropriate Air Assist
Air assist directs airflow toward the cutting point. It helps remove smoke and debris while reducing heat around the cut.
Proper airflow can improve edge quality, reduce charring, and help prevent flare-ups.
The ideal airflow depends on the material and machine, so follow your laser manufacturer’s recommendations and test different settings when necessary.
Keep the Material Flat
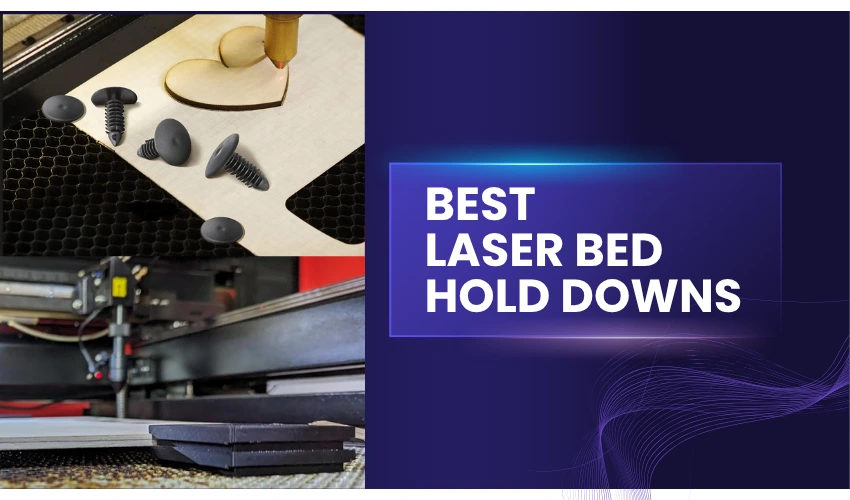
A warped sheet can cause inconsistent focus and cutting depth.
Make sure your material is flat and securely positioned before starting a job. Suitable clips, magnets, pins, or jigs can help with thin materials as long as they don’t interfere with the laser path.
Use a Suitable Cutting Bed
A honeycomb or elevated cutting bed allows airflow beneath the material and can help prevent smoke and heat from becoming trapped underneath.
It also provides support while reducing the amount of material in direct contact with the cutting surface.
Keep Your Optics Clean
Smoke residue and dust on the lens can reduce cutting efficiency.
If your laser suddenly requires more power or slower speeds to cut the same material, inspect the lens and other optics according to the manufacturer’s maintenance instructions.
Always use the recommended cleaning method and avoid abrasive materials or unsuitable chemicals.
We recommend cleaning your laser’s lens and mirrors with the Eclipse Optic Cleaning Solution and Wellgler’s Lint-Free Cleaning Swabs for excellent results.


Improve Smoke Extraction
Good ventilation is important for both project quality and safe operation.
Smoke can settle onto the surface of your material and create stains even when the actual cut is clean. Effective exhaust ventilation or a suitable fume extractor helps remove smoke from the cutting area.
Keep filters and exhaust systems maintained according to their instructions.
Use Laser-Safe Masking
Masking can protect the surface around a cut from smoke and residue, particularly when working with wood and acrylic.
However, don’t assume every tape or adhesive is laser-safe. Some materials can melt, produce excessive smoke, or release hazardous fumes.
Use masking specifically recommended for laser applications and follow the manufacturer’s instructions.
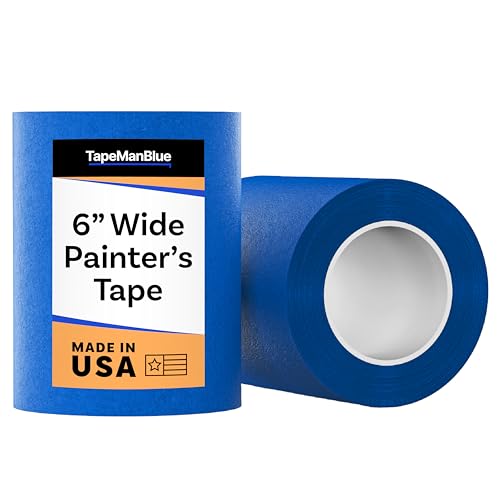
- SUPERIOR ADHESION & CLEAN REMOVAL: Our wide blue painters tape, perfect as 3D printer tape or laser masking tape, removes cleanly without residue, streaks, or stains for up to 21 days. Unlike other painting tape or masking tape that peels prematurely, TapeManBlue's extra wide painters tape stays put on your surfaces. Whether you're using it as 3D printing tape, for laser engraving, or general painting projects, our thick painters tape delivers reliable performance every time.
We recommend TapeManBlue Wide Painters Tape for laser cutting because its 6-inch width makes masking larger pieces much faster, while its strong adhesion helps keep the protective layer in place during cutting.
It’s also designed to remove cleanly without leaving residue, which is especially useful when you want to minimize smoke stains and scorch marks on wood and other laser-cut materials.
Its paper construction, resistance to curling, and clean removal make it a practical option for both hobbyists and small-business laser users. The fact that it’s made in the USA is another nice bonus.
Choose Consistent, Laser-Compatible Materials
Material quality can have a major impact on cutting results.
Plywood, for example, can vary in wood species, adhesive, moisture content, core construction, and surface finish. Two sheets with the same advertised thickness may therefore require different settings.
Always verify that a material is suitable for laser processing before cutting it.
Never laser cut an unknown plastic or manufactured material. Some materials can release dangerous fumes when exposed to a laser.
How To Prevent Burns From Laser Cutting on Wood and Plywood
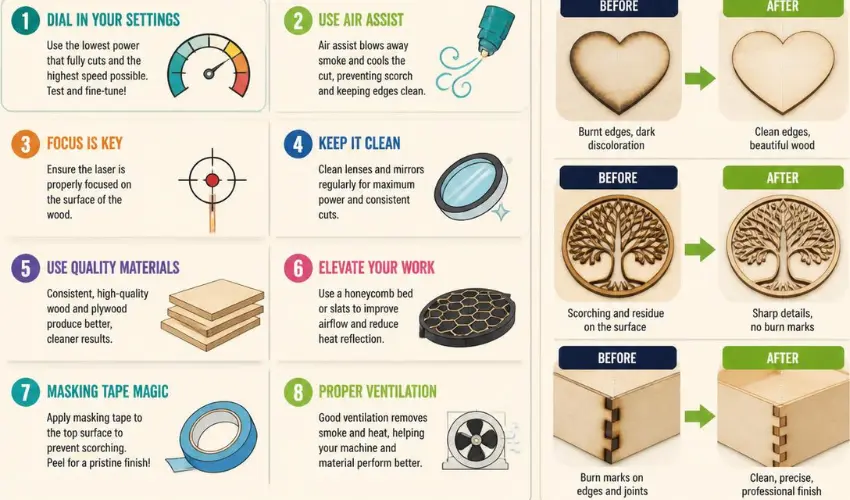
Wood and plywood are especially prone to scorching because they are organic materials.
Start with a power and speed test to find an efficient cutting combination. Avoid extremely slow speeds unless your material requires them.
Air assist can help clear smoke and heat from the cutting zone, while masking can protect the surrounding surface from smoke stains.
If you’re still seeing heavy charring, test faster speeds, lower power, or multiple passes rather than simply increasing the amount of heat delivered in a single pass.
Minor surface soot may sometimes be removed with light sanding, but be careful around fine engravings and delicate details.
How To Prevent Burns From Laser Cutting Leather
Leather can produce very different results depending on its type, tanning process, finish, and thickness.
Always confirm that the leather is suitable for laser processing. Vegetable-tanned leather is commonly used for laser projects, but individual products can still behave differently.
Test a small section first and use appropriate ventilation because laser-cut leather can produce significant smoke and odor.
For cleaner results, keep the leather flat, use appropriate settings and airflow, and consider laser-compatible masking if it works with your particular leather.
How To Prevent Burns From Laser Cutting Acrylic
Acrylic responds differently to laser energy than wood or leather. Too much heat can cause melting, deformation, or unwanted edge effects.
Use the correct focus and cutting settings for the specific acrylic you’re using.
It’s also important to match the laser wavelength to the material. CO2 lasers are generally well suited to acrylic, while diode lasers can have limitations depending on the acrylic’s color and composition.
Always test unfamiliar acrylic before cutting your final design.
Why Does My Laser Cut Have Black Edges?
Black edges usually indicate excessive heat or charring.
The most common causes are incorrect power and speed settings, poor focus, inadequate airflow, excessive smoke, or the characteristics of the material itself.
If the material is cutting successfully but the edges are heavily burned, try a test with a faster speed or lower power. If the material isn’t cutting completely, consider adjusting power, speed, or the number of passes.
Make small changes rather than dramatically changing several settings at once.
Why Does My Laser-Cut Wood Have Smoke Stains?
Smoke stains occur when smoke and residue settle onto the surface surrounding the cut.
Masking can provide a protective barrier, while good air assist and smoke extraction help reduce the amount of residue reaching the material.
If staining does occur, the appropriate cleanup method depends on the material. Light sanding may work on unfinished wood, while finished or delicate surfaces may require a different approach.
Should I Increase Power or Decrease Speed?
Neither is automatically the better solution.
If your laser isn’t cutting through the material, you need to increase the amount of energy reaching the cutting point. You can do this by increasing power, reducing speed, or adding passes.
However, dramatically reducing speed can increase scorching because the laser spends more time heating the same area.
Run a test grid and make small adjustments until you find an efficient balance.
How To Get Cleaner Laser-Cut Edges
Clean cuts usually come from several factors working together rather than one magic setting.
Start with a suitable material and make sure it is flat. Check your focus, optics, air assist, and ventilation before adjusting your power and speed settings.
For a new material, use a test file before cutting the final project. This gives you a chance to find the cleanest settings without wasting your finished material.
Burns From Laser Cutting Prevention Checklist
Before starting a cutting job, check:
Material: Is it known to be safe and suitable for your laser?
Focus: Is the material positioned at the correct focal distance?
Settings: Have you tested power and speed?
Air assist: Is the airflow working correctly?
Masking: Would laser-safe masking help protect the surface?
Ventilation: Is smoke being removed effectively?
Cutting bed: Is the material properly supported and ventilated underneath?
Optics: Are the lens and other relevant components clean?
Material condition: Is the sheet flat and free from unexpected coatings or finishes?
Safety: Are you following the laser manufacturer’s operating and ventilation requirements?
Final Thoughts
The best way to prevent burns from laser cutting is to control heat throughout the entire cutting process.
Use a suitable material, maintain correct focus, test your power and speed settings, and use appropriate air assist and ventilation.
Masking can provide additional protection against smoke stains, while a suitable cutting bed can improve airflow around the material.
Most importantly, test unfamiliar materials before committing to a finished project. A few minutes spent finding the right settings can save material, reduce cleanup, and give you much cleaner laser-cut edges.
With the right combination of settings and preparation, you can significantly reduce scorch marks and produce more consistent, professional-looking laser projects.
Frequently Asked Questions
How to avoid burn marks from laser cutting?
To avoid burn marks in laser cutting, adjust the power and speed settings to prevent excessive heat, use air assist to blow away smoke and debris, apply protective masking tape to the material, and ensure proper focus of the laser. Additionally, cut in multiple passes for thicker materials and ensure good ventilation.
How to clean burnt edges from laser cutting?
To clean burnt edges from laser cutting, use a fine-grit sandpaper or a microfiber cloth to gently buff the affected area. For stubborn burns, you can also use a wood cleaner or an adhesive eraser. If necessary, apply a light coat of paint or finish to restore the appearance.
How to laser cut leather without burning?
To laser cut leather without burning, use lower power settings and higher speed to minimize heat buildup. Additionally, use air assist to blow away smoke and debris, and ensure proper laser focus. Testing on scrap pieces is recommended to fine-tune settings.
How does air assist help prevent burns from laser cutting?
Air assist blows a steady stream of air directly at the cutting point, reducing heat buildup and clearing away smoke and debris. This helps cool the cut edge, prevents flame flare-ups, and significantly reduces scorch marks and smoke stains.
Should I use multiple passes instead of one slow cut to prevent burns from laser cutting?
Yes. Using multiple fast passes at lower power is often better than a single slow, high-power pass. This reduces laser dwell time, minimizes heat concentration, and helps prevent charred edges—especially when cutting thick wood or plywood.
Does material masking help reduce burns from laser cutting?
Absolutely. Applying paper masking tape or leaving the factory masking on materials like wood and acrylic protects the surface from smoke stains and scorching. After cutting, the masking can be removed to reveal a cleaner finish.
How does material elevation reduce burns from laser cutting?
Elevating the material using a honeycomb bed or risers allows heat and smoke to escape from underneath. This prevents laser flashback and reduces burn marks on the underside of the cut, resulting in cleaner edges and less discoloration.