Laser engraving metal is a precise and versatile technique used across industries to create detailed designs, logos, and text on metal surfaces. However, before starting a laser engraving project on metal, there are several key factors to consider to ensure optimal results and safety.
These include selecting the right type of laser, understanding the properties of different metals, and taking precautions for heat and reflection management.
In this article, we’ll guide you through the essential considerations you need to keep in mind before laser engraving metals.
Table of Contents
Top 5 Considerations Before Laser Engraving Metal
1. Properties of Metal
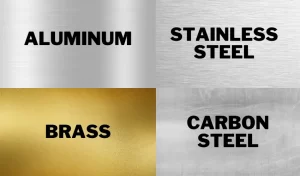
Knowing about the properties of the metal you plan to work with is quite essential. It is because each metal has its unique characteristics and reactions to the laser beam.
- Steel – Given its hardness or solidity, steel takes more time to engrave than other metals. It’s easier to make white markings than black ones.
- Aluminum – Engraving aluminum at high speed is feasible as it easily absorbs fiber laser light.
- Stainless Steel – You can only avoid rust if the chromium oxide layer on the metal’s surface is not damaged. When this occurs, ‘annealing’ is the laser process of choice.
- Copper – Marking copper is not as simple as aluminum or stainless steel but still possible with a good quality fiber laser. Copper is highly reflective which means that it only absorbs small amounts of laser light
- Lead – You can mark/engrave lead without much hassle due to its strong absorption of fiber laser light.
- Anodized aluminum – For anodized aluminum, you can either engrave it beforehand or on the anodized layer.
2. Types of Lasers
When it comes to metal engraving, not all laser engravers are created equal. Different types of laser technologies are suited for different kinds of metals and engraving needs. Below is an overview of the four main types of laser engravers used for metal, including their strengths, weaknesses, and ideal use cases.
Fiber Laser Engravers
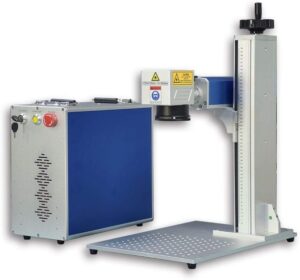
Best For: Bare metals (stainless steel, aluminum, brass, copper, gold, silver, titanium)
How It Works:
Fiber lasers generate a highly concentrated beam using a fiber optic cable doped with rare-earth elements. This beam is ideal for marking or deeply engraving metals without requiring coatings or pre-treatment.
Pros:
- Directly engraves bare metal (no coating required)
- High precision and speed
- Long lifespan (typically 100,000 hours)
- Excellent for deep engraving and permanent markings
Cons:
- Expensive (often $2,000+)
- Not suitable for non-metals like wood or acrylic
- Usually limited to flat or slightly curved surfaces
Ideal Users:
Industrial users, metal fabricators, jewelry makers, and businesses doing high-volume metal marking.
UV Laser Engravers (Ultraviolet Lasers)
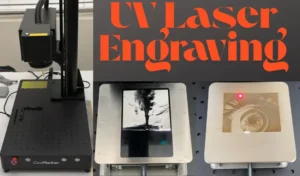
Best For: Plastic, glass, coated metals, and some untreated metals
How It Works:
UV lasers operate at a 355nm wavelength, which causes a photochemical reaction on the material surface. This “cold” process minimizes heat damage, making it ideal for delicate materials.
Pros:
- Precise marking on sensitive or heat-sensitive materials
- Works on plastics and coated metals
- Minimal surface damage or heat stress
Cons:
- High cost
- Lower power output compared to fiber lasers
- Smaller engraving area and slower on thick materials
Ideal Users:
Electronics manufacturers, medical device companies, and small engravers needing high precision with minimal thermal effect
Diode Lasers with 1064nm IR Attachment

Best For: Coated metals, powder-coated tumblers, and soft metals with IR add-on
How It Works:
Standard diode lasers (typically 450nm) can’t mark metal effectively, but when paired with a 1064nm infrared laser module, they gain the ability to mark or engrave certain metals.
Pros:
- More affordable than fiber or UV lasers
- Versatile: engraves wood, acrylic, leather + metal (with IR module)
- Great for hobbyists and small business use
Cons:
- Not all diode lasers support IR attachments
- IR power is usually limited (2W) — surface marking only
- May require more passes or pre-treatment
Ideal Users:
Craft businesses, hobbyists, and makers who want metal engraving without investing in a fiber laser
CO₂ Lasers
Best For: Coated or painted metals (not bare metal), wood, acrylic, leather, glass
How It Works:
CO₂ lasers emit light at 10,600nm and are absorbed by organic materials. They can’t engrave bare metal unless you use a marking spray like Brilliance Laser Inks.
Pros:
- Versatile for non-metal materials
- Great for engraving anodized aluminum or painted metal
- Cost-effective for general crafting
Cons:
- Cannot engrave raw metal directly
- Needs additional consumables (marking sprays) for metal work
- Slower and less precise than fiber for metals
Ideal Users:
Crafters and small shops engraving wood, acrylic, glass, and occasional coated metal pieces
Summary Comparison Table
Laser Type | Direct Metal Engraving | Cost Range | Best For | Limitations |
|---|---|---|---|---|
Fiber Laser | Yes | $$$–$$$$ | Industrial metal engraving | Expensive, not for wood/acrylic |
UV Laser | Some metals | $$$$ | Precision work on sensitive items | Slower, not for deep engraving |
Diode + IR Module | Light metals only | $$–$$$ | Hobby-level metal + material mix | Surface marking, not all metals |
CO₂ Laser | (needs marking spray) | $$–$$$ | Organic materials + coated metals | No direct bare metal engraving |
- For professional, high-volume metal engraving: Go with a fiber laser.
- For high-contrast markings on coated or delicate materials: Consider a UV laser.
- For a budget-friendly hobbyist setup: Choose a diode laser with IR module.
- For general crafting with occasional metal work: Use a CO₂ laser and marking spray.
Each type of laser engraver has its place—choose the one that best fits your materials, project types, and budget.
3. Surface Preparation Matters
Metal surfaces—especially raw or oxidized—often have coatings, oils, debris, or oxidation that can interfere with how the laser interacts with the material. Poor prep can lead to:
- Inconsistent or patchy engraving
- Faint or faded marks
- Increased fire risk (if flammable residues are present)
- Gumming up your laser lens or mirrors
- More wear on the laser over time
How to Prepare Metal for Laser Engraving

Clean the Surface Thoroughly
Use one or more of the following to remove oil, dust, and debris:
- Isopropyl alcohol (IPA) – evaporates cleanly without residue
- Acetone – strong degreaser, but use with care on coated metals
- Mild dish soap + water – followed by drying with lint-free cloth
- Glass cleaner – for light grime on anodized or coated metals
Tip: Avoid touching the cleaned area with your bare hands—your fingerprints contain oils
Remove Oxidation or Rust (if applicable)
For metals like steel or iron that may oxidize:
- Use fine-grit sandpaper or a brass wire brush to remove surface rust
- A light pass with Bar Keepers Friend available on Amazon can also help
Flatten and Secure the Surface
Ensure the metal lies flat and doesn’t shift. An uneven surface can:
- Throw off the laser’s focal distance
- Cause blurry or distorted engravings
Use:
- Magnetic clamps on Amazon for steel surfaces
- Double-sided tape or laser-safe jigs for non-ferrous metals
Apply Coating (Only if Needed)
Some lasers (like CO₂ lasers) can’t engrave raw metal directly and require laser marking spray or paste:
- Brilliance Metal Marking Spray on Amazon
- These create a contrast-rich black mark when hit with the laser
- Only needed for lasers that don’t emit a suitable wavelength for direct marking (e.g., CO₂)
Let the spray dry completely before engraving
What to Avoid
- Residue from stickers, tape, or adhesives
- Dirty or scratched surfaces (these affect engraving quality)
- Highly reflective metals without proper coatings or defocusing (they can reflect the laser and cause damage)
Final Tip
Always run a small test engraving after prepping a new type of metal. Even minor changes in surface texture or finish (polished vs. brushed) can alter how the metal reacts to the laser.
Summary
Task | Why It Matters |
|---|---|
Clean the surface | Prevents blotchy or weak engravings |
Remove oxidation/rust | Ensures even laser interaction |
Secure the material | Maintains consistent laser focus |
Apply marking spray | Enables CO₂ lasers to engrave metal |
Avoid adhesives/residue | Prevents fumes and engraving defects |
Proper surface prep is one of the easiest ways to improve engraving results, reduce rework, and protect your equipment.
4. Design
When laser engraving metals, design considerations are just as critical as machine settings and surface preparation. Metal behaves differently than wood, acrylic, or leather, so to get crisp, high-contrast results, you need to tailor your designs for the material.
Here’s what to keep in mind:
Key Design Considerations for Metal Laser Engraving
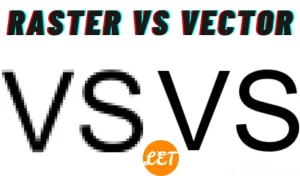
Use High-Contrast, Vector-Based Designs
- Vector graphics (SVG, AI, DXF) are ideal because they provide clean, scalable lines for precise engraving.
- Avoid low-res raster images unless you’re doing photo engraving with dithering or grayscale (and your laser supports it).
- Black = engraved / white = skipped: Stick to bold, simple contrast.
Pro Tip: Convert text to outlines or paths to avoid font issues across machines
Optimize Font Choice and Size
- Use bold, sans-serif fonts for the best visibility and readability on metal.
- Avoid thin or overly decorative fonts—they may not engrave well or may look blurry on reflective surfaces.
- Minimum font size: Aim for at least 6–8 pt for metal parts, larger for high-speed engraving.
Engraving Depth and Fill Type
- Hatch fill (crosshatch or parallel lines) works best for filling shapes with consistent marking.
- Consider engrave vs. mark: You don’t always need to etch deeply into metal—light surface marks may suffice and preserve strength.
- Avoid excessive depth on thin or coated metals to prevent warping or damage.
Consider Heat Effects and Material Reaction
- Metals conduct heat, which can distort fine details or discolor the surface if the power is too high.
- Design around this by limiting large solid fills (these cause more heat buildup).
- Use dot matrix or low-density hatching for better contrast without overheating.
Test for Surface Finish Compatibility
Design appearance will vary based on metal type:
Metal Type | Best Design Style |
|---|---|
Stainless Steel | High-contrast, line work, filled logos |
Anodized Aluminum | Negative space, reverse engraving |
Brass/Copper | Light line engravings (high reflectivity = risk) |
Titanium | Color marking with tight focus, low power |
Coated Metals | Use coating to get dark, crisp marks |
Consider Object Shape & Layout
- Curved or cylindrical items (tumblers, rings) need designs that account for curvature—especially if using rotary attachments.
- Use wrap-around templates for tumblers and jigs to position parts consistently.
Engraving Alignment & Registration
- Always include center marks or guide shapes in your design to help with alignment on the machine.
- Use the “framing” or “outline” feature in your software to preview placement before engraving.
Summary Table: Metal Laser Engraving Design Tips
Consideration | What to Do |
|---|---|
Design type | Use high-contrast vectors; avoid low-res images |
Fonts | Bold, simple, and legible fonts; avoid overly decorative ones |
Fill method | Use hatch or dot fills for efficient marking |
Heat control | Limit large solid fills; adjust design to avoid warping |
Metal type compatibility | Match design style to the metal surface and finish |
Curved object design | Wrap designs accurately for tumblers, rings, etc. |
Placement & alignment | Use guides or test outlines to ensure correct positioning |
Designing with the material in mind ensures professional-grade laser results on metal—no matter the laser type or project scale.
5. Safety Considerations
When laser engraving metals, safety must be a top priority due to the intense energy involved, high reflectivity of metals, and potentially hazardous byproducts. Whether you’re a hobbyist or running a business, here are the most important safety considerations to keep in mind:
Safety Considerations When Laser Engraving Metals
Eye Protection Is Critical
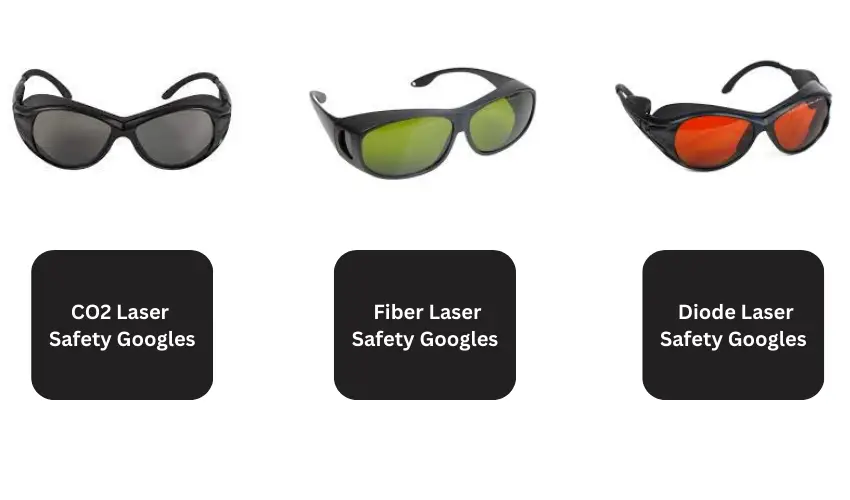
- Laser beams, especially from fiber and UV lasers, can be extremely dangerous to your eyes.
- Always wear laser safety goggles rated for your laser’s wavelength (e.g., 1064nm for fiber, 355nm for UV).
- Diode lasers with IR modules also require protection from both visible and infrared radiation.
Even with enclosed machines, goggles are essential during setup and testing phases
Proper Ventilation and Fume Extraction
- Metal engraving can produce toxic fumes, especially when:
- Engraving coated or anodized metals (e.g., paint, powder-coat)
- Using laser marking sprays (like Brilliance Laser Inks or CerMark)
- Use a fume extractor with HEPA and activated carbon filters or vent outdoors through a sealed exhaust hose.
Never engrave galvanized steel or PVC—they release extremely hazardous fumes
Avoid Reflective Surface Hazards
- Polished metals like stainless steel, aluminum, and chrome can reflect the laser beam, creating a risk of eye damage or fire.
- Use matte finishes or apply marking sprays to reduce reflectivity.
- Ensure beam enclosures are properly shielded—especially with open-frame lasers.
Fire Risk and Thermal Management
- Although metals themselves don’t burn easily, surrounding components (coatings, adhesives, masking tape) can ignite.
- Keep a fire extinguisher (Class C or CO2) available on Amazon.
- Do not leave the laser unattended—especially during long or deep engraving jobs.
Tip: Run test passes first and avoid excessive passes that build up too much heat
Electrical and Equipment Safety
- Laser engravers use high-voltage components and cooling systems (especially fiber lasers and CO2 machines).
- Use a grounded outlet and a surge protector.
- Inspect wires, cooling lines, and ventilation regularly for wear or leaks.
Machine and Workspace Setup
- Place the machine on a stable, non-flammable surface.
- Keep clutter away from the laser path and beam window.
- Use proper rotary attachments for cylindrical objects like tumblers to prevent slipping and misalignment.
Material-Specific Hazards
Metal Type | Caution |
|---|---|
Anodized Aluminum | Can release metal oxide dust—use ventilation |
Coated/painted metals | Release toxic chemicals—wear gloves, ventilate |
Stainless Steel | May reflect beam—use matte or pre-treated surface |
Brass or Chrome | Very reflective—ensure proper shielding and PPE |
Laser Marking Spray | Flammable when aerosolized—never spray near the operating machine |
Quick Safety Checklist for Metal Engraving
Laser goggles for correct wavelength
Proper fume extraction or external venting
Fire extinguisher within reach
No unattended operation
Pre-clean materials to remove flammable or toxic coatings
Work in a well-lit, uncluttered area
Use appropriate rotary attachments for curved objects
Frequently Asked Questions
What type of laser is best for engraving metal?
The best laser types for metal engraving are:
Fiber lasers (1064nm): Ideal for deep engraving, marking, and etching all bare metals (stainless steel, brass, aluminum, titanium, etc.). Fast, precise, and durable.
UV lasers (355nm): Suitable for marking metals with high contrast and minimal heat—great for delicate applications like electronics or jewelry.
Diode lasers with IR (1064nm) modules: Cost-effective and versatile for engraving coated or anodized metals, especially powder-coated stainless steel.
CO₂ lasers (10,600nm): Cannot engrave bare metals directly but can mark anodized, painted, or coated metals with proper settings or laser marking spray.
Can I engrave stainless steel tumblers with a diode laser?
Yes, but with limitations. Standard diode lasers (blue light) can’t engrave bare stainless steel directly. However, you can:
Use laser marking spray (e.g., Brilliance Laser Inks, CerMark) to create a permanent mark.
Upgrade to a diode + 1064nm IR module, which allows marking without spray.
For best results and speed, use a fiber laser or UV laser.
Is laser engraving on metal permanent?
Yes. Laser engraving creates permanent marks by either:
Removing material (deep engraving or etching)
Oxidizing the surface (color change)
Fusing a marking spray (if using non-metal-specific lasers)
The permanence depends on the laser power, material, and engraving depth. Fiber lasers deliver the most durable results, often resistant to abrasion, corrosion, and heat.
Conclusion
Laser engraving is an effective, adaptive, and precise technique for crafting detailed engravings and designs into metals. So consider and put in place the factors discussed in your laser engraving process. It can help you streamline the metal engraving process at your facility. That, too, without compromising the production quality.