There are many things you can do with lasers, from creating simple shapes to engraving graphics and 3D shapes and models; the possibilities are endless. However, there are some items you will require. Aside from the obvious (laser cutter and materials), one more thing you need is a laser cutting file.
The file guides the laser machine to make the desired cut or engraving design.
So, what kind of file do you need for laser cutting? Well, several options are available. They include:
Vector files - Raster files
- CAD & 3D design files
In this article, we will take a deep look at each file type, various extensions available, and what you can use them for during laser processing.
Table of Contents
Common File Types for Laser Cutting
Vector files
Vector files are images that are made up of mathematical formulas and calculations. They are made up of lines and shapes that can either follow straight or curved paths.
Vector files are like a map that provides a distinct path with lines and coordinates that the laser machine should follow. They are not made up of pixels and thus are not affected by resolution. Therefore, the size of the images can be adjusted infinitely, and they will always appear clear and crisp.

Several vector file formats are available for use when it comes to laser cutting/engraving. They include:
1. SVG (Scalable Vector Graphics)
Best overall format for laser cutting
- Works with most laser software
- Easy to edit
- Widely supported
If you’re unsure what to use, go with SVG
2. DXF (Drawing Exchange Format)
Great for CAD-based designs
- Common in engineering and technical drawings
- Compatible with most laser machines
- Ideal for precise measurements
Best for: Mechanical parts, technical projects
3. AI (Adobe Illustrator)
Professional design format
- High precision
- Advanced editing tools
- Requires Adobe Illustrator
Best for: Designers and professionals
4. PDF (Vector-Based Only)
Flexible but must be vector
- Works across many platforms
- Easy to share
Important:
Not all PDFs are vector files—some are just images
What About LightBurn Files?
If you’re using LightBurn, you’ll also see:
- LBRN / LBRN2 files
These are project files that store:
- Layers
- Power settings
- Speed settings
- Layout
Use these for saving and reopening your projects—not for sharing raw designs.
Why vector files?
- They contain precise path information.
- They allow easy scaling without losing quality.
- They guide the laser exactly where to cut or engrave.
Tips When Using Vector Files for Laser Cutting
1. Use Thin or Hairline Stroke Widths
- Set cutting lines to hairline thickness (typically 0.001 inch or less).
- This signals the laser software to cut rather than engrave or rasterize.
2. Ensure All Shapes Are Closed Paths
- Closed paths are necessary for proper cutting.
- Open lines may cause incomplete cuts or unexpected movements.
3. Convert Text to Outlines or Paths
- Always convert fonts to curves/outlines before saving.
- This prevents font substitution issues if opened on a different system.
4. Color Code Your Layers
- Assign specific colors to different operations:
- Red = Cut
- Blue = Score
- Black = Engrave
- Follow your machine’s color settings for easy operation setup.
5. Simplify Complex Paths
- Clean up unnecessary nodes or anchor points.
- Simplified paths speed up cutting and reduce machine errors.
6. Check Your File Scale and Units
- Confirm that your file uses the correct units (mm or inches) depending on your laser software settings.
- Scale the design to the correct finished size before exporting.
7. Avoid Overlapping Lines
- Duplicate or overlapping lines cause the laser to cut the same area multiple times.
- This can burn edges or waste time—always check and remove duplicates.
8. Save in Compatible Formats
- Preferred file types include SVG, DXF, or AI.
- Save/export in the file format your laser cutter or software requires (and use older versions if needed for compatibility).
9. Test with a Scrap Cut
- Before doing a final cut on expensive material, run a test cut on scrap to check settings and path behavior.
10. Keep a Backup Copy
- Always save a master file separately in case you need to make adjustments later.
Final Tip:
When in doubt, import your file into the laser software and preview the job. It’s the fastest way to catch mistakes like open paths, wrong colors, or missing outlines!
Raster files
Raster files, also known as bitmap, are graphic images that are made up of pixels. The pixels contain tonal information and unique colors. Together, these pixels add up to create the image you see when displayed on a computer, paper, or other surfaces.
Since raster files are made up of pixels, their clarity is dependent on resolution. If you zoom in on a raster image, you will start seeing tiny squares (the pixels) as the image increases in size. This is the main difference between raster and vector files.
When it comes to raster or bitmap files, several formats are available. They include:
- BMP (Bitmap image file) – Most laser software—including LightBurn, EZCAD, RDWorks, and LaserGRBL—can easily import BMP files for raster engraving workflows.
- JPEG (Joint Photographic Expert Group) – one of the most popular raster image files. However, it tends to compress images, leading to pixel loss.
- GIF (Graphics Interchange Format) – a raster file format that only supports up to 256 colors. Mainly used for creating animation images.
- PNG (Portable Network Graphics) – was designed to replace GIF files in terms of color options (48-bit color options). PNG files also have the added advantage of lossless compression.
- TIFF (Tagged Image File Format) – popular with commercial printing since it supports Photoshop’s program features while creating lossless compression images.
These raster files can be created and edited using various software programs such as Photoshop, Painter, Photo-PAIN, GIMP, Corel Painter, and others just to mention a few.
Why raster files?
- Great for photo engraving or shaded images.
- The laser will engrave the different pixel shades to create depth.
Important Tips When Using BMP Files for Engraving
- Resolution Matters: Use high-resolution images (at least 300 DPI) for the best engraving quality. Low-res BMPs can look pixelated or blurry when engraved.
- Convert to Grayscale: If you’re doing a detailed photo engraving, convert your BMP to grayscale before importing it into your laser software for better tonal control.
- Adjust Image Contrast: Boost contrast and sharpness before engraving to make sure the final engraved image has strong highlights and dark shadows.
- No Vector Cutting: Because BMP files are pixel-based, they cannot be used for cutting paths. If you need to cut, you’ll need to convert it to a vector file like SVG, DXF, or AI.
Compound files
While vector and raster files are the most popular, some files can store both vector and raster graphics. These include:
- EPS (Encapsulated PostScript) – a graphic file image that can be found on the Adobe Illustrator software. It is mainly used to create 2D vector images, but can also store text and bitmap images.
- PDF (Portable Document Format) – It can either be vector or raster depending on the software program used. For example, Adobe Illustrator or CorelDraw will create vector PDF files. On the other hand, Photoshop and Corel Paintshop will create raster files
CAD & 3D Design files

Another classification of files used in laser cutting or engraving is the CAD (computer-aided design) files. These files are created using CAD software programs such as AutoCAD, FreeCAD, TinerCAD, Fusion 360, Solidworks, DraftSight, and others.
CAD files are vector in nature. However, they differ from other vector files in that they are more technical (as opposed to being graphics). Therefore, they are mainly used to create complex 2D or 3D designs for laser cutting.
Examples of CAD file formats used in laser cutting include:
- DXF (Drawing Exchange Format) – popularly known as AutoCAD DXF, it is a CAD file developed by Autodesk. DXF files are ideal if you are looking to create mechanical parts or metal fabrication projects (laser cut signs, etc.).
- DWG (DRAWING) is a CAD vector file for creating 2D or 3D designs. It is native to the AutoCAD program and thus supports all its features.
Tips When Using DXF Files for Laser Cutting
- Ensure all shapes are closed paths for proper cutting.
- Use hairline or very thin line weights for cutting paths.
- Check for duplicate lines (they can cause double cuts).
- Simplify complex designs if necessary—too many nodes or intricate paths can slow down or confuse the laser cutter.
We Recommend LightBurn Software for Creating Laser Cutting Files
If you’re serious about laser cutting, LightBurn is one of the best tools you can use.
It combines design, editing, and machine control into a single, easy-to-use platform—so you don’t need multiple programs to get started.
Why LightBurn Is a Great Option
- All-in-one workflow
Design, edit, and send jobs to your laser from one place. - Beginner-friendly interface
Easy to learn, even if you’ve never used design software before. - Powerful vector tools
Create shapes, text, and detailed designs directly inside the software. - Precise laser control
Adjust speed, power, passes, and layers for clean, consistent cuts. - Wide compatibility
Works with most diode, CO₂, and fiber laser engravers.
What You Can Do With It
- Create laser-ready vector files
- Import and edit SVG, DXF, AI, and PDF files
- Convert images into cuttable vector paths
- Optimize settings for different materials
- Preview your job before cutting to avoid mistakes
Recommended Reading
If you want to get the most out of LightBurn, The LightBurn User Guide 2026 by Alex Hartwell is an excellent companion.
This book walks you through the entire process—from setup to advanced workflows—in a clear, practical way. It’s useful whether you’re just getting started or looking to improve consistency and efficiency in your projects.
What You’ll Learn
- How to install and configure LightBurn on Windows, macOS, and Linux
- Connecting and calibrating your laser for accurate results
- Designing and editing files using built-in vector tools
- Setting speeds, power, layers, and passes for clean cuts and engravings
- Using cameras and rotary attachments for better alignment
- Troubleshooting common issues and improving engraving quality
- Streamlining your workflow with shortcuts, macros, and material libraries
Why It’s Worth Reading
What makes this guide useful is how practical it is. Instead of just explaining features, it shows you how to actually use them in real projects. The examples, tips, and step-by-step approach help turn LightBurn from something powerful but confusing into something you can confidently rely on.
If you want faster setup, better results, and fewer mistakes, this is a worthwhile read.
Whether you’re a beginner or running a small laser business, LightBurn gives you the tools you need to create accurate, professional laser cutting files quickly and efficiently.
How do you make a laser cutting file in LightBurn?
If you’re using LightBurn, creating a laser cutting file is actually pretty straightforward once you understand the basics. You’re essentially drawing (or importing) vector shapes and assigning the right settings so your laser knows what to cut.
Here’s a simple step-by-step guide.
1. Set Up Your Workspace
Start by opening LightBurn and:
- Set your workspace size to match your laser bed
- Choose mm or inches (keep this consistent)
- Set your origin position (important for alignment)
This ensures your design matches your actual machine.
2. Create or Import Your Design
You have two options:
Option A: Draw in LightBurn
Use built-in tools to create shapes:
- Rectangle
- Circle
- Text
- Line tool
These are already vector paths, so they’re ready for cutting.
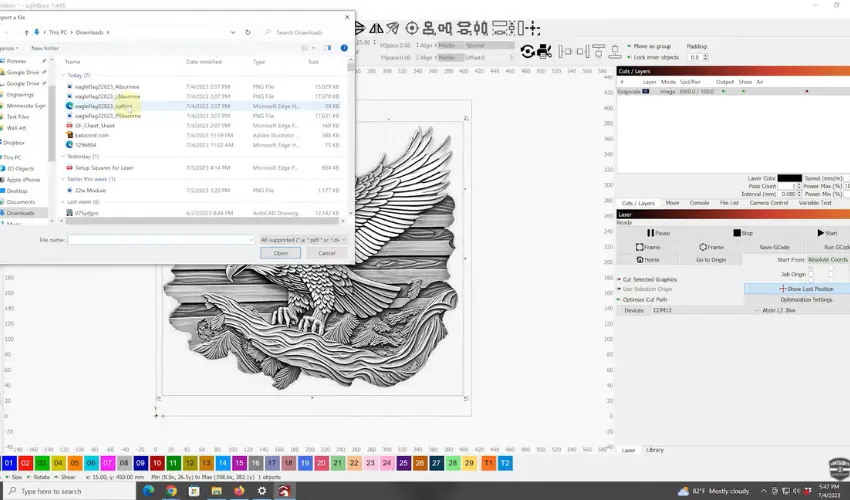
Option B: Import a File
You can import:
- SVG
- DXF
- AI
- PDF (vector)
Just drag and drop or go to File → Import.
3. Convert Everything to Vectors (If Needed)
If you imported an image (PNG/JPG):
- Select the image
- Click Trace Image
- Adjust settings → click OK
This converts the image into vector lines your laser can follow.
4. Set Cut Lines (Very Important)
For laser cutting, your lines must be:
- Thin (hairline)
- Not filled (outline only)
In LightBurn:
- Set Fill = OFF
- Use Line mode
If your lines are too thick, the laser may engrave instead of cut.
5. Assign Layers and Settings
Each color = a different operation.
For cutting:
- Select your design
- Assign a layer color (e.g., red)
- In the Cuts/Layers panel:
- Mode: Line
- Set Speed (e.g., 10–20 mm/s depending on material)
- Set Power (e.g., 80–100%)
- Set Passes (usually 1 for thin material)
You can also create multiple layers:
- One for cutting
- One for engraving
- One for scoring
6. Check for Common Issues
Before running your job, check:
- Open paths (use “Edit → Close Path” if needed)
- Duplicate lines (can cause double cuts)
- Correct size and scale
- Design inside workspace
Use Preview (Alt + P) to simulate the job.
7. Save Your File
You have two main options:
- .LBRN / .LBRN2 → keeps everything (recommended)
- Export as SVG/DXF → for sharing or reuse
8. Frame and Run the Job
Before cutting:
- Click Frame to preview the position on your material
- Adjust placement if needed
- Start the job
Always stay nearby while cutting.
Pro Tips for Better Results
- Use air assist for cleaner cuts
- Test settings on scrap material first
- Keep your design simple and clean
- Use a honeycomb bed to reduce burn marks
- Make sure your material is flat and secure
Common File Problems (And How to Fix Them)
1. The Laser Won’t Cut the Design
Cause: Raster file or thick lines
Fix: Convert to vector and use thin stroke lines
2. Double Lines or Overlapping Cuts
Cause: Duplicate paths
Fix: Remove overlapping lines in your design software
3. Design Imports as an Image
Cause: File exported incorrectly
Fix: Re-export as SVG or DXF with vector paths enabled
4. Wrong Size After Import
Cause: Unit mismatch (mm vs inches)
Fix: Check export settings and scale inside your software
Final Thoughts
When it comes to laser cutting, the file type matters just as much as your machine settings.
If you remember one thing, make it this:
Use vector files (SVG, DXF, AI) for cutting, and raster files (PNG, JPG) for engraving.
Get your file right, and everything else—from clean cuts to consistent results—becomes much easier.
Frequently Asked Questions
What file types are best for laser cutting?
For laser cutting, vector files are best. Common formats include.SVG, .DXF, .AI, .EPS, and properly prepared vector-based PDFs. These files contain precise path information that the laser follows to cut accurately.
Can I use a JPEG or PNG file for laser cutting?
No, JPEG and PNG files are raster (pixel-based) images. They are suitable for engraving (especially photo engraving), but not for cutting, because they don’t contain the vector path data that a laser needs to follow for cuts.
Is a DXF file good for laser cutting?
Yes! DXF files are one of the most widely accepted formats for laser cutting. They are vector-based, widely compatible with different laser software, and ideal for precise mechanical and artistic cutting projects.
What should I check before sending my file for laser cutting?
Make sure that:
All lines are vectors, not pixels.
Shapes are closed paths for cutting.
Text is converted to outlines to avoid font errors.
Layers and colors are properly assigned (e.g., red for cuts, blue for scores, black for engraves, depending on the machine’s setup).
Line thickness is set to hairline or very thin for cut paths.
Can I use a PDF file for laser cutting?
Yes, but only if it is a vector-based PDF. A vector PDF contains paths and curves, which lasers can follow. If the PDF only contains scanned images or embedded bitmaps, it can only be used for engraving, not cutting.