Laser engraving is a powerful tool for makers, hobbyists, and business owners alike—but it comes with a learning curve.
Whether you’re just starting out or looking to improve your results, understanding the most common mistakes can save you time, material, and frustration.

Here are the top 10 laser engraving mistakes and the best ways to avoid or fix them.
Table of Contents
1. Incorrect Focus Distance

The mistake:
Engraving looks blurry or cuts don’t go through.
Why it happens:
The laser isn’t focused at the correct height, so the beam loses power and precision.
How to fix it:
Incorrect focus is one of the fastest ways to ruin engraving quality—but it’s also one of the easiest fixes.
1. Set the Correct Focus Height
Adjust the distance between the laser head and the material so it matches your machine’s focal point.
- Use the focus tool or spacer that came with your machine
- Lower or raise the laser head until it touches the spacer
- Make sure the spacer sits flat on the material
2. Use Auto-Focus (If Available)
If your machine has auto-focus, use it before every job. It’s faster and more consistent than manual adjustment.
3. Refocus When Changing Materials
Different thicknesses = different focus points.
- Switching from 3mm plywood to thicker wood? Refocus
- Engraving curved or uneven surfaces? Check multiple points
4. Make Sure the Material Is Flat
Warped or uneven material can throw off focus.
- Use weights, magnets, or clamps
- Work on a level surface
5. Clean the Lens
A dirty lens can mimic focus problems.
- Use a proper lens cleaner and wipes or swabs
- Avoid paper towels or rough materials
We recommend using the Eclipse Optic Cleaning Solution with Wellgler’s Lint-Free Cleaning Swabs for excellent results.


6. Run a Quick Test
Before starting your final project:
- Do a small test engraving
- Check for sharp lines and clean edges
- Adjust slightly if needed
Quick Tip
If your engraving looks blurry or your cuts aren’t going through, focus is the first thing to check. Getting this right makes a huge difference in both quality and consistency
2. Using the Wrong Speed and Power Settings
The mistake:
Burnt designs or barely visible engravings.
Why it happens:
Too much power causes charring. Too little power results in weak engraving.
How to fix it:
Getting speed and power right is key to clean engraving and cutting. If your results look off, here’s how to fix it.
1. Start With Recommended Settings
Use manufacturer guidelines or a trusted settings chart as your baseline. Don’t jump straight to 100% power.
2. Adjust in Small Steps
Make gradual changes instead of big jumps:
- Too dark or burnt? → Lower power or increase speed
- Too light or not visible? → Increase power or slow down
Adjust by about 5–10% at a time until you get the result you want.
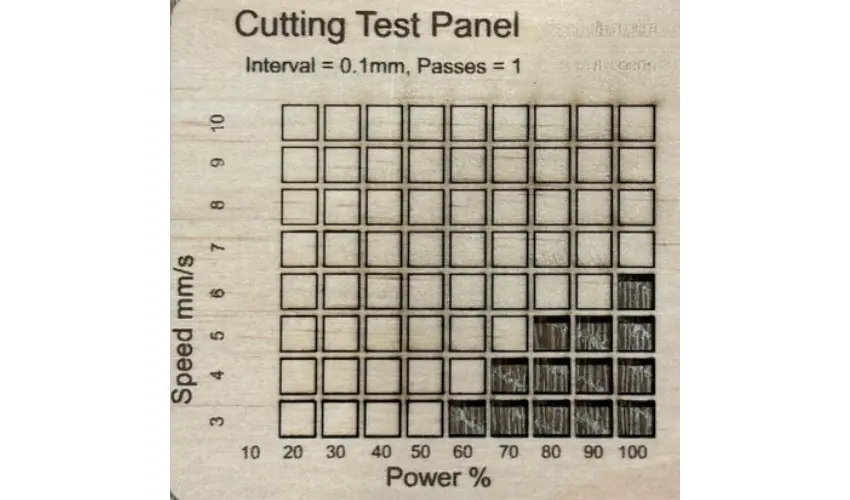
3. Run a Test Grid
Create a small test grid with different speed and power combinations.
- Helps you find the best settings quickly
- Saves material in the long run
- Gives you a repeatable reference
4. Match Settings to Material
Different materials react differently:
- Wood burns easily → use moderate power
- Acrylic melts → use faster speeds
- Leather scorches → use lower power
Always test when using a new material.
5. Watch the Results in Real Time
Pay attention while the laser is running:
- Heavy smoke or strong burning smell → too much power
- Weak marks or incomplete cuts → not enough power
Quick Rule
- More power + slower speed = deeper, darker results
- Less power + faster speed = lighter, cleaner results
Final Tip
There’s no universal setting that works for everything. The best approach is to test, adjust, and keep notes so you can reuse successful settings later
3. Skipping Air Assist
The mistake:
Burn marks, smoke stains, and rough edges.
Why it happens:
Without airflow, heat and debris build up during engraving and cutting.
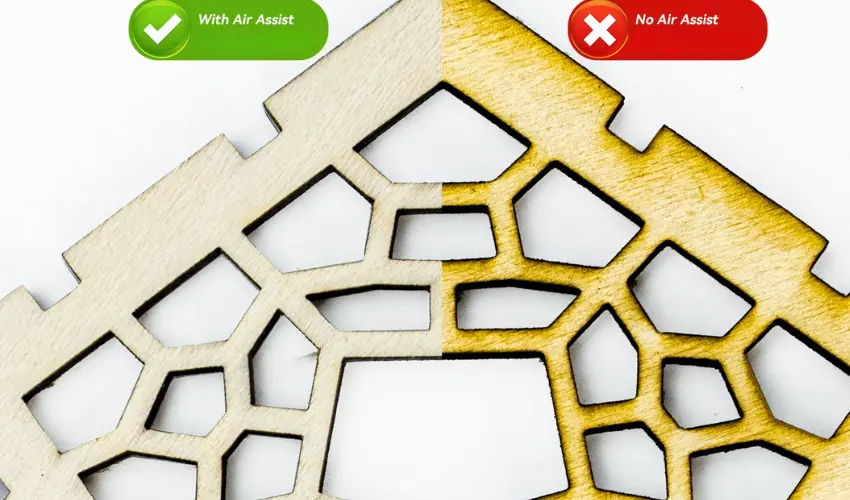
How to fix it:
Use an air assist system to clear smoke and cool the material. This improves quality and reduces fire risk.
4. Not Masking the Material
The mistake:
Smoke stains around engraved areas.
Why it happens:
Smoke residue settles on the surface and gets baked into the material.
How to fix it:
Apply masking tape or transfer tape before engraving. Remove it after for a clean finish.
We recommend TapeManBlue Wide Painters Tape, which yields excellent results.
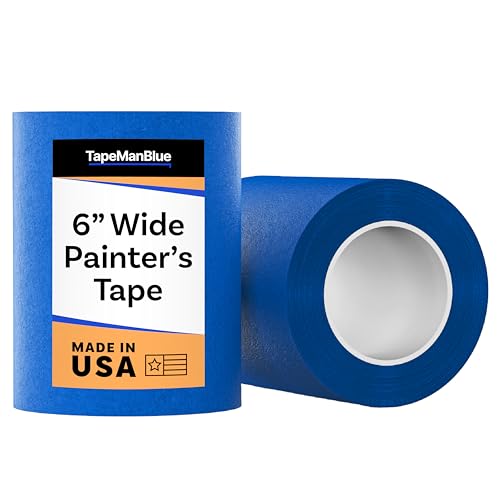
- SUPERIOR ADHESION & CLEAN REMOVAL: Our wide blue painters tape, perfect as 3D printer tape or laser masking tape, removes cleanly without residue, streaks, or stains for up to 21 days. Unlike other painting tape or masking tape that peels prematurely, TapeManBlue's extra wide painters tape stays put on your surfaces. Whether you're using it as 3D printing tape, for laser engraving, or general painting projects, our thick painters tape delivers reliable performance every time.
5. Wrong DPI (Resolution) Settings
The mistake:
Low detail or unnecessarily long engraving times.
Why it happens:
Incorrect DPI settings either reduce quality or waste time.
How to fix it:
Wrong DPI can either ruin detail or waste a lot of time. The fix is simple once you understand what to adjust.
1. Use the Right DPI for the Job
Match DPI to your project type:
- 250–300 DPI → Best for most wood engraving
- 300–318 DPI → Detailed images or photos
- 150–200 DPI → Large designs or faster jobs
Higher isn’t always better.
2. Avoid Overly High DPI
If your job is taking too long with no visible improvement:
- Lower the DPI
- Reduce heat buildup and burning
Most materials won’t benefit from anything above ~300 DPI.
3. Increase DPI for Better Detail (If Needed)
If you see visible lines or gaps:
- Increase DPI slightly
- Check if the image resolution is high enough
4. Match DPI to Image Quality
Low-resolution images won’t improve with higher DPI.
- Use high-quality images for engraving
- Avoid stretching small images
5. Run a Quick Test
Engrave a small sample with different DPI settings to compare:
- Look for smooth shading
- Check for visible scan lines
- Balance quality vs speed
Quick Tip
If you can see lines in your engraving, increase DPI
If your job is slow with no quality gain, lower it
6. Using the Wrong File Format
The mistake:
Blurry lines or poor-quality designs.
Why it happens:
Raster images (JPG, PNG) are not ideal for sharp lines.
How to fix it:
Use vector files (SVG, DXF) for logos and line work. Use high-resolution images for photos.
7. Not Securing the Material
The mistake:
Design shifts or misalignment during engraving.
Why it happens:
Movement caused by vibration or airflow.
How to fix it:
Secure materials using clamps, magnets, tape, or pins to keep everything in place.
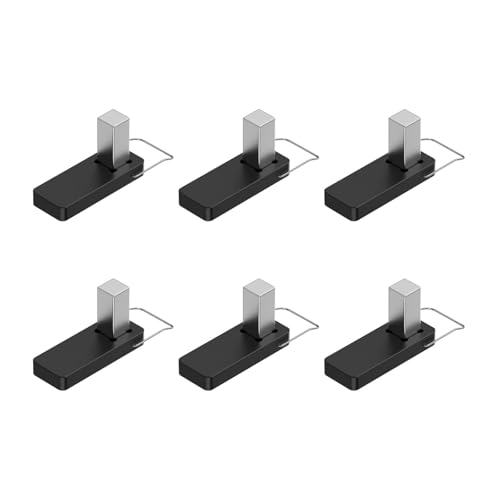
- It is made of strong plastic and magnets that press down on the wood for a clean and consistent cut on warped boards
8. Ignoring Ventilation
The mistake:
Strong fumes, residue buildup, and unsafe working conditions.
Why it happens:
Laser engraving produces smoke and harmful particles.
How to fix it:
Bad ventilation isn’t just annoying—it’s a safety issue. Here’s how to fix it properly.
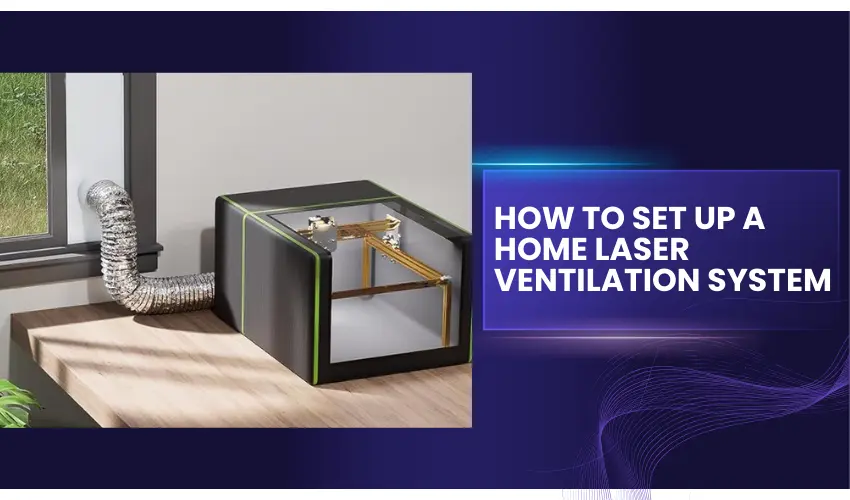
1. Vent Air Outside
The best solution is to direct fumes outside your workspace.
- Use an exhaust hose connected to your laser
- Route it through a window or wall vent
- Keep the hose as short and straight as possible
2. Upgrade Your Exhaust Fan
Built-in fans are often weak.
- Add an inline duct fan (4” or 6”)
- This increases airflow and removes smoke faster
3. Use a Fume Extractor
If venting outside isn’t possible:
- Use a fume extractor with activated carbon filters
- This helps remove odors and harmful gases
4. Seal Your Enclosure
Air leaks reduce efficiency.
- Check for gaps in your laser enclosure
- Seal openings so airflow is properly directed
5. Improve Airflow Inside the Machine
- Clean vents and fans regularly
- Make sure nothing is blocking airflow
- Use air assist to push smoke away from the cut area
6. Work in a Ventilated Space
If you’re using an open-frame laser:
- Work in a garage or near an open window
- Avoid small, enclosed rooms
Quick Tip
If you can smell smoke lingering or see haze in the air, your ventilation isn’t strong enough
9. Skipping Test Cuts
The mistake:
Wasted materials due to incorrect settings.
Why it happens:
Every material reacts differently to laser settings.
How to fix it:
Run a test grid on scrap material before starting your final project.
10. Using Unsafe Materials
The mistake:
Toxic fumes, poor results, or machine damage.
Why it happens:
Some materials release dangerous chemicals when cut or engraved.
How to fix it:
Avoid materials like PVC, vinyl, and unknown plastics. Stick to laser-safe materials such as wood, acrylic, and leather.
Laser Engraving Mistakes Final Tip: Keep a Laser Journal
Record your settings, materials, and outcomes. This not only helps you learn faster but also builds a valuable reference for future projects.
Final Thoughts
Most laser engraving problems come down to a few simple mistakes. The good news is they’re easy to fix once you know what to look for.
By avoiding these common issues and taking time to test your settings, you’ll get:
- Cleaner engravings
- Better cutting results
- Less wasted material
- More consistent projects
Master these basics, and your laser engraving results will improve immediately.
Frequently Asked Questions
What is the most common mistake in laser engraving?
One of the most common mistakes is using the wrong speed and power settings. Too much power can burn the material, while too little won’t engrave properly. Always run test settings before starting your final project.
Why does my engraving look blurry or unclear?
Blurry engraving is usually caused by:
Incorrect focus
Dirty lens or mirrors
Too high speed or low power
Make sure your laser is properly focused and your optics are clean.
Why are my cuts not going all the way through?
This often happens due to:
Insufficient power
Too high speed
Poor air assist
Incorrect focus height
Try slowing down the speed, increasing power, or adding more passes.
How do I avoid burn marks on wood?
To reduce burn marks:
Use air assist
Apply masking tape to the surface
Adjust speed and power settings
Ensure proper ventilation
These steps help keep edges cleaner and reduce charring.
Why is my design not aligned correctly on the material?
Misalignment can be caused by:
Incorrect origin settings
Material shifting during engraving
Camera calibration issues (if using one)
Always secure your material and preview the job before starting.