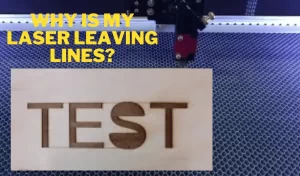
You may be asking why is my laser leaving lines? Laser engraving is a popular method for adding designs to various materials. You can create beautiful, intricate designs with laser engraving. However, problems may occur, like leaving lines, and you wonder why this happens.
This could be caused by the laser beam moving back and forth over the surface, removing material in an uneven pattern. Lines can also be left behind depending on the speed at which the laser is traveling. It could also be because of contamination on the surface being engraved.
In this post, I’ll take a look at some of the potential causes of this problem and offer some solutions. So, if you’re troubleshooting why your laser is leaving lines, read on.
Table of Contents
Causes of Laser Leaving Lines
Read on for a detailed discussion of some of the potential causes for laser leaving lines:
Unstable or Weak Laser Beam
The laser beam can be weakened or destabilized due to misalignment of the components in the system, such as lenses and mirrors. It can also be due to poor maintenance resulting in an uneven pattern being created as it moves across the engraved surface.
This will further cause it to be unable to remove the material consistently, resulting in lines being left behind.
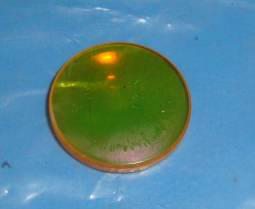
- Problem: Dust, smoke, and debris on lenses or mirrors distort the laser beam, causing inconsistent burns and lines.
- Fix: Regularly clean your optics with a lens-safe cleaner and inspect for scratches or cracks. Replace damaged components.
Also Read:

When Should I Replace My CO2 Laser Tube

CO2 Laser Cutter Calibration Issues and How To Correct Them
Improper Mirror Alignment & Focus of Laser Beam
It is important that the mirrors are aligned and the laser beam focused correctly; otherwise, it will not be able to engrave the design accurately. If the laser beam is not focused correctly, it can cause uneven patterns or lines on the material being engraved, especially when it is a curved surface.
Check if the focal length is correct, especially after the lens is cleaned or replaced. Pay attention to the direction of the focusing lens. Adjust the correct installation direction and focal length of the focusing lens.
- Problem: If the laser mirrors are not aligned and the lens is not focused properly, the beam may flare or scatter, resulting in blurry edges and overlapping lines.
- Fix: Use your machine’s autofocus feature or manually set the correct focal distance based on your lens type. Use a mirror alignment tool to ensure that the mirrors are perfectly aligned. We recommend using the American Photonics Alignment Tool for precise alignment of mirrors and the lens head.
American Photonics CO₂ Laser Mirror Alignment Tool – A Game-Changer for CO₂ Laser Alignment

The American Photonics Mirror Alignment Tool is a must-have accessory for anyone working with CO₂ laser cutters or engravers. Designed to simplify and speed up the mirror alignment process, this tool is quicker, safer, and far more precise than traditional methods. Whether you’re a hobbyist or a professional, this tool can significantly improve your laser’s cutting and engraving accuracy.
Precise Mirror & Lens Head Alignment
Available in multiple sizes (19mm, 16mm K40+, 16.15mm, 17mm, 18mm, 20mm, 21mm, 22mm, 23mm, 24mm, 25mm, and K40), this tool ensures compatibility with a wide range of laser machines. What makes it special is that it aligns mirror #3 directly to the lens, not the Z-axis, giving you true optical alignment every time.
Always-On Red Laser for Quick and Safe Alignment
The built-in red laser provides a continuous visual cue during alignment, making the process faster and safer compared to the traditional scorch mark method. This tool doesn’t replace the scorch method for aligning mirror #1, but it does provide perfect alignment for mirrors #2 and #3, making your workflow much more efficient.
Step-by-Step Alignment Made Simple
The reverse alignment tool is incredibly easy to use:
- Insert the tool into the lens tube.
- Align mirror #3 to #2, then mirror #2 to #1 using the red dot as your guide.
- Mark target spots with tape, adjust your laser tube and mirrors accordingly.
- Finish by aligning mirror #1 to the laser head entry point.
The tool even highlights if your gantry is out of level, a common but often overlooked issue that can impact beam consistency across the bed.
Why It Stands Out
- Aligns the 3rd mirror to the center of the lens, not just mechanically.
- Always-on red laser speeds up the process and increases safety.
- Eliminates guesswork and minimizes human error.
- Helps diagnose gantry leveling issues during the process.
- Compatible with a wide range of mirror sizes and machines.
The American Photonics Mirror Alignment Tool is a powerful upgrade for any CO₂ laser user. It turns a traditionally tedious and error-prone task into a fast, accurate, and frustration-free process. Whether you’re upgrading your alignment process or troubleshooting beam inconsistencies, this tool will quickly prove its value.
Highly recommended for laser engraver owners who demand precision and reliability.
High or Low Engraving Speed
The laser traveling too fast over the surface can cause residue material to be burned and melted instead of vaporized. This will leave an uneven pattern on the surface that can look like lines.
When the engraving speed is too slow, the material may not be properly vaporized. This can lead to residue being left behind, which can look like lines.
- Problem: Using too much power or running the laser too slowly can overburn the material, causing visible lines or grooves.
- Fix: Adjust your speed and power settings. Run test passes to find the optimal combination for clean, smooth results.
Contamination on the Engraving Surface
If there is dust, dirt, or other contaminants on the surface being engraved, this could cause a decrease in quality and lines appearing in the engraving. It is crucial that you keep your working area clean to ensure the best results.
Material Movement or Vibration
- Problem: Slight movement during cutting or engraving can cause ghost lines, doubled edges, or misaligned details.
- Fix: Secure the material firmly to the bed using clamps, magnets, or a honeycomb platform to prevent shifting.
Beam Reflection or Bouncing
- Problem: Materials like metal or acrylic can reflect the laser beam, creating ghost lines or secondary marks.
- Fix: Use proper laser settings and test your material first. Apply masking tape or coating to reduce reflection on shiny surfaces.
Scanning Offset or Stepper Motor Issues
- Problem: Misaligned motors or backlash in the scanning system can cause horizontal lines in raster engraving.
- Fix: Recalibrate the scanning offset in your software and inspect belts or gears for looseness or wear.
Software Artifacts or Resolution Mismatch
- Problem: Low-resolution artwork or incompatible file formats may cause visible pixel lines during engraving.
- Fix: Use high-resolution images and vector files whenever possible. Check DPI settings (300–600 DPI is ideal).
Operator Error
Finally, operator error can cause lines to appear in laser engraving. If the settings are incorrect or the operator is not experienced with using the machine, this could result in uneven patterns being left behind on the material. For example, if you’re making multiple passes over the same area, then that could lead to lines.
Pro Tips To Reduce Laser Leaving Lines
- Use the American Photonics Mirror Alignment Tool: For Precise Mirror & Lens Head Alignment.
- Use Air Assist: Helps blow away debris, prevents burning, and improves line quality.
- Choose the Right Material: Some materials engrave more cleanly than others. Test before running a large project.
- Engrave at 90° Angles: If you notice lines in one direction, try rotating the design or changing the scan angle.
- Enable Overscanning: This allows the laser head to accelerate/decelerate outside the engraving area, avoiding edge burn.
- Upgrade Motion System: For frequent line issues, a better stepper or servo system may be worth the investment.
Routine Maintenance To Reduce Laser Leaving Lines
Unwanted lines or marks during laser engraving and cutting are a common issue—but with the right maintenance routine, you can significantly reduce or even eliminate them. Whether you’re a hobbyist or run a production shop, regular upkeep helps your machine perform at its best. We’ll cover the essential routine maintenance tasks to help reduce laser leaving lines and keep your results clean and professional.
Clean Optics Regularly (Lenses & Mirrors)
Why It Matters:
Dust, smoke, and debris can build up on your laser’s mirrors and focus lens, scattering the beam and causing uneven power delivery. This often results in faint lines, inconsistent engraving, or double lines.
How Often:
- Every 20–40 hours of use
- After working with materials that produce heavy smoke or residue (e.g., wood, leather)
How to Do It:
- Use lens wipes or optics-safe cleaner
- Avoid touching lenses with bare hands
- Replace damaged optics immediately
Check and Adjust Focus

Why It Matters:
Incorrect focus causes the beam to flare or spread, reducing precision and leading to blurry or lined engravings.
How Often:
- Before every new project or material
- After changing lens or machine adjustments
Pro Tip:
Use a focus gauge or perform a ramp test to verify focus is dialed in.
Tighten and Inspect Belts, Rails, and Screws
Why It Matters:
Loose belts or wobbly gantries cause vibration, leading to wavy or jagged lines. This is especially noticeable during raster engraving.
How Often:
- Weekly or every 50 hours of use
- After transporting your machine
Checklist:
- Check for slack in X/Y belts
- Inspect for rail debris and clean with isopropyl alcohol
- Ensure screws on frame and carriage are tight
Maintain Air Assist and Exhaust Systems
Why It Matters:
Air assist clears debris from the beam path and cools the surface, preventing scorching and buildup. A weak or blocked air stream can cause charring and visible lines.
How Often:
- Inspect before each session
- Clean nozzles weekly
- Replace air filters as needed
Tips:
- Upgrade to an external compressor for better air volume
- Clean your exhaust fan and ducting monthly
Realign Mirrors and Laser Beam Path

Why It Matters:
Even minor misalignment can cause the laser to lose energy or hit the edge of the nozzle, leading to inconsistent cuts and ghost lines.
How Often:
- Monthly or after optics maintenance
- After moving your machine
How:
- Use tape burn tests to align the beam path through all mirrors and lens
Pro Tip: Use the American Photonics Mirror Alignment Tool for perfect CO2 Laser Mirror Alignment
Check Water Cooling System (For CO₂ Lasers)
Why It Matters:
Overheating can reduce tube efficiency, leading to inconsistent output and visible engraving artifacts like lines or patches.
How Often:
- Check water levels weekly
- Replace distilled water monthly
Tips:
- Use only distilled or reverse osmosis water
- Install a water chiller for better cooling stability
Update Firmware and Software Settings
Why It Matters:
Outdated firmware or incorrect software settings (like overscanning or stepper motor tuning) can cause scanning artifacts and line issues.
How Often:
- Every 1–3 months
- When troubleshooting persistent issues
Tips:
- Enable overscanning for cleaner raster edges
- Use 300–600 DPI resolution for detailed engraving
Most unwanted lines in laser engraving and cutting are due to simple issues like dirty optics, poor focus, or machine instability. A consistent maintenance routine—from cleaning lenses to checking belts—will go a long way in keeping your laser machine running smoothly and your output looking flawless.
Take time to care for your machine, and it will reward you with cleaner cuts, sharper engravings, and fewer surprises!
Frequently Asked Questions
Why is my laser engraving leaving horizontal lines across the design?
Horizontal lines are often caused by dirty optics, misaligned scanning offsets, or stepper motor backlash. Clean the lens and mirrors, calibrate your scanning settings in the software, and inspect belts or gears for looseness or wear.
Why do I see faint ghost lines around my cuts or engravings?
Ghost lines are typically the result of material movement or laser beam reflections, especially on glossy surfaces like metal or acrylic. Secure your material firmly and consider applying masking tape or a coating to reduce reflections.
Can poor focus cause lines or marks in my engraving?
Yes. An out-of-focus laser beam spreads or flares, causing uneven lines and burned edges. Make sure your laser is properly focused using either an autofocus function or a manual focus gauge suited to your lens.
How do I prevent overburning and groove lines during cutting?
Overburning is usually caused by too much power or slow speeds. Adjust your settings for a cleaner cut—try lowering the power or increasing the speed. Always run test cuts to find the right balance for your material.
Could my artwork or file settings be causing line issues?
Absolutely. Low-resolution files or improper DPI settings can create visible engraving lines or pixelation. Use high-resolution raster images (300–600 DPI) or clean vector files to avoid software artifacts during engraving.
Final Thoughts
If your laser is leaving unwanted lines, the issue is often related to dirty optics, unstable materials, or incorrect settings. By performing routine maintenance and fine-tuning your machine’s focus, speed, and power, you can eliminate most of these problems and get back to creating smooth, clean engravings and cuts.
Need help dialing in your settings or cleaning procedures? Reach out, and we’ll help troubleshoot your setup!