3D laser engraving on wood is a unique process involving high-powered laser technology to engrave designs, patterns, and textures on wooden surfaces that give off the look and feel of three-dimensional depth. These designs can be incredibly intricate and complex, so there is no limit to what creative types can do with wood.
This guide will explain everything you need to know about 3D laser engraving on wood. We will cover how to use a laser engraving machine to create designs with texture and depth on wooden surfaces, and we will also even explain how to prepare the wooden surface for 3D engraving and avoid making basic mistakes.
If you are ready to learn valuable tips and techniques for 3D laser engraving on wood, you have come to the right place!
Table of Contents
What is 3D Laser Engraving on Wood?
Traditional laser engraving burns away material at a uniform depth, creating a flat image (2D). In contrast, 3D laser engraving removes wood in varying depths across the design to create shadows, depth, and dimension, similar to carved reliefs.
Think of it as digitally sculpting wood. The laser engraver follows height or grayscale data from the artwork, burning deeper in darker areas and shallower in light areas to form a three-dimensional effect.
How Does 3D Laser Engraving On Wood Work?
To achieve a true 3D laser engraving, you need:
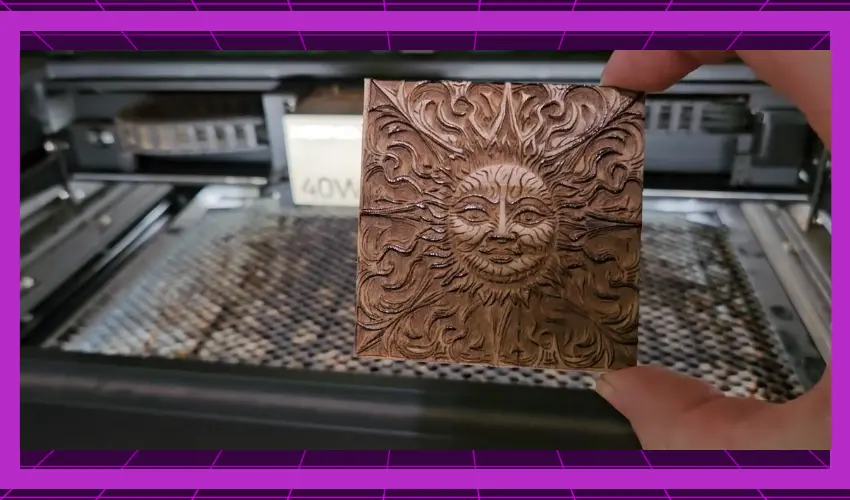
- A powerful laser engraver (usually a CO₂ or Diode laser with at least 40W+)
- A grayscale heightmap or relief file (an image where black = deepest carve and white = shallowest)
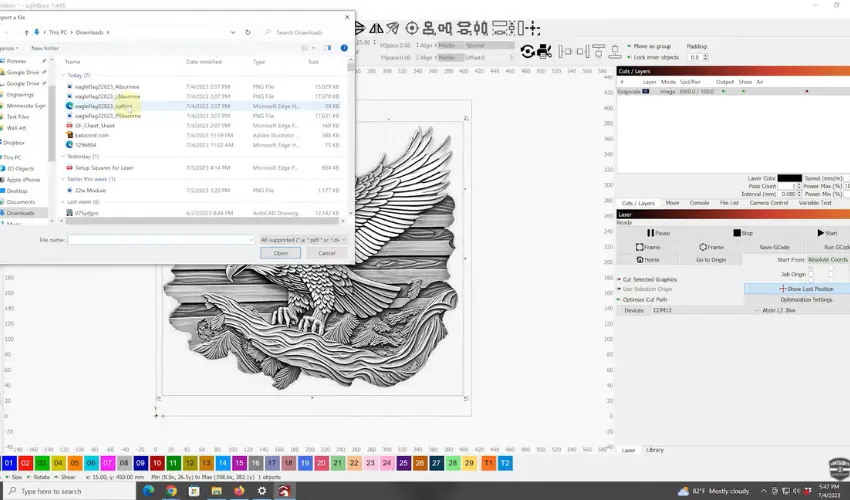
- Correct laser software (LightBurn, xTool Creative Space advanced mode, EZCAD, etc.)
- Multiple passes with different power levels, or a continuous power modulation mode
The laser engraving software translates different shades of gray into different power/speed levels, carving deeper where the image is darker.
What Kind of Laser Do You Need for 3D Laser Engraving On Wood?
Not every laser is capable of true 3D engraving. Here’s a quick overview:
Laser Type | 3D Engraving Capability | Best For |
|---|---|---|
CO₂ Laser | Yes (best option) | Wood, acrylic, leather |
Diode Laser (20W+) We recommend a 40W+ For Best results | Limited, slower | Basic 3D effects, small reliefs |
Fiber Laser | Not suitable for wood | Metals & plastics only |
Why We Recommend the xTool P2 CO₂ for 3D Laser Engraving On Wood
- Powerful 55W CO₂ Laser Output
Provides the strength needed to carve deeper layers into hardwoods in a single pass — essential for creating layered and sculpted 3D effects. - Dynamic Autofocus & 3D Mapping
The P2’s onboard sensors can automatically detect material thickness and adjust focal height, allowing it to engrave at multiple depth levels with consistent detail. - Grayscale & Relief Engraving Mode
Supports grayscale engraving, where the machine interprets different shades as different burn depths — perfect for creating sculpted relief portraits, landscapes, or topographical maps. - Large Work Area & Material Support
With a 26″ x 14″ working area, you can engrave bigger designs or batch multiple pieces at once. Works exceptionally well with wood, bamboo, leather, acrylic, and more. - Water Cooling + Air Assist = Clean Results
Integrated air assist and water cooling help prevent charring or burning during deep carving so your 3D relief engravings stay clean and precise. - Compatible with 3D Design Workflow
Supports importing layered grayscale bitmap images from tools like Photoshop or Procreate, so your 3D carving projects translate beautifully into wood.

Why We Recommend the xTool S1 40W Diode Laser for 3D Laser Engraving On Wood
- Industry-Leading Diode Power (40W)
Delivers strong, concentrated beam power capable of carving wood deeply enough for dimensional or relief-style engraving. - High Precision & Fine Detail
Its 0.08 mm compressed spot size allows for extremely sharp grayscale engraving and smooth shading — essential for 3D texture effects. - Grayscale & Relief Engraving Support
Works with grayscale images and layer-based height maps to simulate 3D depth in wood, producing sculpted or embossed-style designs. - Autofocus + Height Adjustment
Intelligent focusing and adjustable Z-axis ensure consistent depth of field, especially useful for layered carving or uneven wood surfaces. - Fast Carving Speed & Stability
Rigid structure and high-speed engraving reduce burn marks while efficiently carving deeper passes — ideal for creating 3D reliefs or topographic designs. - Safe and Enclosed Design
The enclosed chassis and Class 1 safety design make high-power 3D carving projects safer and more beginner-friendly compared to open-frame lasers.

What Are the Advantages of 3D Laser Engraving on Wood?
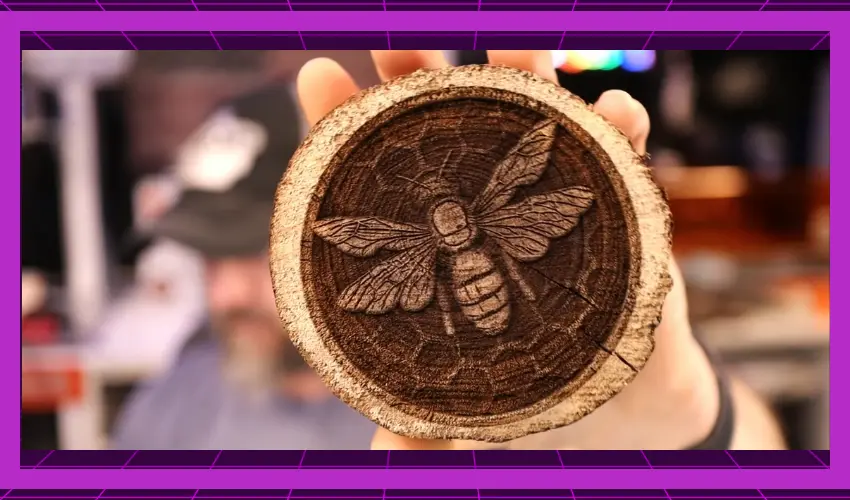
The main advantage of 3D laser engraving wood is the incredible level of detail you can achieve, thanks to the precision and accuracy of a laser beam. The focused laser beam used to engrave the wood can create sharp and clean lines, meaning your designs can be incredibly intricate.
The level of detail you can achieve with laser engraving would be nearly impossible to replicate with traditional carving methods. The accuracy is incredible, and the software used to control a 3D laser engraving machine makes it very easy to be creative.
Whatever designs and textures you dream up, you can easily create them using user-friendly design software. Once your designs are complete, you can upload them to your laser engraving machine; then, the machine will do the rest.
Laser engraving wood is also far less labor-intensive than traditional carving methods. Using laser engraving, you can engrave complicated and customized designs quickly and without much effort. This means even beginners can engrave personalized wooden objects and surfaces.
The Importance of Understanding the Process of 3D Laser Engraving on Wood
Before we get into the process you will follow, it’s worth explaining why it is so important to have a firm grasp of the entire process from start to finish. Knowing the process will help optimize your designs, so your laser engraving machine can create your vision.
It will also help to inform your material choices, meaning which types of wood you will choose for your upcoming engraving projects. Understanding the entire process also helps keep the whole process more efficient, as you will know exactly what to do to engrave wood using a laser engraving machine.
The Step-by-Step Process of 3D Laser Engraving on Wood
Now that you know more about what laser engraving wood is and the many advantages this engraving method offers, we can jump into the process of creating a laser-engraved wooden object.
Remember, no matter how experienced you are with laser engraving wood, you should always follow the relevant safety precautions. Always work in a well-ventilated space, wear protective gear, and follow the manufacturer’s safety instructions when operating a laser engraving machine.
Now that we have gotten that out of the way, let’s dig in to the details.
1. Conceptualization and Design
A. Choosing the Right Software
While personal preference always plays a role when choosing design software, you must use a program compatible with your laser engraving machine. Popular software options for laser engraving wood include Adobe Illustrator, CorelDRAW, AutoCAD, and SketchUp.
When choosing between software options, check the instruction manual provided by your laser engraver manufacturer. If you have multiple options, you should also consider the design software’s 3D modeling capabilities and how easy it is to export designs and convert them to vector images so that you can scale them up or down.
If your laser engraving machine is compatible with various design programs, we always recommend choosing the software you are familiar with, as this will make the design process much more intuitive.
B. Creating Your 3D Model
Once you have chosen a type of design software compatible with your laser engraving machine, use it to design your own 3D model or import an existing model you would like to engrave.
If you want your model to work well, ensure it is scalable. Optimize the engraving depth with the wood you plan to engrave. One of our favorite tips is to simplify complex designs whenever possible. The less complicated your design is, the better it will look when engraved into the wood.
Preparing 3D Files & Artwork
To engrave in 3D, your image must encode depth. You can prepare your artwork in two main ways:
Grayscale Heightmaps
- Black = deepest cut
- White = shallowest cut
- Use Photoshop, GIMP, or online heightmap generators
3D Models Converted to Heightmaps
- Create or download a 3D model (.STL, .OBJ)
- Convert to a grayscale depth map using software like Blender, Reliefmod, or HeightMap2Laser
Make sure to export a high-resolution PNG or BMP image — the smoother the grayscale gradient, the smoother your 3D carve.
2. Preparing the Wood for Engraving
A. Choose the Right Wood
Once you are satisfied with your design, it is time to choose the wood you will be engraving. Material selection is crucial for any laser engraving project, but it is particularly important when engraving wood. This is because different types of wood have different properties.
Hardwoods, like maple and oak, can be more expensive but far more durable, so your finished engraved object should last longer. On the other hand, softwoods, like pine and birch, are easier to work with, as the reduced density of the woods makes it easier for the laser system to carve.
Choose hardwoods that engrave evenly and show contrast. Some favorites include:
- Basswood – Soft, consistent, easy to carve
- Maple – Smooth grain, good for detailed 3D reliefs
- Walnut – Dark contrast, rich finishes
- Cherry – Good for fine details, medium hardness
Avoid plywood and MDF — they engrave inconsistently and have glue layers that ruin detail.
No matter what you hope to engrave, wood selection is always important. Always consider the grain of the wood and the density and hardness of the type of wood you have chosen.
B. Prepare the Surface of the Wood
No matter which type of wood you have chosen to engrave, you must ensure it is prepared for laser engraving. To start, clean the surface of the wood and make it smooth using fine-grit sandpaper. Sand the wood until you have removed all dirt and excess roughness from its surface.
We recommend using small, circular motions, as this helps to give the wood an even and uniform surface. Make sure you wipe the wood down afterward, as this will remove any debris from your sanding efforts.
3. Engraving the Design
A. Setting Up the Laser Engraving Machine
Ensure you have properly configured the laser system settings and that the design you have uploaded has accounted for engraving depth at various points of your design.
You will also want to ensure that the laser engraver is used on a stable surface and that the room has proper ventilation. Remove any flammable material from the area. Once you are ready, securely position the wood so your laser engraver can work with high stability.
B. Running the Engraving Job

If your wood has been positioned and secured and your laser engraving machine is ready, you can begin engraving. Send your design file to the machine and initiate the engraving job.
- Generate or import your grayscale file (heightmap)
- Import into Laser Software (LightBurn, XCS, etc.)
- Set parameters:
- High DPI: 300–600
- Low speed: 100–300 mm/min
- Varying power or grayscale mode
- Run test samples! (Start with small blocks before the final piece)
We always recommend monitoring the process, as this is important for accuracy. If you do so safely, you can make minor adjustments if the engraving process is not going as planned.
Once again, it is of vital importance that you follow proper safety precautions throughout the engraving process.
4. Finishing and Post-Processing
A. Cleaning the Freshly Engraved Wood
You can turn your laser engraver off once your design has been successfully engraved onto the wood. Unplugging the machine before retrieving your freshly engraved wood surface is always a good idea.
You can now begin removing excess debris from the surface of the wood. A soft-bristled brush or compressed air canister will do the trick. Removing loose particles and dust from the surface of the wood is essential, especially before you add any sort of varnish or color to it.
For best results, we recommend smoothing out any rough areas. Use fine-grit sandpaper to give any rough patches or blemishes a light sanding. While laser engravers usually leave smooth lines and clean engravings, you may notice a few rough spots and burns if using an entry-level machine.
Detailed Information on how to clean laser engraved wood can be found here
B. Add Color and Texture
This step is optional, but you can make your engraved design pop by adding color and stains to the wood. Depending on what you use, apply your wood stain, dye, paint, or other finish to the engraved design, then allow it to dry completely.
If you would like to add more texture to your design, you can also consider techniques like sandblasting the wood, burnishing, or even laser engraving a secondary, lighter design to the wood. While these texturing techniques can take some practice, they are a great way to add different effects to your wood.
Lightly charring the wood is another way to add texture and give your finished design a rustic look, but you need to be incredibly careful not to expose the wood to too much heat, or it could ruin your design.
Detailed information on How to Achieve the Perfect Laser Engraving Paint Effect can be found here
Tips for Best Results
- Use Air Assist to keep edges clean
- Do multiple shallow passes rather than one deep one
- Use a honeycomb or stable base to avoid warping
- Seal finished work with mineral oil or varnish to highlight detail
Frequently Asked Questions
What is the difference between regular laser engraving and 3D laser engraving on wood?
Regular laser engraving burns the surface of the wood at a single depth to create flat designs. 3D laser engraving uses varied laser power and focal adjustments to carve wood at different depths, creating layered or sculpted effects like relief art, topography, or grayscale portraits. In short: regular engraving is flat, 3D engraving has depth and dimension.
What type of laser engraver is best for 3D engraving wood?
A CO₂ laser engraver with at least 40W–80W of power is recommended. These machines can engrave deeper into hardwood and support grayscale or relief engraving modes. Machines like the xTool P2 are great because they offer autofocus and powerful laser power suitable for multi-depth carving – something diode lasers usually struggle with.
What kind of files do I need to make 3D laser engravings?
You’ll typically use a grayscale bitmap or PNG file, where darker areas represent deeper engraving and lighter areas are shallower. Many users create these in Photoshop, GIMP, or use tools like Lithophane Makers. The laser interprets shades of gray as different burn depths during engraving. Some machines also allow stacked SVG layers, but grayscale images are most common.
Do I need special wood for 3D laser engraving?
You can engrave 3D designs on most natural hardwoods, but the best results usually come from lighter, soft grains like basswood, maple, cherry, or beech. These woods burn cleanly and show the depth contrast better. Avoid plywoods with glue layers or highly resinous woods, as they can carve unevenly or produce unwanted burn marks.
Final Words
3D laser engraving on wood is a fast, efficient, and effective way to create a wide range of visually captivating designs on wooden surfaces. You can create any number of intricate designs and add texture and depth to wood surfaces that were previously plain.
If you follow the steps we covered above, you can turn your visions into incredible pieces faster than you ever thought possible.