Laser cutting is a precise and efficient technique for cutting and engraving various materials. However, one common challenge users face is burns from laser cutting, which can ruin the aesthetic and functionality of the final product.
Preventing burn marks is crucial for achieving a clean, professional finish. So how do you prevent burns from laser cutting?
Table of Contents
Here’s a comprehensive guide to help you minimize or eliminate burns from laser cutting.
Why Do Burns From Laser Cutting Occur?
Burn marks result from excessive heat generated during the laser cutting process. This heat can scorch the material’s surface or edges, leaving unwanted discoloration or residue. Several factors contribute to burn marks:
- Material residue or contaminants on the laser bed.
- High laser power or speed settings.
- Poor material preparation.
- Improper focus or alignment of the laser beam.
Materials Prone to Burns From Laser Cutting
Certain materials are more susceptible to burn marks, including:
- Fabric/Textiles: Can scorch or fray under improper settings.
- Wood: Particularly lighter woods like birch or maple.
- Acrylic: Tends to melt and discolor when exposed to excessive heat.
- Paper/Cardboard: Burns easily due to its low melting point.
How Do You Prevent Burns From Laser Cutting

1. Optimize Laser Settings
Optimizing laser settings prevents burns from laser cutting by ensuring the laser delivers the appropriate amount of energy for the material and design, minimizing unnecessary heat and damage.
Here’s why it works:
- Proper Power Levels: Using excessive power can overheat the material, causing burns or scorch marks. Adjusting to the correct power level ensures only the required energy is applied.
- Controlled Speed: Cutting too slowly allows heat to accumulate, increasing the risk of burning. Optimizing speed ensures the laser moves quickly enough to avoid overheating.
- Focus Precision: Ensuring the laser beam is properly focused prevents diffuse energy from heating areas outside the cut line, reducing burn marks.
- Material-Specific Settings: Different materials respond uniquely to lasers. Using settings tailored to the specific material prevents over-processing that can cause burns.
By fine-tuning these parameters, you achieve cleaner cuts with less surface damage, enhancing the quality of the finished product.
2. Use Masking Tape
Masking tape prevents burns from laser cutting by acting as a protective barrier between the laser beam and the material’s surface. Here’s how it works:
- Absorbs Excess Heat: The tape absorbs some of the heat generated during the cutting process, preventing the material’s surface from scorching.
- Shields from Smoke and Debris: As the laser cuts, smoke, and soot can settle on the material and cause discoloration. The tape protects the surface from these particles.
- Disperses Laser Energy: The tape diffuses the laser’s energy slightly, reducing the intensity of direct contact with the material.
- Clean Removal: After cutting, the tape can be peeled away, leaving a clean, unblemished surface without adhesive residue if a proper tape is used.
This method is especially effective for materials like wood, acrylic, and plastics, which are prone to burn marks.
We recommend TapeManBlue Wide Painters Tape, which yields excellent results.
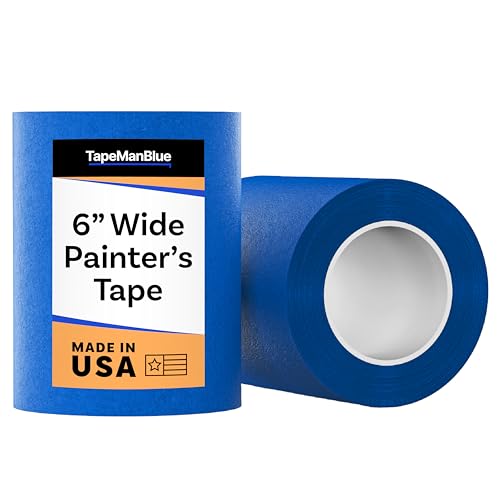
- SUPERIOR ADHESION & CLEAN REMOVAL: Our wide blue painters tape, perfect as 3D printer tape or laser masking tape, removes cleanly without residue, streaks, or stains for up to 21 days. Unlike other painting tape or masking tape that peels prematurely, TapeManBlue's extra wide painters tape stays put on your surfaces. Whether you're using it as 3D printing tape, for laser engraving, or general painting projects, our thick painters tape delivers reliable performance every time.
3. Focus on Air Assist
Air assist prevents burns from laser cutting by reducing the heat buildup and removing debris that can cause scorching. Here’s how it works:
- Cooling the Material: The stream of air directed at the cutting point helps dissipate heat generated by the laser, preventing the material from overheating and burning.
- Removing Smoke and Debris: Air assist clears away smoke, soot, and molten material from the cut line. This prevents these residues from settling back onto the material and causing discoloration or burn marks.
- Improving Laser Efficiency: A clean cutting surface allows the laser beam to focus more precisely, reducing the likelihood of excessive heat spreading beyond the cut area.
- Preventing Flame Formation: For materials prone to catching fire (like wood or acrylic), air assist reduces the concentration of combustible gases around the cut area, minimizing the chance of flames and burns.
Overall, air assist enhances the cutting process by ensuring cleaner cuts, reducing surface damage, and improving the safety and quality of laser-cut projects.
Need to upgrade your air assist pump? We recommend the powerful 0-50L/min Ortur Air Assist Pump that generates the most air while still being quiet. Can be used on almost all Diode and CO2 Lasers.

- 💐 Applicable Laser Engraver - Applicable to Ortur LU2-4-LF & LU2-10A & LU3-20A Laser Module, including Laser Master 2 S2-LU2-4-LF, 2 PRO-S2-LU2-4-LF, 2 PRO-S2-LU2-10A, Laser Master 3 10W and 20W.
4. Elevate the Material
Using a honeycomb laser bed prevents burns from laser cutting by improving airflow, minimizing heat reflection, and reducing material contact with the laser bed. Here’s how it works:
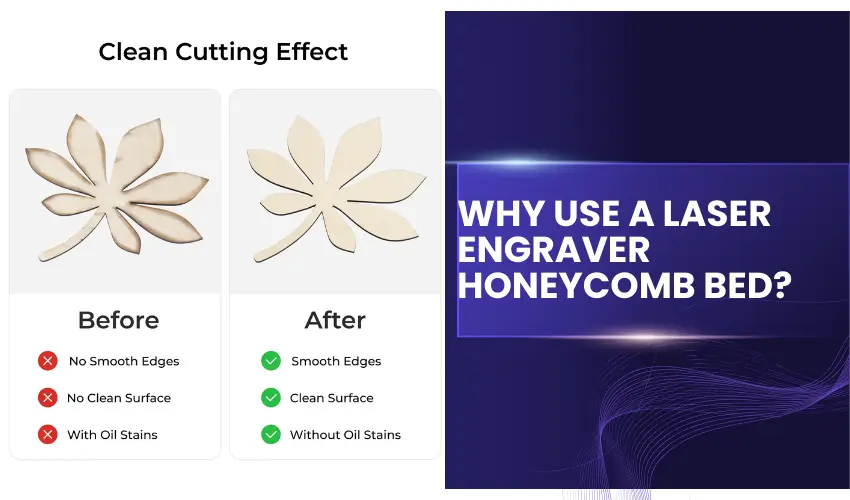
- Enhanced Airflow: The honeycomb structure allows air to flow freely underneath the material, helping to dissipate heat and prevent the buildup of smoke or debris that can cause burns.
- Minimized Surface Contact: By supporting the material with a grid-like structure, the honeycomb bed reduces the points of contact. This minimizes the risk of burn marks from heat transfer between the material and the cutting surface.
- Reduced Heat Reflection: A honeycomb bed prevents laser beam reflections from bouncing back onto the material, which can cause unwanted burns or scorch marks on the underside.
- Improved Debris Management: The open spaces in the honeycomb grid allow cut debris to fall away from the material, preventing it from being re-burned by the laser beam.
By optimizing airflow and reducing secondary heat effects, a honeycomb laser bed ensures cleaner, more precise cuts and helps maintain the aesthetic quality of laser-cut projects.
5. Clean the Laser Bed and Optics
Cleaning the laser bed and optics regularly helps prevent burns from laser cutting by maintaining optimal laser performance and minimizing interference from debris or residue. Here’s how:
- Improved Beam Quality: Dirty optics, such as lenses or mirrors, can scatter or absorb the laser beam, reducing its precision and efficiency. This can lead to excessive heat buildup, increasing the risk of burns on the material. Clean optics ensure a focused and powerful beam.
- Reduced Heat Reflection: A dirty laser bed, covered with residue or debris, can cause the laser beam to reflect back onto the material, creating unwanted burn marks. Keeping the bed clean minimizes this issue.
- Consistent Airflow: Dust, debris, or soot buildup on the laser bed can obstruct airflow, which is crucial for dissipating heat and removing smoke. Proper airflow reduces the chances of burns.
- Enhanced Material Contact: Residue on the laser bed can cause uneven support for the material, leading to inconsistent cuts and scorching. A clean surface ensures stable material placement and better cutting results.
- Prevent Fire Risks: Accumulated debris on the bed can ignite during cutting, leading to burns or fire hazards. Regular cleaning reduces this risk and ensures safe operation.
We recommend cleaning your laser’s lens and mirrors with the Eclipse Optic Cleaning Solution and Wellgler’s Lint-Free Cleaning Swabs for excellent results.


Routine maintenance of the laser bed and optics ensures efficient operation, reduces heat-related damage, and enhances the quality of laser-cut projects.
6. Adjust Focus and Alignment
Adjusting the focus and alignment of your laser cutter is crucial for preventing burns from laser cutting because it ensures the laser beam is accurately directed and efficiently utilized. Here’s how:

- Precise Energy Delivery: Proper focus ensures the laser beam converges at the correct point on the material. If the beam is out of focus, it can spread energy over a larger area, generating excessive heat and causing burns. Proper focus ensures the laser beam converges at the correct point on the material. If the beam is out of focus, it can spread energy over a larger area, generating excessive heat and causing burns.
- Cleaner Cuts and Engravings: Proper alignment ensures the laser beam travels unobstructed and hits the material precisely where intended. Misaligned beams can cause irregular or uneven cuts, leading to scorched edges or burn marks.
- Minimized Heat Buildup: When the laser is focused and aligned correctly, it operates efficiently, cutting through materials with minimal heat dispersion. This reduces the chances of heat lingering on the material, which can lead to burns.
- Improved Beam Intensity: Proper focus increases the beam’s intensity at the focal point, ensuring quick and efficient material removal. This reduces the time the laser spends on any area, decreasing the risk of burning.
- Enhanced Precision and Control: Correct alignment ensures that the laser head moves accurately according to the design file. This precision helps avoid unintentional overexposure of certain areas, which can cause burns.
Best Practices for Adjusting Focus and Alignment:
- Use the Correct Focal Lens: Ensure the lens is appropriate for the material thickness.
- Check Focus Distance: Use a focus gauge or adjustment tool to set the optimal focal distance for your material.
- Align the Beam Path: Regularly inspect and adjust the mirrors to ensure the laser beam is centered and aligned throughout its path.
- Test Before Cutting: Perform a small test to confirm focus and alignment before starting a full project.
By maintaining proper focus and alignment, you enhance cutting efficiency, reduce heat-related damage, and achieve cleaner, more professional results.
Material-Specific Tips
For Wood
To prevent laser cutter burns on wood, consider the following tips:
- Adjust Power and Speed Settings: Lower the power and increase the speed to prevent excessive heat from building up on the wood surface. Perform test cuts to determine the optimal settings for your specific wood type.
- Use Air Assist: Air assist blows away smoke, dust, and debris during the cutting or engraving process, which helps to keep the wood cool and reduces the risk of burns.
- Use Masking Tape: Apply masking tape to the wood surface. The tape helps absorb heat and minimizes scorch marks on the wood. It can also prevent charring around edges and makes for easier cleaning afterward.
- Proper Focus: Ensure that the laser is properly focused on the surface of the wood. An out-of-focus laser can cause excess heat buildup, leading to burns and unwanted marks.
- Cut in Multiple Passes: For thicker wood, cut in multiple passes at lower power instead of one deep pass. This reduces the amount of heat applied to the wood at once, preventing burns.
- Choose the Right Wood: Different types of wood have different burning characteristics. For example, plywood often has glue layers that can burn more easily, while hardwoods tend to cut cleaner with less scorching. Experiment with various woods to find the best one for your project.
- Increase Ventilation: Make sure there is adequate ventilation or use a fume extractor to clear out smoke and gases. This helps prevent them from re-depositing onto the wood surface, which can contribute to burns.
- Keep the Wood Clean: Any dirt, dust, or oils on the wood can cause uneven laser cuts or burns. Ensure the wood is clean before cutting or engraving.
For Acrylic

To prevent burns from laser cutting on acrylic, follow these tips:
- Adjust Power and Speed Settings: Reduce the laser power or increase the speed to avoid overheating the acrylic, which can cause burns or scorch marks.
- Use a Proper Focal Length: Ensure the laser is focused correctly on the acrylic surface to minimize excessive heat concentration in one spot.
- Keep the material masking intact: Keep the factory masking on the material, or if it’s not pre-masked, apply a protective transfer tape to the acrylic surface before cutting or engraving. This tape absorbs heat, prevents burns, and makes residue removal much easier.
- Choose the Right Acrylic: Choose high-quality, cast acrylic, as it tends to burn less compared to extruded acrylic.
- Air Assist: Use air assist to blow away smoke and debris during the engraving or cutting process. This helps keep the acrylic cool and reduces the risk of burns.
- Reduce Cutting Depth: If possible, cut the acrylic in multiple passes at lower power to prevent excessive heat buildup.
- Proper Ventilation: Ensure good ventilation or use a fume extractor to clear smoke, which can contribute to burn marks.
By using these techniques, you can achieve cleaner cuts and engravings without unsightly burns on acrylic.
For Fabrics
To prevent laser cutter burns on fabrics, follow these best practices:
- Adjust Power and Speed Settings: Use lower power settings and higher speeds to prevent overheating the fabric. Test with a scrap piece of the material to find the optimal settings.
- Use Air Assist: Enabling air assist during cutting or engraving helps to blow away debris and smoke, which can cause burns. It also cools the fabric and prevents heat from building up.
- Use the Right Fabric: Different fabrics react to lasers in varying ways. For example, natural fabrics like cotton tend to burn more easily than synthetic fabrics. Always test on a small piece first to check the results.
- Control the Laser Focus: Ensure the laser is properly focused to the fabric’s surface to prevent excessive heat concentration in one spot, which could lead to burns.
- Consider Fabric Thickness: Thicker fabrics may require lower power settings or multiple passes at a lower setting to avoid burns. For delicate or thin fabrics, be extra cautious with power settings.
- Cooling Between Passes: If cutting or engraving multiple layers, allow time for the fabric to cool between passes to prevent heat buildup that can cause burns.
By combining these methods, you can significantly reduce the risk of burns and achieve cleaner, precise cuts and engravings on fabric.
Post-Cut Cleaning Techniques
Even with preventative measures, minor burn marks might occur. Here are ways to clean them up:
- For Wood: Use fine-grit sandpaper to remove scorch marks.
- For Acrylic: Apply a plastic polish or flame-polish the edges.
- For Metal: Use a polishing compound to buff out discoloration.
- For Fabric: Launder or steam the fabric to restore its appearance.
Conclusion
Burn marks can detract from the quality of your laser-cut projects, but with proper preparation, optimized settings, and post-cut cleaning techniques, they can be significantly reduced or avoided. By understanding your material and laser system, you’ll be able to achieve clean, professional results every time.
Whether you’re cutting wood, acrylic, or textiles, following these tips will ensure your projects stand out for their precision and quality.
Frequently Asked Questions
How to avoid burn marks from laser cutting?
To avoid burn marks in laser cutting, adjust the power and speed settings to prevent excessive heat, use air assist to blow away smoke and debris, apply protective masking tape to the material, and ensure proper focus of the laser. Additionally, cut in multiple passes for thicker materials and ensure good ventilation.
How to clean burnt edges from laser cutting?
To clean burnt edges from laser cutting, use a fine-grit sandpaper or a microfiber cloth to gently buff the affected area. For stubborn burns, you can also use a wood cleaner or an adhesive eraser. If necessary, apply a light coat of paint or finish to restore the appearance.
How to laser cut leather without burning?
To laser cut leather without burning, use lower power settings and higher speed to minimize heat buildup. Additionally, use air assist to blow away smoke and debris, and ensure proper laser focus. Testing on scrap pieces is recommended to fine-tune settings.
How does air assist help prevent burns from laser cutting?
Air assist blows a steady stream of air directly at the cutting point, reducing heat buildup and clearing away smoke and debris. This helps cool the cut edge, prevents flame flare-ups, and significantly reduces scorch marks and smoke stains.
Should I use multiple passes instead of one slow cut to prevent burns from laser cutting?
Yes. Using multiple fast passes at lower power is often better than a single slow, high-power pass. This reduces laser dwell time, minimizes heat concentration, and helps prevent charred edges—especially when cutting thick wood or plywood.
Does material masking help reduce burns from laser cutting?
Absolutely. Applying paper masking tape or leaving the factory masking on materials like wood and acrylic protects the surface from smoke stains and scorching. After cutting, the masking can be removed to reveal a cleaner finish.
How does material elevation reduce burns from laser cutting?
Elevating the material using a honeycomb bed or risers allows heat and smoke to escape from underneath. This prevents laser flashback and reduces burn marks on the underside of the cut, resulting in cleaner edges and less discoloration.