Laser engraving is a handy and practical technique used to create permanent marks on various materials, including but not limited to textiles, acrylics, wood, natural stones, metals, etc. From engraving company logos on products to making personalized gifts, there are plenty of things you can create with a laser machine.
Wood is particularly loved by most beginners due to its versatility and availability. Never mind the fact that it can be a bit challenging to working with.
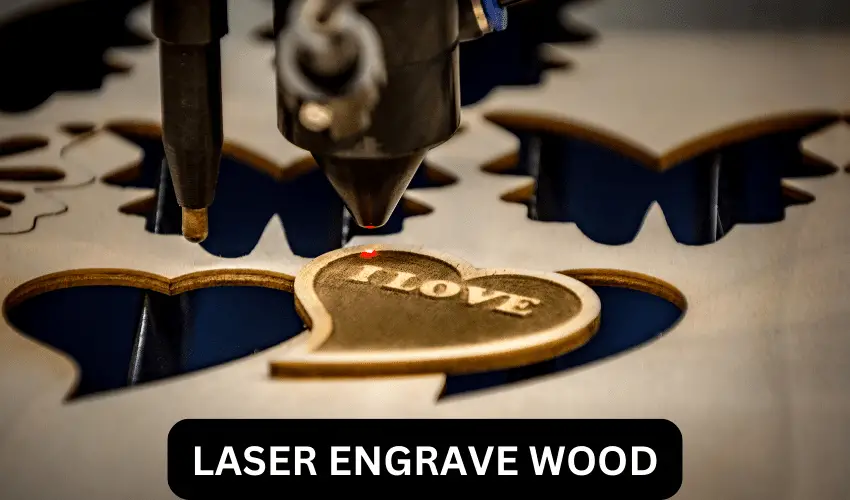
So, how do you laser engrave wood? Well, laser engraving on wood happens pretty much like in other materials – a laser beam is passed over the material, which heats it up and vaporizes it. The result is a smooth, clean, and perfect engraving that cannot be imitated by other woodworking equipment.
The main difference between laser engraving wood and other materials is that in wood, it is typically a sublimation process. This means that as the laser beam is passed over the material, it is converted via combustion into a gaseous state. Expectedly, the process creates smoke in the processing area from time to time during laser engraving.
Table of Contents
Because it is natural, wood has a ton of inconsistencies that can be problematic when engraving. Fortunately, once you get the hang of things and discover the right power settings and speed for different wood types, you will end up with perfect engravings.
Wood is quite adaptable. Not only is it easy to cut and engrave, but it also comes in lots of different varieties, shapes, and sizes.
How Laser Engraving Works on Wood
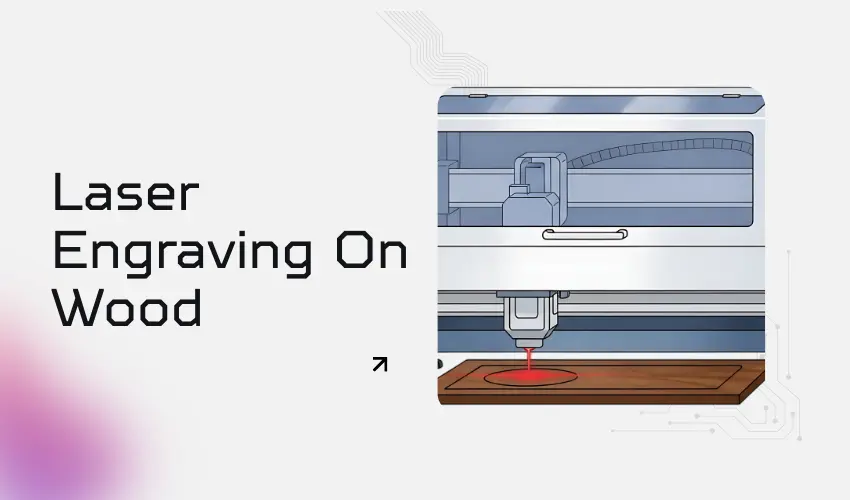
Laser engraving uses a focused laser beam to remove material from the surface of the wood. The heat from the laser burns the wood, creating a design with depth, contrast, and precision. The depth of the engraving can be controlled by adjusting the laser’s power and speed settings.
Best Lasers for Wood Engraving
Diode Lasers
- Ideal for hobbyists
- Excellent for light to medium engraving
- Lower cost, slower cutting
CO₂ Lasers
- Best overall for wood engraving and cutting
- Deep engraving, smooth edges
- Faster production speeds
How To Choose The Best Wood for Laser Engraving
The type of wood you plan on cutting into is of the utmost importance when laser engraving on wood. For instance, a bamboo cutting board will not engrave the same way an oak barrel will. Ideally, softwoods such as redwood, western red cedar, southern pine, and balsa don’t need high laser power to engrave.
They also cut quicker and result in lighter engravings. On the flip side, hardwoods such as dense wood, Brazilian ebony, snakewood, and African pearwood require more laser power to cut through and engrave. These also give off dark engravings. Ultimately, the type of wood used will affect the final output.

Choosing the Right Wood for Laser Engraving
- Basswood – Soft, even grain, excellent for beginners
- Maple – Clean burns, high detail
- Birch & Baltic Birch Plywood – Consistent layers, great contrast
- Cherry – Rich tone and smooth engraving
- Alder – Light color with good contrast
Woods to Avoid
- Pine – High resin causes uneven burns
- Cedar – Excessive oils and smoke
- Reclaimed wood – Hidden glue, nails, or contaminants
Should the wood be sappy or dry?
Apart from the type of wood to use, the resin content is also very important when selecting the best wood for laser engraving. Wood largely burns lighter or darker depending on its sap or resin content. For woods with low resin contents, the laser beam vaporizes the wood and leaves a minimal burn.
If the resin content is on the high side, the laser beam will consume the resin and dig deeper into the wood leading to a darker burn. In case you are wondering which wood types have a high resin content, cherry and alder top the list every time.
Both are excellent for light-color engraving projects. However, cherry tends to have a high level of streaking but still makes for an excellent material for wood engraving projects.
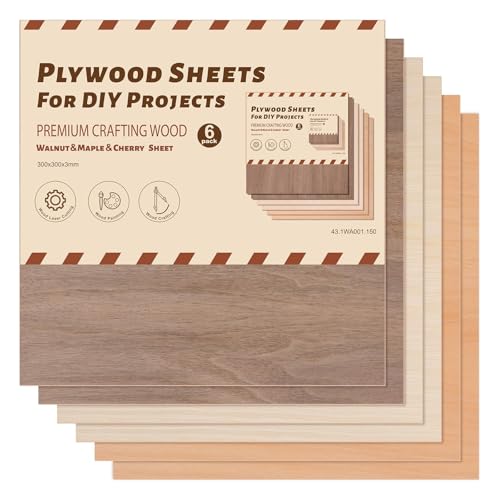
Best Wood Options for Laser Engraving Available On Amazon


Preparing Wood for Laser Engraving
- Sanding: Ensure the wood surface is smooth and clean for better engraving results.
- Masking: Apply masking tape to the surface to reduce scorch marks and make cleanup easier.
- Testing: Run a test engraving on a scrap piece to adjust the laser settings.
Optimizing Laser Settings for Wood
Achieving the best results depends on fine-tuning your laser engraver. Key settings include:
- Power: Higher power for deeper engravings, lower power for surface-level designs.
- Speed: Slower speed allows for more precise engraving; faster speeds reduce burn depth.
- Focus: Ensure the laser is properly focused on the surface for sharp details.
- DPI (Dots Per Inch): A higher DPI creates detailed engravings but may take longer.
Design Considerations for Wood Engraving
- Contrast: Designs with bold, simple lines work best for wood engraving.
- Grain Alignment: Align your design to complement the wood’s natural grain for a professional look.
- Types of Designs: Text, logos, images, and patterns are all possible. Consider using grayscale for varied shading effects.
Finishing Touches
After engraving, you can enhance the final product with these steps:
Cleaning
- Soft brush or compressed air
- Isopropyl alcohol (90%+)
- Avoid water (raises grain)
Finishing Options
- Mineral oil – Enhances contrast
- Danish oil – Durable finish
- Spray lacquer – Commercial products
- Stain – Apply before engraving for contrast
Recommended Settings for Laser Engraving on Wood
Diode Laser Engraving on Wood Settings (10W–20W)
(Starting point only—always test)
Wood Type | Power | Speed | Passes | DPI / LPI | Notes |
|---|---|---|---|---|---|
Basswood | 30–45% | 3000–4500 mm/min 118-177 in/min | 1 | 300–400 | Excellent contrast, very forgiving |
Birch Plywood | 40–55% | 2500–3500 mm/min 98-137 in/min | 1 | 300 | Masking recommended |
Maple | 45–60% | 2200–3200 mm/min 86-125 in/min | 1 | 300–400 | Dense wood, slower speed helps |
Alder | 35–50% | 2800–4000 mm/min 110-157 in/min | 1 | 300 | Very clean engraving |
Cherry | 40–55% | 2400–3500 mm/min 94-137 in/min | 1 | 300 | Produces rich dark contrast |
Bamboo | 35–50% | 3000–4500 mm/min 118-177 in/min | 1 | 300 | Consistent results |
Pine (not ideal) | 20–30% | 3500–5000 mm/min 137-196 in/min | 1 | 250 | Resin causes uneven burn |
Diode tips:
- Always use air assist
- Use masking tape for lighter woods
- Faster speeds reduce scorch marks
CO₂ Laser Engraving on Wood Settings (40W–60W)
(Starting point only—always test)
Wood Type | Power | Speed | Passes | DPI / LPI | Notes |
|---|---|---|---|---|---|
Basswood | 10–20% | 300–450 mm/s 11–17 in/s | 1 | 400–600 | Ideal for fine detail |
Birch Plywood | 15–25% | 250–400 mm/s 9–15 in/s | 1 | 400 | Watch for glue pockets |
Maple | 18–30% | 200–350 mm/s 7–13 in/s | 1 | 500–600 | Dense wood engraves clean |
Alder | 12–22% | 300–450 mm/s 11–17 in/s | 1 | 400–500 | Minimal burning |
Cherry | 15–25% | 250–400 mm/s 9–15 in/s | 1 | 400 | Excellent contrast |
Bamboo | 15–25% | 300–450 mm/s 11–17 in/s | 1 | 400 | Smooth engraving |
Pine (not ideal) | 8–15% | 350–500 mm/s 13–19 in/s | 1 | 300 | Resin darkens quickly |
CO₂ tips:
- Use higher DPI for smooth shading
- Avoid high power—CO₂ lasers burn wood fast
- Elevate material or use honeycomb bed
Preventing Burn Marks and Smoke Stains When Laser Engraving on Wood
1. Use Masking Tape
Applying paper masking tape (or laser-safe transfer tape) to the wood surface before engraving is one of the most effective solutions.
Why it works:
- Protects the surface from smoke residue
- Prevents scorch marks around engraved areas
- Peels off cleanly after engraving
Avoid plastic masking—it can melt and ruin your project.
We recommend TapeManBlue Wide Painters Tape, which yields excellent results.
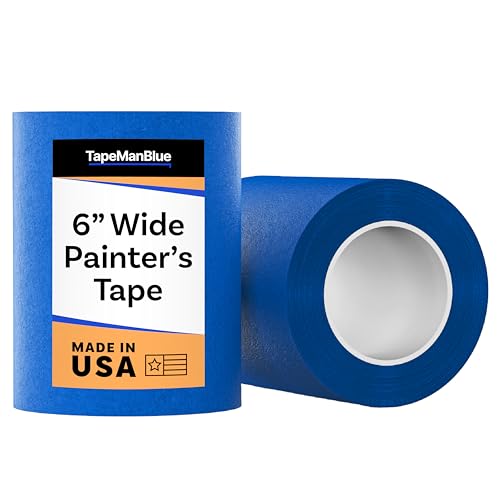
- SUPERIOR ADHESION & CLEAN REMOVAL: Our wide blue painters tape, perfect as 3D printer tape or laser masking tape, removes cleanly without residue, streaks, or stains for up to 21 days. Unlike other painting tape or masking tape that peels prematurely, TapeManBlue's extra wide painters tape stays put on your surfaces. Whether you're using it as 3D printing tape, for laser engraving, or general painting projects, our thick painters tape delivers reliable performance every time.
2. Enable Air Assist (Critical)

- 💐 Applicable Laser Engraver - Applicable to Ortur LU2-4-LF & LU2-10A & LU3-20A Laser Module, including Laser Master 2 S2-LU2-4-LF, 2 PRO-S2-LU2-4-LF, 2 PRO-S2-LU2-10A, Laser Master 3 10W and 20W.
Air assist blows smoke and debris away from the engraving path, reducing heat buildup and surface charring.
Benefits:
- Cleaner engraved edges
- Less surface discoloration
- Reduced flare-ups
For best results, use steady airflow, not excessive pressure that can cool the burn too much and reduce contrast.
3. Increase Speed and Reduce Power
Burning often comes from too much dwell time.
Try:
- Lower power settings
- Faster engraving speeds
- Multiple light passes instead of one heavy pass
This allows material to vaporize cleanly without excessive charring.
4. Choose the Right Wood
Not all wood engraves the same.
Best woods for clean engraving:
- Basswood
- Maple
- Birch
- Alder
- Bamboo
Woods to avoid or be cautious with:
- Pine and other resin-heavy softwoods
- Oily woods (teak, rosewood)
Resins and oils cause uneven burning and smoke staining.
5. Elevate the Wood or Use a Honeycomb Bed
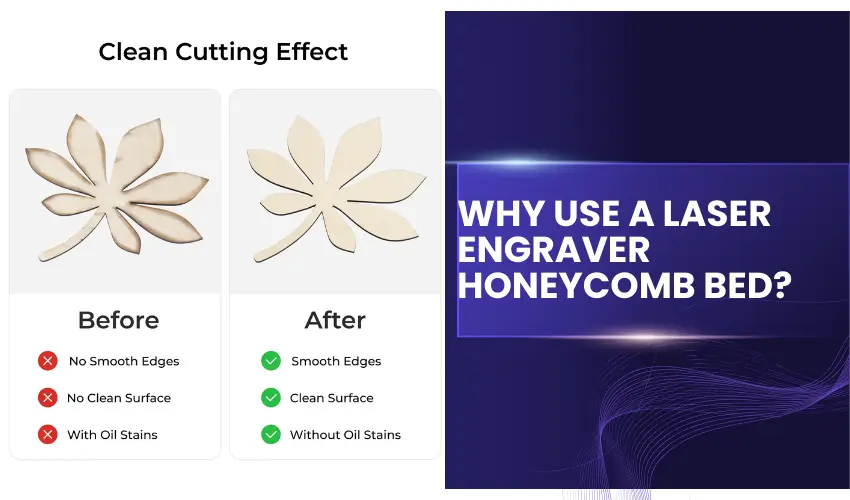
Placing wood flat on a solid surface traps heat and smoke underneath.
Better options:
- Honeycomb workbed
- Pin or riser supports
This reduces backside burn marks and flashback scorching.
6. Keep Optics Clean
Dirty lenses scatter the laser beam, increasing heat and burn marks.
Regularly clean:
- Laser lens
- Mirrors (for CO₂ lasers)
A clean beam equals cleaner engraving. We recommend using Aeroclipse Optic Cleaning Fluid and PEC-PAD Lint Free Wipes to keep your laser lens and mirrors in tip-top condition.

- AEROCLIPSE FOR OPTICS - Aeroclipse digital sensor cleaning fluid meets the same exacting standards of purity as our optic cleaner, Eclipse optic cleaning fluid, and is intended for all sensors and critical optics.
7. Proper Focus Matters
Being slightly out of focus can cause excessive burning.
- Focus precisely on the wood surface
- For deeper engraving, experiment with controlled defocusing, not accidental misfocus
8. Ventilation & Smoke Extraction
Poor exhaust causes smoke to linger and stain the wood.
- Ensure strong airflow from your exhaust system
- Keep ducting short and unobstructed
- Clean filters regularly
Better airflow = less smoke redepositing on your work.
9. Test Before Final Engraving
Always run a small test grid on scrap wood:
- Vary speed and power
- Compare masked vs unmasked results
This saves time, material, and frustration.
Quick Checklist for Clean Wood Engraving
- Paper masking applied
- Air assist enabled
- Faster speed, lower power
- Quality wood selected
- Elevated work surface
- Clean optics
- Proper focus
- Good ventilation
Final Tip
If you want maximum contrast with minimal burn, use light passes + masking + air assist. This combination consistently produces clean, professional wood engravings.
Common Wood Laser Engraving Mistakes
- Using the wrong wood species
- Too much power causing charring
- Poor air assist setup
- Skipping material testing
- Ignoring grain direction
Safety Tips for Laser Engraving on Wood
- Always operate the laser engraver in a well-ventilated area.
- Avoid engraving treated or painted wood to prevent harmful fumes.
- Wear protective eyewear and follow manufacturer guidelines for your machine.
Important Buying Guides:

Laser Engraver Exhaust Fan Options

Laser Engraver Enclosure Options

Fume Extractors For Laser Engravers
What Can You Create With Laser Engraving on Wood?
Laser engraving on wood is a versatile and creative process that allows for intricate designs, detailed personalization, and professional-quality results.
Whether you’re a hobbyist or running a small business, the possibilities with wood engraving are endless. Below, we explore some of the most popular items and ideas that can be created using this powerful technology.
Personalized Gifts
Laser-engraved wood gifts are highly sought after for their unique and custom appeal. Some ideas include:
- Customized Cutting Boards: Perfect for weddings, anniversaries, or housewarming gifts, engraved with names, dates, or designs.
- Photo Frames: Engrave meaningful quotes or intricate patterns on the wooden frame to enhance its sentimental value.
- Keepsake Boxes: Add personalized messages, names, or artistic patterns to wooden boxes for a thoughtful touch.
Home Décor
Decorative items made with laser engraving add a personal and artistic flair to any space. Examples include:
- Wall Art: Create custom wooden signs with inspirational quotes, family names, or geometric designs.
- Coasters: Unique engraved designs on wooden coasters make them both functional and decorative.
- Clocks: Engrave intricate patterns or custom numbers onto wooden clock faces for a stylish, one-of-a-kind timepiece.
Business Products
Wood laser engraving is an excellent way to produce professional items for businesses and organizations. Common products include:
- Promotional Products: Custom-engraved keychains, coasters, or desk plaques with company logos.
- Signage: Create professional-looking wooden signs for businesses, restaurants, or events.
- Product Labels: Use engraving to add a rustic or artisanal touch to product packaging, like on wooden wine boxes or gift baskets.
Jewelry and Accessories
Wood engraving allows for the creation of unique, stylish accessories such as:
- Pendants and Bracelets: Engrave intricate designs or personalized messages onto wooden jewelry pieces.
- Keychains: Create themed or custom wooden keychains that make great souvenirs or gifts.
- Phone Cases: Add laser-engraved designs to wooden phone cases for a sophisticated, custom look.
Furniture Accents
Enhance furniture pieces with elegant engravings. Ideas include:
- Tables and Desks: Add decorative engravings along the edges or surface.
- Chairs: Personalize the backrest or legs with names or designs.
- Drawer Fronts: Engrave floral patterns, abstract designs, or custom labels.
Art and Craft Projects
Laser engraving on wood is a favorite for artists and DIY enthusiasts. Some creative ideas are:
- Engraved Portraits: Turn photos into detailed engravings on wood for a unique piece of art.
- Puzzle Pieces: Create custom wooden puzzles with engraved images or messages.
- Models and Toys: Craft intricate designs for wooden toys, models, or educational tools.
Functional Everyday Items
Practical items can be elevated with laser engraving, blending functionality with artistry:
- Utensils: Add decorative patterns or labels to wooden spoons, spatulas, or other kitchen tools.
- Bookmarks: Personalize wooden bookmarks with quotes or intricate designs.
- Storage Boxes: Engrave labels or decorative patterns on boxes for organizing items.
Awards and Recognition Plaques
Laser engraving is ideal for creating wooden plaques and trophies for awards ceremonies, sporting events, or corporate recognition. These items combine professionalism with a timeless, rustic aesthetic.
Seasonal and Holiday Items
Seasonal products made with wood engraving are perfect for celebrations:
- Christmas Ornaments: Create custom designs for hanging decorations.
- Halloween Décor: Engrave spooky patterns on wooden signs or props.
- Easter Decorations: Design intricate patterns on wooden eggs or plaques.
The possibilities with laser engraving on wood are virtually limitless, making it a fantastic medium for personal, artistic, and professional projects.
Whether you’re creating gifts, home décor, or business products, the precision and versatility of laser engraving ensure stunning results every time. With the right tools and a touch of creativity, wood engraving can bring your ideas to life in extraordinary ways.
Final Thoughts
Laser-engraved wood is high in demand because it increases the value of items. It is also remarkably impressive and easy to achieve. Since wood is quite easy to find, this would be a great material for every beginner to start their engraving business with.
Laser engraving on wood offers endless creative possibilities and practical applications. With the right tools, techniques, and preparation, you can achieve stunning, professional-quality results on a variety of wooden surfaces.
Frequently Asked Questions
Can you laser engrave on wood?
Yes, you can laser engrave on wood. It is a versatile material that works well with laser engravers to create detailed designs, text, and images.
How do you prepare wood for laser engraving?
To prepare wood for laser engraving, ensure the surface is clean, dry, and free of dust or debris. Sand it lightly if needed for a smooth finish, and use masking tape to reduce burn marks if desired.
Why does laser-engraved wood sometimes turn dark or burned?
Darkening occurs when the laser heat chars the wood surface. This is common with slow speeds, high power, or resin-rich wood. Using masking tape, air assist, faster speeds, and multiple light passes can significantly reduce burn marks and smoke staining.
Can I laser engrave plywood?
Yes, but results depend on the plywood quality and glue used. Laser-grade plywood with uniform veneers and low-resin adhesive engraves more cleanly. Cheaper plywood may engrave unevenly due to glue pockets that react differently to the laser.
What laser settings should I use for engraving wood?
There is no universal setting—it depends on your laser type, wattage, and wood species. In general:
Use lower power for light engraving
Use higher speed to reduce burning
Run test grids before final projects to dial in depth and contrast
Do I need air assist when laser engraving wood?
Yes. Air assist is highly recommended for wood engraving. It blows smoke and debris away from the engraving path, reducing scorch marks, improving edge quality, and helping maintain consistent engraving depth.