Discover the endless possibilities with laser engraving on leather! In this article, “Top 10 Design Ideas for Laser Engraving on Leather,” we explore creative and innovative ways to personalize leather items.
From intricate patterns and monograms to custom artwork and functional designs, learn how to transform leather into unique masterpieces.
Whether you’re a beginner or an experienced engraver, these design ideas will inspire you to experiment and enhance your leather projects.
Table of Contents
Top 10 Design Ideas for Laser Engraving on Leather
Laser engraving on leather opens up a world of creativity and personalization. Whether you’re crafting gifts, fashion accessories, or home decor, laser engraving can add a unique touch to your leather projects.
Here are ten design ideas to inspire your next leather engraving masterpiece.
1. Personalized Monograms
Monograms add a touch of elegance and personalization to leather items. From wallets to bags, you can engrave initials in various fonts and styles to create a sophisticated and customized look. Experiment with different font sizes and placements to make each piece unique.
Here’s a step-by-step guide to help you achieve professional-looking monogram engravings.
Materials Needed:
- Laser engraver
- Computer with design software (e.g., Adobe Illustrator, CorelDRAW, or similar)
- Leather piece (veg-tanned leather recommended)
- Masking tape (optional, for protecting areas of the leather)
- Leather conditioner (for post-engraving treatment)
Step-by-Step Guide:
Prepare Your Design:
- Choose a Font: Select a font that matches the style you want. Script fonts often work well for elegant monograms, while serif or sans-serif fonts are great for a more modern look.
- Create the Monogram: Use your design software to create the monogram. Typically, a monogram includes the initials of the person’s first, middle, and last name, with the last name initial larger and in the center.
- Example: For John Alexander Doe, the monogram would be “JDA,” with “D” larger in the center.
- Format the Design: Position the letters according to your desired layout. Make sure the design fits within the dimensions of the leather piece you’ll be engraving.
Set Up the Laser Engraver:
- Adjust the Settings: Depending on your laser engraver, adjust the power, speed, and resolution settings for engraving leather. As a starting point, you might use:
- Power: 25-50%
- Speed: 200-300 mm/s
- Resolution: 300-500 DPI
- Test on Scrap Leather: Before engraving your final piece, test the settings on a scrap piece of the same leather to ensure the results meet your expectations.
Prepare the Leather:
- Clean the Leather: Ensure the leather is clean and free of dust or oils that could affect the engraving.
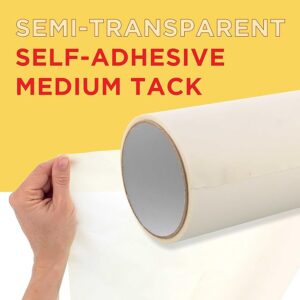
- Mask the Leather (Optional): Use masking tape to cover areas of the leather you don’t want to be engraved. This can help protect the leather from smoke and residue. Selecting the right masking tape is essential for successful leather laser engraving. Use a heat-resistant, low-residue tape specifically designed for such applications. Blue painter’s tape and some specialty masking tapes often fall short for this purpose. We recommend this semi-transparent masking tape available on Amazon as a top choice.
Position the Leather:
- Align the Leather: Place the leather piece on the laser engraver bed. Use rulers or guides if available to ensure it’s positioned correctly.
- Focus the Laser: Adjust the focus of the laser to match the thickness of the leather.
Engrave the Monogram:
- Send the Design to the Laser: Import the design file into your laser engraver’s software and position it on the virtual workspace to match the placement of the leather.
- Start Engraving: Begin the engraving process. Monitor the engraving closely to ensure it’s proceeding correctly.
Post-Engraving Treatment:
- Clean the Leather: After engraving, gently clean any residue off the leather with a soft brush or cloth.
- Condition the Leather: Apply a leather conditioner to keep the leather supple and enhance the engraved design.
Optional Sealing:
For sealing burned-in designs, I recommend using Acrylic Resolene, which is available on Amazon. This water-based solution can be applied with a cloth, sponge, or sprayed onto the leather.
In my workshop, I use an airbrush to apply a 50/50 mixture of water and Resolene for even coverage. The result is a waterproof finish that still allows the leather to be oiled without compromising the design. Additionally, extra virgin olive oil is an excellent leather conditioner, particularly for preserving and protecting engraved patterns.

Tips for Best Results:
- Experiment with Settings: Different types of leather and designs may require adjustments in settings. Keep experimenting until you find the perfect combination.
- Use High-Quality Leather: Veg-tanned leather is recommended for its ability to produce clean, detailed engravings.
- Practice on Scrap Leather: Always test your design and settings on scrap leather before working on the final piece.
- Ventilation: Ensure your workspace is well-ventilated to avoid inhaling any fumes produced during the engraving process.
Buying Guides:
Top 5 Laser Engraver Exhaust Fan Options: Best Quality!
Best Fume Extractors for Laser Engravers: 5 Quality Options!
Laser Engraver Enclosure Options: You Need The Best Quality
Enhancing Your Personalized Monograms :
- Depth Variation: Experiment with varying the depth of the engraving to add more dimension to your design.
- Color Fill: After engraving, you can fill the engraved areas with leather paint or dye to add color and contrast to the design.
- Burnishing: Use a burnishing tool to smooth the edges of the engraved areas for a polished finish.
Burnishing Steps:
- Prepare the Edges:
- If desired, use an edge beveler to round off the sharp edges of the leather. This step is optional but can make burnishing easier and the final look smoother.
- Lightly sand the edges with sandpaper to remove any rough spots. Start with a lower grit (around 200) and move to a finer grit (up to 400) for a smooth finish.
- Apply Burnishing Solution:
- Dampen the edges of the leather with water or an edge burnishing solution. You can use a sponge, cloth, or even your fingers to apply the liquid. The moisture helps the burnishing process by allowing the fibers to compress and smooth out.
- Burnish the Edges:
- Using a burnishing tool, start rubbing the edges of the leather back and forth. If you’re using a manual burnisher, apply firm pressure and move in a consistent motion. For an electric burnisher, use a medium speed to avoid burning the leather.
- Continue this process until the edges become smooth and shiny. The friction created during burnishing will compress the leather fibers and give a polished look.
- Apply Beeswax or Gum Tragacanth (Optional):
- For an extra smooth and glossy finish, apply a small amount of beeswax or gum tragacanth to the edges. Rub it in with your fingers or a cloth, then continue burnishing. This step helps seal the edges and gives them a professional appearance.
- Final Polish:
- After burnishing, use a clean cloth or rag to wipe off any excess wax or solution from the edges. This step ensures that the edges are clean and free of any residue.
Tips:
- Consistency is key. Make sure to apply even pressure and keep the motion steady for a uniform finish.
- Practice on scrap pieces of leather before working on your final project to get a feel for the process and achieve the desired results.
- Use different sizes and shapes of burnishing tools for various leather thicknesses and project requirements.
By following these steps, you can create beautiful, personalized monograms on leather that stand out with precision and elegance. Whether for personal projects, gifts, or business products, laser-engraved monograms add a touch of sophistication to any leather item.
2. Intricate Patterns
Create visually stunning pieces by engraving intricate patterns on leather. Geometric shapes, floral motifs, and abstract designs can transform a simple leather item into a work of art. Use detailed patterns to add texture and depth, making your creations stand out.
3. Custom Artwork
Bring your artistic vision to life by engraving custom artwork onto leather. Whether it’s a detailed illustration or a simple sketch, laser engraving allows for high precision and detail. This is perfect for artists looking to transfer their designs onto a new medium.
4. Quotes and Messages
Engrave meaningful quotes, messages, or lyrics onto leather items to add a personal touch. This is ideal for creating gifts that carry sentimental value. Choose fonts that match the tone of the message, whether it’s a whimsical script or a bold statement.
5. Logos and Branding Laser Engraving on Leather
For businesses, laser engraving logos and branding elements onto leather products can create a professional and polished look. This is perfect for creating custom merchandise, promotional items, or branded accessories that leave a lasting impression.
6. Nature-Inspired Designs
Incorporate elements from nature into your leather engraving projects. Leaves, trees, animals, and other natural motifs can create a calming and organic aesthetic. These designs are perfect for rustic and earthy themed items.
7. Mandala Designs
Mandala designs, with their intricate and symmetrical patterns, are perfect for laser engraving on leather. These designs can be used to create mesmerizing and detailed pieces that captivate the eye.
Mandalas are great for decorating items like journals, belts, and purses. Tips on how to draw your own versions of these special symbols can be found here.
8. Photorealistic Engraving
Take laser engraving to the next level with photorealistic designs. Advanced laser engravers can replicate the fine details of photographs onto leather, creating stunning and realistic images. This is ideal for commemorative pieces or personalized gifts.
9. Functional Engravings
Add functional elements to your leather items through engraving. This can include measurement marks on crafting tools, customized grids on notebooks, or even engraved instructions on DIY kits. Functional engravings add both utility and style to your products.
10. Cultural and Traditional Patterns
Incorporate cultural and traditional patterns into your leather engraving projects. Designs inspired by different cultures can add a rich and diverse aesthetic to your items. From Celtic knots to tribal patterns, these designs can celebrate heritage and artistry.
Recommended Blanks For Laser Engraving on Leather
Brown Leather Keychain
Dimensions: 3.15″ x 1.18″ Quantity: 5pcs

Laserable Leather Notebook
Color: Black to Silver, Black to Gold, Brown to Gold, Brown to Silver, Pale Pink to Gold

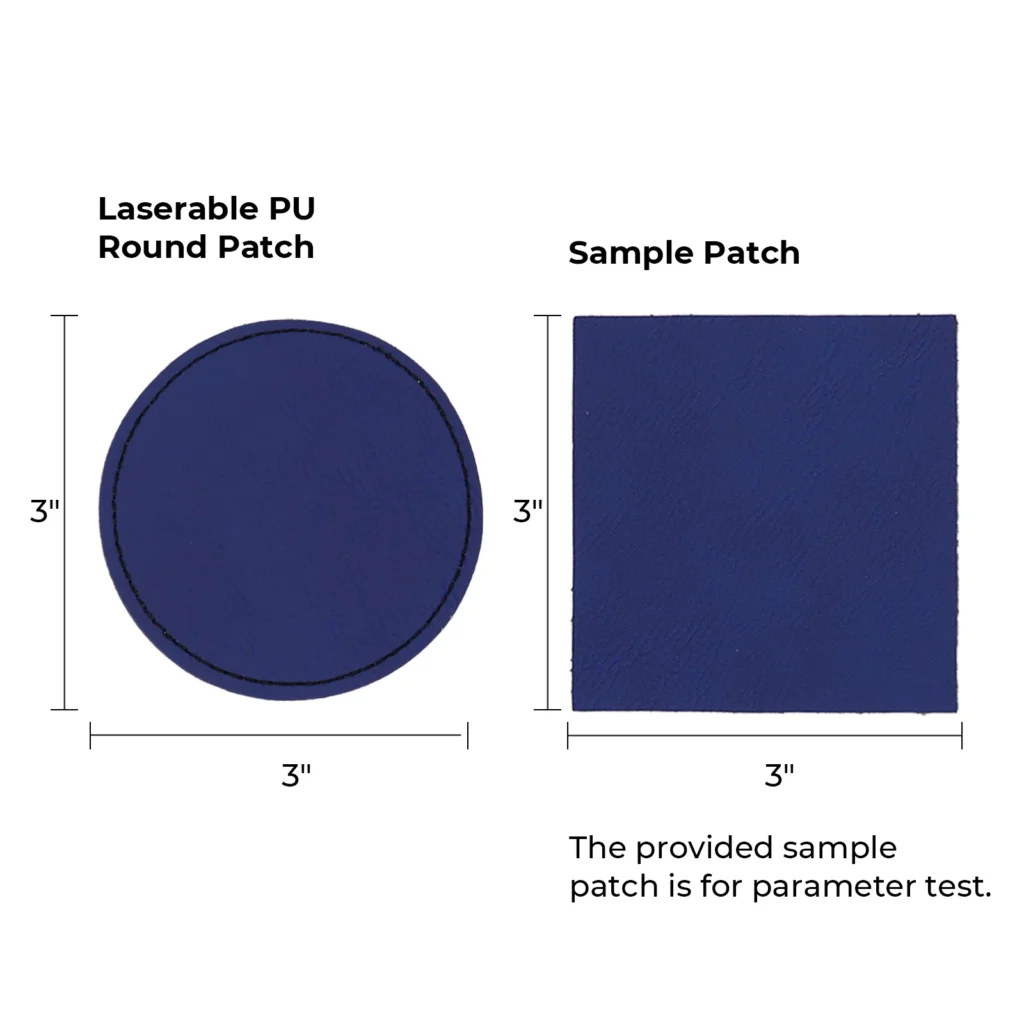
Round Leather Patch
Contains 10 round patches and 1 sample patch for parameter test.
Tips for Successful Laser Engraving On Leather
Here are the best tips for successful laser engraving on leather whether you’re creating for personal use, gifts, or business purposes, these tips can help you make the most of your leather engraving projects.
- Test Your Designs: Always test your designs on a scrap piece of leather to ensure the settings and design come out as expected.
- Choose the Right Leather: Different types of leather react differently to laser engraving. Veg-tanned leather is often recommended for its engraving quality.
- Adjust Settings: Fine-tune your laser engraver’s settings for power, speed, and resolution to achieve the best results.
- Post-Engraving Care: After engraving, treat the leather with appropriate conditioners to keep it supple and enhance the engraved design.
Frequently Asked Questions
What types of designs engrave best on leather?
Leather takes engraving extremely well, especially designs with clean lines, bold shapes, and high contrast.
The best-performing design styles include:
Monograms and initials
Geometric patterns
Line art and silhouettes
Mandalas and botanical motifs
Logos and badge-style graphics
Vegetable-tanned leather provides the sharpest detail and deepest contrast for all of these.
Can I engrave detailed artwork like portraits on leather?
Yes — but results vary by leather type and laser power.
Vegetable-tanned leather is best for fine detail because it burns more evenly and produces a darker, richer contrast.
Tips for portrait engraving:
Use high-resolution images
Convert to grayscale and adjust contrast
Use a test tile to fine-tune DPI and power settings
For best results, CO₂ lasers and high-power diode lasers provide the most definition.
What are the most popular leather engraving designs for selling online?
Trending, high-demand designs include:
Personalized wallets (names, coordinates, quotes)
Leather patch hats with logo badges
Keychains with minimalist icons
Pet collars with engraved names
Leather journals with mandalas or nature scenes
Meaningful quote bookmarks
These designs sell especially well on Etsy, craft fairs, and custom gift shops.
Do different leather colors affect how the engraving looks?
Yes — the leather color dramatically affects engraving contrast.
Light brown or natural veg-tan leather → darkest burns, best detail
Medium brown leather → great contrast, rich tone
Black leather → subtle engraving, often appears gray
Dyed or painted leather → engraving may reveal lighter layers beneath
Always run a small test to see how the burn reacts before committing to a full design.
What file formats should I use for leather engraving designs?
Most lasers accept common vector and image formats.
Best formats for engraving:
SVG → clean vector lines; ideal for logos, monograms, patterns
DXF → compatible with CAD-style designs
PNG (high-resolution) → excellent for photos and textured artwork
JPG → works fine for images but less sharp than PNG
Vector files (SVG) produce the cleanest, sharpest engravings on leather.
Conclusion
Laser engraving on leather opens up a world of creative possibilities, allowing you to personalize and customize items with intricate designs and unique patterns. From personalized monograms to detailed mandala designs, the top 10 design ideas we’ve explored provide inspiration for both novice and experienced engravers.
Whether you’re creating gifts, fashion accessories, or home decor, these designs can add a touch of sophistication and individuality to your projects.