
Laser engraving depth control is one of the most important skills for achieving clean, consistent, professional results.
Whether you’re engraving wood, acrylic, coated metals, or stainless steel, controlling how deeply the laser interacts with the material can make the difference between a crisp design and a burned, uneven surface.
Table of Contents
This guide explains what controls engraving depth, how laser power and speed affect results, and how to achieve consistent engraving depth across different materials.
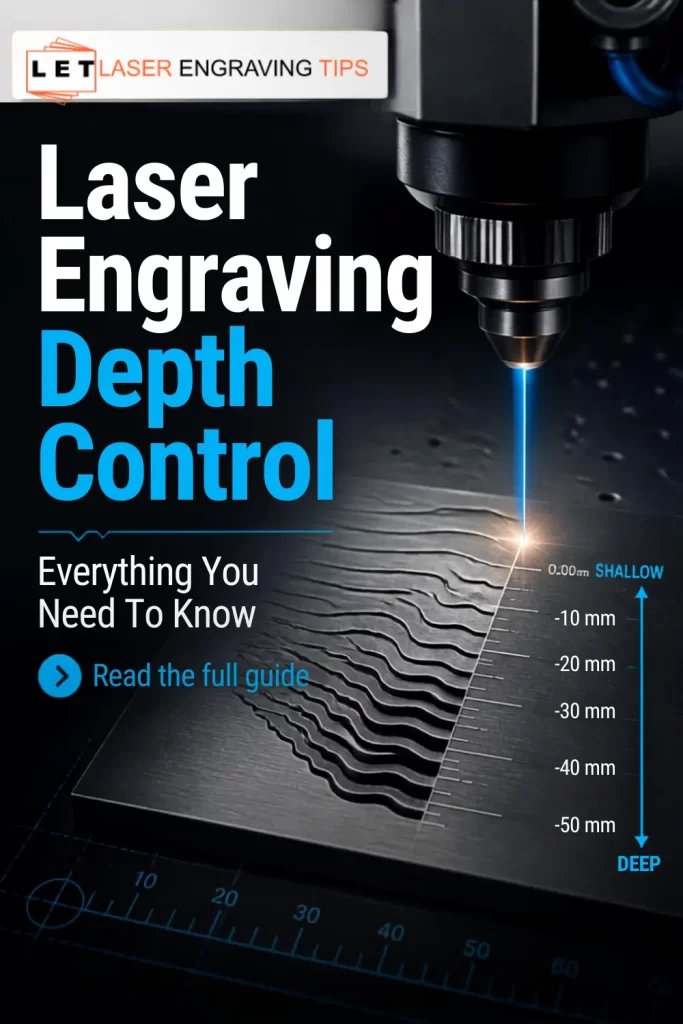
What Is Laser Engraving Depth?
Laser engraving depth refers to how far the laser removes or alters the surface of a material during engraving.
A shallow engraving may only remove a thin surface layer, while a deeper engraving can create a noticeable recess that you can feel with your finger.
The required depth depends on the application. Photo engraving usually requires relatively shallow material removal, while dimensional artwork, molds, signs, and deep metal engraving may require multiple passes.
What Controls Laser Engraving Depth?
Several factors determine engraving depth, but the two most important are laser power and engraving speed.
Laser Power
Higher laser power generally delivers more energy to the material. When other settings remain constant, increasing power can increase the amount of material removed.
For example, a 20W diode laser can generally remove material more aggressively than a 10W diode laser under comparable conditions.
However, maximum power isn’t always the best choice. Excessive power can cause charring, melting, discoloration, or loss of fine detail.
Engraving Speed
Speed determines how long the laser remains over a particular area.
Slower engraving gives the material more laser energy and generally produces deeper engraving. Faster engraving reduces energy delivered to the surface and typically produces a lighter or shallower result.
A useful way to think about it is:
Higher power + slower speed = more energy delivered
Lower power + faster speed = less energy delivered
The relationship isn’t perfectly linear because material composition, laser wavelength, focus, scanning pattern, and heat buildup also affect the result.
Power vs. Speed for Depth Control
One of the easiest ways to control engraving depth is to adjust power and speed together.
Desired Result | Power | Speed | Typical Effect |
|---|---|---|---|
Light marking | Low | High | Shallow surface mark |
Standard engraving | Medium | Medium | Moderate material removal |
Deep engraving | High | Low | Greater material removal |
Very deep engraving | High | Very Low | Maximum material removal, greater heat buildup |
These are general relationships rather than universal machine settings. Every material and laser requires testing.
Multiple Passes vs. One Deep Pass
For deep engraving, multiple passes are often better than trying to remove a large amount of material in a single pass.
Instead of using extremely high power and very low speed, you can use a more controlled setting and repeat the engraving several times.
This approach can provide:
- Better depth consistency
- More control over the final appearance
- Less excessive heat buildup per pass
- Cleaner edges
- Easier adjustment during testing
For example, if one pass produces a 0.2 mm recess, several controlled passes can gradually build depth while allowing you to inspect the result between passes.
How Focus Affects Engraving Depth
Focus is critical when controlling engraving depth.
A properly focused laser concentrates energy into a small area, producing a high energy density and sharper engraving.
If the laser is significantly out of focus, the beam spreads over a larger area. This can reduce cutting and engraving efficiency and produce softer edges.
For deep engraving, however, focus becomes more complicated because the surface of the material changes as material is removed.
On sufficiently deep engravings, dynamic focusing or carefully controlled focus adjustments can help maintain laser energy at the engraving surface.
How Laser Type Affects Depth
Different laser technologies interact with materials differently.
Diode Lasers
Diode lasers are popular for wood, leather, cardboard, some acrylics, and coated materials. Higher-power diode lasers can produce considerably deeper engraving than low-power models.
A 10W diode laser and a 20W diode laser may require very different settings even when engraving the same material.
Fiber Lasers
Fiber lasers are particularly effective for metals. They can produce shallow markings, annealing effects, and deep metal engraving depending on power, speed, frequency, pulse settings, and number of passes.
Higher-power fiber lasers are generally better suited to production applications requiring substantial engraving depth.
MOPA Fiber Lasers
MOPA fiber lasers provide additional control over pulse characteristics compared with standard fiber systems.
This can make them especially useful when you need to control marking color, surface finish, heat input, and engraving characteristics on metals.
For applications where both detail and depth matter, MOPA systems offer a high degree of process control.
CO₂ Lasers
CO₂ lasers are commonly used for wood, acrylic, leather, rubber, glass, and other non-metal materials.
Direct engraving of bare metal is generally not a primary CO₂ application, although coated metals and marking compounds can allow CO₂ lasers to create visible marks on metal surfaces.
Material Type Makes a Major Difference
Not all materials respond to laser energy in the same way.
Wood varies according to species, density, resin content, moisture, and grain structure. Acrylic can melt when excessive heat is applied.
Metals conduct heat away from the engraving area, while plastics can deform or produce undesirable fumes when processed incorrectly.
This means a setting that produces a deep engraving in one material may barely mark another.
Laser Engraving Depth on Stainless Steel
Stainless steel is commonly engraved with fiber and MOPA fiber lasers. For shallow marking, higher speeds and lower energy settings can create clean surface marks.
For deeper engraving, the laser generally needs to deliver substantially more energy through higher power, slower speeds, multiple passes, or a combination of these factors.
Deep stainless-steel engraving should be approached gradually. Start with a test pattern and increase the energy delivered until you reach the desired depth without creating excessive heat buildup.
Laser Engraving Depth on Aluminum
Bare aluminum is highly reflective and thermally conductive, so laser parameters must be selected carefully.
Fiber and MOPA lasers can create both surface marks and deeper engravings on aluminum. Anodized aluminum behaves differently because the laser can remove or alter the anodized layer to create a contrasting mark.
For anodized aluminum, deep engraving usually isn’t necessary when the goal is simply high-contrast personalization.
Laser Engraving Depth on Wood
Wood is one of the easiest materials for depth experimentation.
A low-power, high-speed setting can create a light brown engraving, while higher energy can remove more material and produce a deeper recess.
However, excessive energy can create dark edges and heavy charring.
For dimensional wood engraving, multiple passes are often preferable to one extremely slow pass.
How to Create a Laser Engraving Depth Test
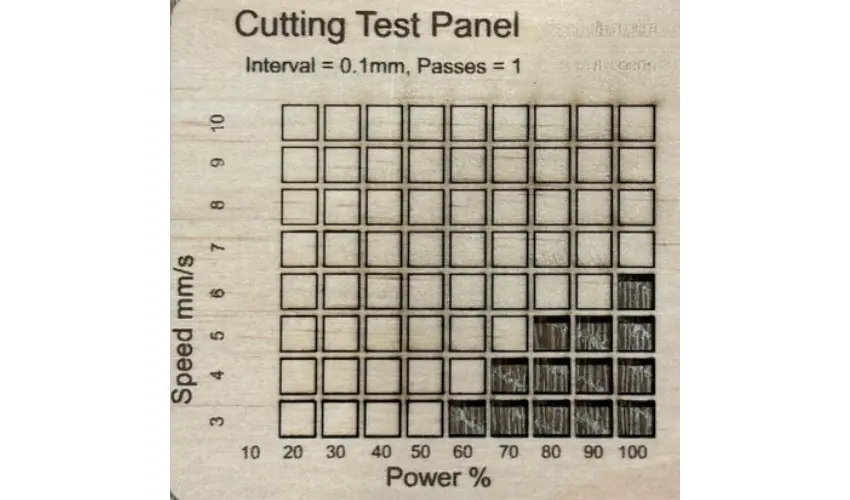
A material test grid is one of the best tools for finding the right depth settings.
Create a grid containing multiple combinations of power and speed. For example, each column can represent a different power level while each row represents a different engraving speed.
Engrave the grid onto a piece of the exact material you intend to use.
After engraving, compare:
Surface appearance: Is the engraving clean and consistent?
Depth: How deep is the engraving?
Edge quality: Are the edges sharp or burned?
Heat damage: Is there excessive discoloration or melting?
Consistency: Does the engraving have an even depth across the entire design?
Choose the setting that produces the desired depth while maintaining acceptable surface quality.
Measuring Laser Engraving Depth
For professional work, don’t rely only on visual inspection.
A digital caliper can measure larger engraving depths, while a depth gauge or suitable microscope measurement system can be useful for very shallow engravings.


For production work, record the following:
Measurement | Why It Matters |
|---|---|
Engraving depth | Confirms dimensional consistency |
Engraving width | Identifies beam or focus variation |
Edge quality | Shows whether energy is excessive |
Surface finish | Helps maintain consistent appearance |
Pass count | Makes production settings repeatable |
Keeping these measurements creates a repeatable production process instead of relying on trial and error.
How DPI and Line Interval Affect Depth
Engraving resolution also affects how much energy reaches the material.
Higher DPI means scan lines are placed closer together. This can increase the amount of laser exposure in a given area, potentially increasing heat buildup and material removal.
Line interval works similarly. A smaller line interval creates more closely spaced passes.
If you change DPI or line interval, you should retest your power and speed settings rather than assuming the previous settings will produce the same depth.
Air Assist and Engraving Depth
Air assist can have a significant effect on engraving.
When working with wood, air assist helps remove smoke and debris from the engraving area and can reduce unwanted scorching.
However, the ideal air-assist setting depends on the desired effect. Strong airflow can alter the appearance of some engravings, particularly when you’re intentionally trying to create a darker or more charred finish.
For deep engraving, test with and without air assist and compare the results.
How to Avoid Overburning While Increasing Depth
One of the biggest mistakes beginners make is simply slowing the laser down dramatically to achieve more depth.
This can work, but it also increases heat buildup.
Signs that you’ve gone too far include:
- Excessive charring
- Melted edges
- Warping
- Smoke staining
- Loss of fine details
- Excessively wide engraving lines
A better approach is often to increase depth gradually using multiple passes while maintaining a reasonable balance between power and speed.
Does Higher Power Always Mean Deeper Engraving?
No.
Higher laser power can increase material removal, but the result also depends on focus, wavelength, material absorption, speed, pulse characteristics, scanning strategy, and heat dissipation.
A poorly focused high-power laser may produce worse results than a lower-power laser that is properly focused.
The goal isn’t simply to use the highest possible power. The goal is to deliver the right amount of energy in the right way.
Best Strategy for Consistent Engraving Depth
For repeatable production, use a controlled workflow.
Start by cleaning the material and confirming the laser is properly focused. Run a power-and-speed test grid using the exact material you’ll be engraving. Select a setting that produces the desired appearance without excessive heat damage.
If more depth is required, increase the pass count gradually rather than immediately using extreme settings.
Once you find the right combination, record the material, laser, power, speed, DPI or line interval, focus, air-assist setting, and number of passes.
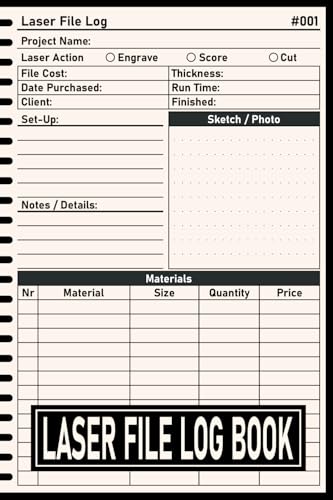

This gives you a repeatable recipe for future jobs.
Final Thoughts
Laser engraving depth control is ultimately about managing energy delivery.
Power, speed, focus, number of passes, resolution, laser type, and material characteristics all work together to determine how deeply the laser engraves.
For beginners, the most reliable approach is simple: test, measure, adjust, and document your settings.
Don’t assume that the highest power or slowest speed will automatically produce the best deep engraving. A controlled combination of settings and multiple passes will often produce cleaner, more consistent results.
Once you’ve developed material-specific settings, depth control becomes much more predictable, allowing you to move from experimental engraving to reliable, professional-quality production.
Frequently Asked Questions
What settings control engraving depth the most?
Engraving depth is mainly controlled by laser power and engraving speed. Higher power and slower speeds increase depth, while lower power and faster speeds create shallower engravings. Focus position, number of passes, and material type also play a major role.
Is it better to increase power or slow down speed for deeper engraving?
In most cases, slowing down the speed produces cleaner and more controlled depth than simply increasing power. Excessive power can cause burning, melting, or loss of detail, especially on wood and acrylic.
How does focus affect engraving depth?
A perfectly focused laser gives maximum detail, but slightly defocusing downward (0.5–2 mm) can increase engraving depth by widening the beam. This technique is commonly used for deeper relief engravings.
Can I control engraving depth on metal with any laser?
No. True depth engraving on metal requires a fiber or MOPA fiber laser. CO₂ and diode lasers can mark or discolor metal but cannot engrave real depth without marking sprays or coatings.
Why does the same setting produce different depths on different materials?
Materials vary in density, hardness, moisture content, and thermal reaction. Even the same type of wood or metal can engrave differently, which is why running a material test grid is essential for accurate depth control.