Laser engraving is a versatile technique used across various materials, each presenting unique challenges and requiring tailored approaches. Here are some tips and techniques to achieve optimal results when engraving popular materials like acrylic, wood, metals, glass, plastic, and stone.
In this article, we will discuss some important tips and tricks for laser engraving the most popular materials. These tips will make your laser engraving journey easier and more rewarding.
Table of Contents
Laser Engraving Tips and Techniques for Acrylic
Understand the Types of Acrylic
- Cast Acrylic:
- Produces a frosted appearance when engraved, ideal for intricate designs and lettering.
- Works well for both surface engraving and cutting.
- Extruded Acrylic:
- Engraves with a clear and polished look but can melt under high heat.
- Best suited for cutting rather than detailed engraving.
The Acrylic Materials We Recommend
SimbaLux Acrylic Sheet
3mm, 1/8″, Plastic Plexi Glass Board with Protective Paper is available in different sizes and quantity combinations.

Opaque Glossy Acrylic
3mm, 1/8″, Opaque Glossy Cast Acrylic. Colors: 14 Color Options Size: 12″ x 12″ Quantity: 3 Pcs

Glow in the Dark Acrylic
3mm, 1/8″ Pale Green Glow in the Dark Cast Acrylic Sheet. Quantity: 3pcs, Size: 12″ x 12″

Preparing the Acrylic for Engraving
- Clean the surface thoroughly with a lint-free cloth to remove dust or debris.
- Apply a layer of masking tape to prevent scratches and reduce the risk of smoke marks during engraving.
- Ensure the acrylic is flat and securely placed on the laser bed to avoid warping or uneven engraving.
Optimize Laser Settings
- Power and Speed:
- Use lower power settings and higher speeds to prevent melting.
- Start with 10-20% power and adjust based on the desired depth.
- DPI Settings:
- Use a resolution of 300-600 DPI for clear and smooth results.
- Higher DPI settings may result in overheating or unnecessary detail.
Techniques for Best Results
- Reverse Engraving:
- For clear acrylic, engrave on the back side to create a polished, dimensional effect when viewed from the front.
- Mirror your design in the software before engraving.
- Edge Polishing:
- Use a flame polisher or fine-grit sandpaper to smooth and enhance cut edges for a crystal-clear finish.
- Layering for Depth:
- For intricate designs, use multiple engraving passes with low power settings instead of one deep pass.
Avoiding Common Problems
- Overheating:
- Maintain proper ventilation to dissipate heat and prevent material distortion.
- Residue Build-Up:
- Clean the engraved area with isopropyl alcohol and a soft cloth to remove residue.
- Chipping or Cracking:
- Ensure the laser is correctly focused and avoid excessive power to prevent material damage.
Finishing Touches
- Painting:
- For engraved designs, apply acrylic paint to the etched areas for enhanced contrast.
- Use a fine brush or paint pen for precise application, then wipe away excess paint with a damp cloth.
- Illumination:
- Pair clear engraved acrylic with LED lighting for stunning backlit effects, perfect for signage or decorative pieces.
Safety Tips
- Use protective eyewear when operating the laser to prevent eye damage.
- Work in a well-ventilated area to avoid inhaling fumes, especially when engraving extruded acrylic.
Acrylic is an excellent material for laser engraving, capable of producing high-quality results for a variety of projects. By understanding the differences between cast and extruded acrylic, optimizing your laser settings, and applying the proper techniques, you can achieve outstanding designs with a professional finish.
Whether creating signage, awards, or decorative items, mastering acrylic engraving opens the door to limitless possibilities.
Laser Engraving Tips and Techniques for Wood
Wood is one of the most versatile and popular materials for laser engraving, offering a natural, rustic look for personalized projects. From signs and plaques to intricate art, understanding the nuances of wood engraving can elevate your craftsmanship.
Here are essential tips and techniques to help you achieve the best results when laser engraving wood.
Choosing the Right Type of Wood
- Softwoods (e.g., Basswood, Alder):
- Easier to engrave due to lower density.
- May produce uneven results due to varying grain patterns.
- Hardwoods (e.g., Maple, Walnut):
- Ideal for detailed engravings and a polished finish.
- Requires higher laser power settings due to density.
- Plywood:
- Affordable and readily available but may have inconsistent results due to glue layers.
- Specialty Woods (e.g., Bamboo, Cherry):
- Great for unique textures and premium-quality projects.
Best Wood Options for Laser Engraving Available On Amazon

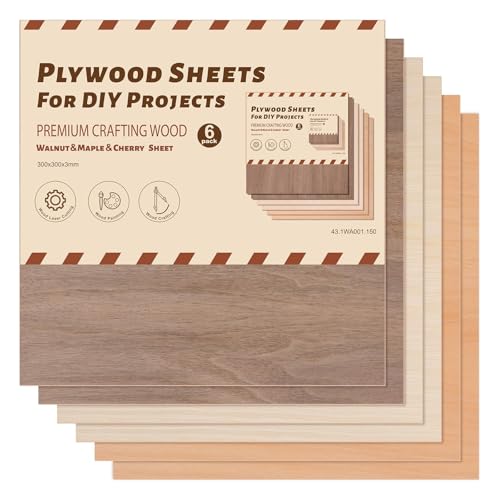

Preparing the Wood Surface
- Sand the wood with fine-grit sandpaper to create a smooth surface for consistent engraving.
- Clean the surface with a damp cloth to remove dust and debris.
- Apply masking tape to protect unengraved areas from scorch marks and smoke residue.
We recommend TapeManBlue Wide Painters Tape, which yields excellent results.

- SUPERIOR ADHESION & CLEAN REMOVAL: Our wide blue painters tape, perfect as 3D printer tape or laser masking tape, removes cleanly without residue, streaks, or stains for up to 21 days. Unlike other painting tape or masking tape that peels prematurely, TapeManBlue's extra wide painters tape stays put on your surfaces. Whether you're using it as 3D printing tape, for laser engraving, or general painting projects, our thick painters tape delivers reliable performance every time.
Adjusting Laser Settings
- Power and Speed:
- Use low to medium power settings and higher speeds to prevent burning.
- Start with 15-30% power and adjust based on the wood type.
- DPI Settings:
- A resolution of 300 DPI is ideal for most wood engravings.
- Higher DPI can produce finer details but increases engraving time.
Engraving Techniques
- Grain Direction:
- Align your design with the grain to minimize distortion and achieve a cleaner look.
- Multiple Passes:
- For deeper engravings, use multiple light passes instead of one heavy pass to avoid burning.
- Contrast Enhancement:
- For better visibility, darken the engraved areas by applying a wood stain, shoe polish, or acrylic paint.
Avoiding Common Issues
- Burn Marks:
- Reduce power or increase speed to prevent excessive burning.
- Ensure the wood is securely held in place to avoid movement during engraving.
- Inconsistent Engraving:
- Use hardwoods with uniform grain for smoother results.
- Ensure the laser is properly focused before starting.
- Smoke Residue:
- Ventilate your workspace and clean the engraved surface with isopropyl alcohol after finishing.
Cutting Techniques
- Use higher power and slower speeds for clean cuts.
- Perform a test cut to determine the ideal settings for the wood thickness.
- Sand and polish the cut edges for a smooth finish.
Post-Engraving Finishing
- Sealing and Protection:
- Apply a clear coat, such as polyurethane or polycrylic, to protect the engraved surface and enhance durability.
- Color Filling:
- Fill the engraved areas with paint or epoxy for a vibrant look. Use a fine brush or paint pen for precision.
- Cleaning Up:
- Remove masking tape and clean residue with a soft cloth to reveal the finished design.
Safety Considerations
- Use proper ventilation to avoid inhaling smoke or fumes.
- Ensure your laser engraver is set up in a stable, well-lit area.
- Wear safety goggles if your laser engraver emits harmful light.
Laser engraving wood is an art that combines creativity and technical precision. By selecting the right type of wood, optimizing laser settings, and employing proper techniques, you can create stunning projects that stand out.
With practice and attention to detail, wood engraving can become one of the most rewarding applications of laser technology.
Also Read: Laser Engraving on Wood – Everything you need to know
Laser Engraving Tips and Techniques for Metals
Metals are commonly used in items like plaques, nameplates, jewelry, and decorative pieces. Laser engraving metals creates intricate, high-contrast designs, adding sophistication and personalization to your projects.
However, engraving metals can be challenging without the right approach. Here are essential tips and techniques to master laser engraving on metals.
Choosing the Right Metals
The best metals for laser engraving depend on your laser type, but these are the top choices:
Stainless Steel (Fiber, Infrared & Co2 Laser With Marking Spray)
Excellent for fiber lasers. Produces high-contrast marks and deep engravings. Great for jewelry, tools, and industrial parts.
Anodized Aluminum (Fiber, Infrared & Co2 Laser)
Very easy to engrave. The laser removes the anodized layer to reveal bright silver underneath. Perfect for tags and business cards.
Brass (Fiber, Infrared & Co2 Laser With Marking Spray)
Engraves beautifully with fiber lasers and creates strong contrast. Popular for plaques and decorative items.
Aluminum (Bare)
Works best with fiber lasers. Lightweight and affordable for custom projects.
Sterling Silver (925)
Ideal for jewelry engraving with fiber or infrared lasers. Offers a clean, premium finish.
Choosing the Right Laser
- Fiber Lasers: Ideal for engraving brass due to their precision and compatibility with metals.
- Infrared Lasers: Ideal for light marking applications.
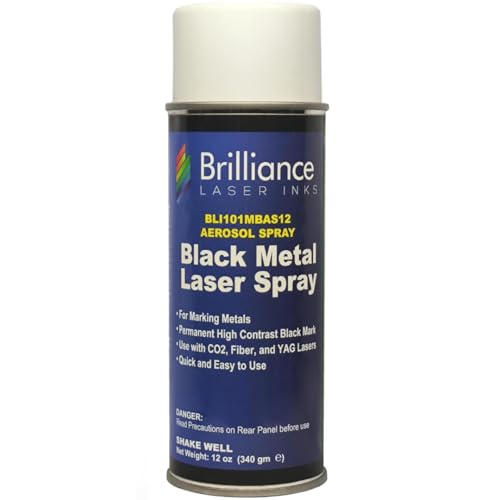
- CO2 Lasers: Typically require the application of marking sprays or pastes like Brilliance Laser Inks to achieve high-quality engravings.
Brilliance Laser Inks 12 Oz Laser Marking Spray – Black (BLI101)
Preparing the Metal Surface
- Clean the Surface: Remove dirt, oil, and fingerprints using isopropyl alcohol.
- Flat Surface: Ensure the metal is flat and secure on the laser bed to prevent uneven engraving.
Optimizing Laser Settings
The ideal settings depend on the type of laser and metal composition. Start with test engravings to fine-tune these parameters:
- Power and Speed:
- Fiber lasers: Use moderate power (30-50%) and medium speed.
- CO2 lasers with marking spray: Use high power (70-90%) and slower speed to achieve good adhesion and contrast.
- Frequency: Adjust frequency (20-30 kHz for fiber lasers) for sharper details.
- Focus: Properly focus the laser for precise engraving depth.
Engraving Techniques
- Depth Control: Use lower power for surface marking and higher power for deeper engravings.
- Passes: For deep engravings, perform multiple light passes to avoid overheating and distortion.
- Contrast Enhancement: For clearer visibility, oxidize the engraved areas or use blackening agents to darken the design.
Cooling and Ventilation
- Cooling: Allow the material to cool between passes to prevent warping.
- Ventilation: Ensure proper ventilation to clear smoke and fumes from coatings or sprays.
Cleaning and Polishing
- Post-Engraving Cleanup:
- For bare metals: Wipe with a soft cloth to remove debris.
- For marking spray: Wash off the residue with warm water and a gentle cleaner.
- Polishing: Use a metal cleaner or polishing compound to restore shine. Avoid abrasive materials that may damage the engraving.
Common Challenges and Solutions
- Scorch Marks or Discoloration:
- Use marking sprays or adjust power settings.
- Clean thoroughly after engraving.
- Inconsistent Engraving:
- Ensure the metal surface is level and the laser focus is accurate.
- Overheating:
- Reduce power and increase speed to minimize heat buildup.
Safety Considerations
- Wear safety goggles designed for your laser type.
- Ensure the workspace is well-ventilated.
- Avoid direct contact with laser light or fumes.
Laser engraving metals requires precision, the right equipment, and optimized techniques. Whether you’re marking brass jewelry or creating detailed plaques, understanding how to prepare and handle metals ensures high-quality results.
With the proper laser settings and practice, you can create stunning and durable designs on metals.
Laser Engraving Tips and Techniques for Glass

Laser engraving on glass offers an elegant way to create custom designs, from personalized drinkware and awards to decorative items and signage.
The process can yield stunning results, but it requires careful preparation and the right approach to ensure success.
Below are essential tips and techniques to master laser engraving on glass.
Understanding Glass Properties
Glass is a delicate and non-porous material that can crack or chip if mishandled during laser engraving. Instead of cutting into the surface, laser engraving creates micro-fractures that produce a frosted appearance.
- Types of Glass:
- Soda-lime glass: Common in drinkware and windows.
- Borosilicate glass: Durable and heat-resistant, used for lab equipment and specialty items.
- Crystal: Contains lead and is softer, producing more intricate engravings.
Choosing the Right Laser
- UV Lasers: The most effective for engraving glass, offering the precision and power needed for clean results.
- CO₂ Lasers: CO₂ lasers remain the most widely used and cost-effective option for engraving glass.
Preparing the Glass Surface
- Clean the Surface: Use a lint-free cloth and isopropyl alcohol to remove dust, fingerprints, and oils.
- Masking: Apply a thin layer of masking material, such as a wet paper towel, to the surface to minimize chipping and reduce residue. Not required when using a UV Laser.
- Positioning: Ensure the glass is flat and stable on the laser bed. Use a jig or clamps to secure irregularly shaped items like glasses or bottles.
Optimizing Laser Settings
The correct settings will depend on the type of glass and the laser being used. Always perform test engravings on a similar piece of glass.
- Power and Speed: Use lower power and higher speed to prevent overheating.
- DPI (Dots Per Inch): Use a resolution of 300–600 DPI for frosted, detailed designs. Higher DPI may cause excessive heat and cracking.
- Focus: Ensure the laser beam is properly focused for consistent engraving.
Enhancing the Engraving Process
- Using a Damp Paper Towel: Placing a damp paper towel or wet newspaper over the engraving area can reduce chipping and improve the frosted effect. Ensure it is securely in place to avoid movement during engraving.
- Rotary Attachments: For cylindrical items like glasses or bottles, use a rotary attachment to ensure even engraving.
Techniques for Achieving Better Results
- Frosted Finish:
- Adjust power settings to achieve a uniform frosted appearance.
- Use multiple light passes rather than one heavy pass to prevent cracking.
- Intricate Designs:
- Ensure the design is vector-based or has high resolution for crisp details.
- Avoid engraving designs with extremely fine lines that may become unclear.
- Color-Filled Engravings:
- For added contrast, fill engraved areas with paint or ink after engraving.
Cleaning and Polishing the Engraved Glass
- Post-Engraving Cleanup: Wipe the surface with a soft, damp cloth to remove residue.
- Polishing: Use glass polish or a mild abrasive to smooth any rough edges and enhance the finish.
Common Challenges and Solutions
- Chipping or Cracking:
- Use lower power settings and a damp paper towel to reduce stress on the glass.
- Ensure the glass is free of imperfections, as these can cause breakage.
- Uneven Engraving:
- Double-check the focus and ensure the glass is level.
- Secure the glass firmly to prevent movement during the engraving process.
- Residue Build-Up:
- Mask the surface to minimize debris, and clean thoroughly after engraving.
Safety Considerations
- Wear safety goggles designed for CO2 lasers.
- Ensure proper ventilation to avoid inhaling fumes or particles.
- Handle the glass carefully to avoid injury from sharp edges or breakage.
Laser engraving glass is a precise and rewarding process that produces stunning, frosted designs. By understanding the material’s properties and following these tips and techniques, you can create beautiful and professional-grade engravings.
Whether you’re customizing glassware or creating intricate artwork, practice and experimentation are key to mastering this medium.
Laser Engraving Tips and Techniques for Plastic
Laser engraving on plastic is a versatile and efficient way to create intricate designs, labels, and markings. From acrylic and polycarbonate to ABS and nylon, plastics are commonly used for both decorative and functional purposes in laser engraving.
Here are key tips and techniques to achieve the best results when engraving plastic.

Understanding Plastic Types
Not all plastics are created equal. The type of plastic you’re engraving will determine the settings and techniques to use.
- Acrylic: One of the most laser-friendly plastics, producing smooth and polished results.
- ABS: Can be engraved but tends to produce a rougher texture and may emit more fumes.
- Polycarbonate: Difficult to engrave due to its melting point and potential for discoloration.
- Delrin: Great for precision engraving; often used in industrial applications.
- PETG: Flexible and durable, suitable for detailed designs.
- PVC: Avoid engraving PVC due to toxic fumes released during the process.
Preparing the Plastic Surface
- Clean the Surface: Use a soft cloth and a non-abrasive cleaner to remove dust, fingerprints, and oils.
- Masking: Apply transfer tape to protect the surface from residue or burn marks.
Optimizing Laser Settings
Plastic is sensitive to heat, so proper settings are crucial to prevent warping or discoloration. Always perform a test engraving on a scrap piece.
- Power and Speed: Use moderate power and higher speeds to avoid excessive melting or scorching.
- Focus: Ensure the laser is properly focused for crisp and clear designs.
- DPI (Dots Per Inch): 300–600 DPI is ideal for detailed engravings.
Techniques for Better Results
- Engraving Depth:
- Use multiple light passes instead of a single heavy pass to achieve consistent depth without overheating the material.
- Contrast:
- For increased visibility, consider using two-layer plastics with a contrasting core color. Engraving removes the top layer, revealing the color beneath.
- Engraving on Transparent Plastic:
- Apply a coating or mask the surface to create frosted effects.
Enhancing the Engraving Process
- Paint Filling:
- For added contrast, fill engraved areas with paint or ink. Ensure the engraving is clean and dry before applying paint.
- Using Templates:
- For irregularly shaped plastic items, use a jig or template to secure the item and ensure consistent results.
Safety Tips
- Fume Extraction: Plastic can emit harmful fumes when engraved. Use proper ventilation or an air filtration system.
- Protective Gear: Wear laser safety goggles and avoid direct exposure to the laser beam.
Troubleshooting Common Issues
- Warping:
- Use lower power settings and shorter engraving times. Ensure the plastic is securely clamped to prevent movement.
- Burn Marks:
- Mask the surface or adjust the focus to minimize burn marks around the engraving.
- Uneven Engraving:
- Double-check that the laser bed and plastic are level, and the laser beam is properly aligned.
Laser engraving on plastic offers endless possibilities for customization and functionality. By understanding the properties of the plastic you’re working with and fine-tuning your settings, you can achieve professional-quality results.
With practice and proper techniques, plastic engraving can become a highly rewarding aspect of your laser engraving projects.
Also Read: How to Engrave Plastic with Laser: Beginners Guide
Laser Engraving Tips and Techniques for Stone
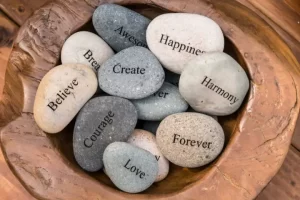
Stone is known for its unique veining and durability, making it a popular choice for laser engraving.
Whether creating custom home décor, memorial plaques, or personalized gifts, stone can yield stunning results when engraved properly.
This guide provides tips and techniques to help you achieve precise and aesthetically pleasing engravings on stone.
Understanding Stone for Laser Engraving
Stone doesn’t melt or burn during laser engraving—it fractures and lightens at the surface, creating contrast. This makes materials like slate, granite, and marble excellent choices for laser engraving.
Best Stones for Engraving:
- Slate – High contrast and beginner-friendly
- Granite – Durable with strong detail reproduction
- Marble – Elegant but slightly lower contrast
Preparing the Stone Surface
Proper preparation ensures clean and consistent engraving results:
- Clean the Surface: Use a damp cloth or isopropyl alcohol to remove dirt, dust, or grease.
- Polished vs. Matte Finish: Polished stone, such as marble, provides a smooth surface for engraving, while matte finishes may require additional preparation for even results.
Optimizing Laser Settings
The right laser settings depend on your machine and the type of stone:
- Power and Speed:
- Use medium power with a slower speed to achieve detailed engravings.
- Excessive power can damage the stone or reduce detail.
- Focus: Ensure the laser is perfectly focused for sharp and precise engravings.
- DPI (Dots Per Inch): Higher DPI (600–1200) ensures better detail and clarity, especially for photos or intricate designs.
Techniques for Successful Stone Engraving
- Masking (Optional): Apply masking tape to the stone to protect surrounding areas from residue or overburn. Remove it carefully after engraving.
- Photo Engraving: For photo engravings, convert the image to grayscale and adjust contrast in photo editing software before engraving. Marble works well for high-detail images.
- Multiple Passes: For deeper engravings, use multiple light passes instead of a single high-power pass to avoid damaging the stone.
Enhancing the Engraving
- Adding Color Fill:
- For better visibility, especially on white marble, use acrylic paint or wax to fill in the engraved areas. Wipe away excess paint while it’s still wet for clean lines.
- Polishing: After engraving, polish the surface with a soft cloth to enhance the stone’s natural shine and make the design pop.
- Sealant Application: Apply a sealant to protect the engraving and maintain the finish, particularly for outdoor projects.
Safety Considerations
- Protective Equipment: Always wear safety goggles and a dust mask when engraving stone to protect yourself from debris and fine particles.
- Proper Ventilation: Engraving stone can release fine dust particles. Use an exhaust system or engrave in a well-ventilated area.
Troubleshooting Common Issues
- Low Contrast:
- Adjust laser power and speed settings or add a color fill to enhance visibility.
- Uneven Engraving:
- Ensure the stone is level and securely placed on the laser bed.
- Chipping or Cracking:
- Reduce power settings or ensure the laser focus is accurate to avoid excessive heat.
Laser engraving stone is an excellent way to create elegant, durable designs for personal and professional projects. With proper preparation, optimized laser settings, and attention to detail, you can achieve stunning results that showcase the natural beauty of stone.
By experimenting with techniques like color filling and photo engraving, you can elevate your projects and make the most of this timeless material.
Also Read: Stone Engraving With Laser: Everything You Need To Know
General Tips for All Materials

- Always Test First: Run small test engravings on scraps to determine the best settings for your material.
- Maintain Your Laser Engraver: Clean lenses and mirrors regularly for consistent performance.
- Ventilation: Ensure proper ventilation to avoid exposure to fumes, especially when engraving materials like plastics or leather.
- Focus Adjustment: Double-check your laser’s focus for sharper engravings.
- Software Settings: Optimize engraving software parameters for better results, including DPI and fill patterns.
Conclusion
Mastering laser engraving requires practice, experimentation, and attention to detail. By applying these tips and techniques, you can achieve professional-quality results across a wide range of materials.