Cutting and engraving wood can be a great way to bring your vision for your projects to life. However, cutting wood by hand can be difficult and time-consuming. Laser-cutting wood solves this problem by providing an effortless way to get precise cuts every time but you need to prepare wood for laser cutting.
Table of Contents
That said, it’s essential to understand the basics before attempting to laser cut your wood, including determining the best wood for laser cutting and the best way to prepare it. If you need some tips for wood laser cutting, you’ve come to the right place. Keep reading to learn the best practices for handling wood for laser cutting.
Why Preparing Wood for Laser Cutting Matters
Wood is a natural material with variations in density, moisture, resin, and grain direction. Without proper preparation, these inconsistencies can cause:
- Uneven cutting depth
- Charring or excessive burn marks
- Warping during cutting
- Inconsistent engraving quality
- Increased fire risk
Preparing your wood correctly ensures clean edges, consistent results, reduced smoke, and safer laser operation.

How To Prepare Wood For Laser Cutting
Step 1: Choose The Best Type of Wood For Laser Cutting
Since wood is a natural material, you have to consider the characteristics of the type of wood that you’re using before preparing it for laser cutting. Some natural wood will deliver better results for your needs than others, and some woods you shouldn’t use at all.
Best Wood For Laser Cutting & Engraving
You can explore the top wood options for laser engraving below to achieve clean, precise results.
- Birch plywood (laser-grade) – Consistent layers, minimal glue
- Basswood – Soft, uniform, excellent for detailed cuts
- Maple – Clean engraving, low resin content
- Alder – Smooth cuts and even burning
- Poplar – Affordable and beginner-friendly
Woods to Avoid
- Pressure-treated wood (toxic fumes)
- Construction plywood (uneven glue layers)
- Oily or resin-heavy woods like pine (unless well-prepared)
Step 2: Check and Control Moisture Content
Moisture is one of the biggest enemies of clean laser cuts.
Ideal Moisture Level
- 6–10% moisture content is ideal for laser cutting
How to Reduce Moisture
- Store wood in a dry, climate-controlled room
- Let wood acclimate for 24–72 hours before cutting
- Avoid freshly cut or outdoor-stored wood
High moisture causes smoke, charring, and incomplete cuts.
Step 3: Inspect for Defects and Imperfections
Before placing wood in your laser:
- Check for knots, cracks, and warping
- Avoid boards with uneven thickness
- Look for glue pockets in plywood layers
Even small imperfections can disrupt laser focus and cause inconsistent results.
Step 4: Clean and Smooth the Surface
When preparing your wood for laser cutting, the first thing you want to check is whether the wood fits into the work area of the laser cutter.
If not, you must cut it down to the necessary size and sand it to remove any sharp edges. Sanding improves engraving clarity and reduces burn marks.
Recommended Sanding Process
- Start with 120–150 grit sandpaper
- Finish with 180–220 grit for a smooth surface
- Sand evenly along the grain
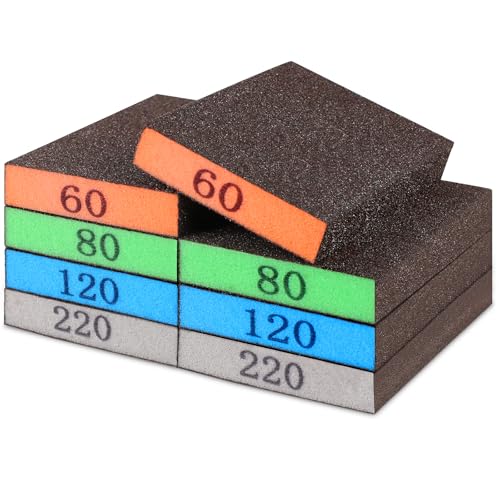
- 【ASSORTED GRIT SANDING BLOCKS】 Each set contains 8 sponge sanding blocks, each measuring 3.9 x 2.76 x 0.6 inches. There are 4 sizes from coarse to ultra-fine, 2 blocks of each grit level, and different colors for different grit sizes: grey (corresponding to grit size - 220), blue (120), green (80), and orange (60).
Avoid over-sanding, as it can thin the wood unevenly.
Additionally, the wood needs to be free of knots and any other flaws that can lead to uneven cutting.
Before beginning to cut, the wood’s surface should be well cleaned and dry because oil or dirt will obstruct the cutting process.
Dust and oils interfere with laser cutting.
Cleaning Tips
- Wipe the surface with a dry microfiber cloth
- For oily woods, lightly wipe with isopropyl alcohol
- Allow the wood to dry completely before cutting
Never use water, as it raises grain and adds moisture.
Step 6: Apply Masking Tape (Highly Recommended)
Masking is one of the best ways to reduce burn marks.
Benefits of Masking Wood
- Prevents surface scorch marks
- Reduces smoke staining
- Keeps engraving crisp and clean
How to Mask Properly
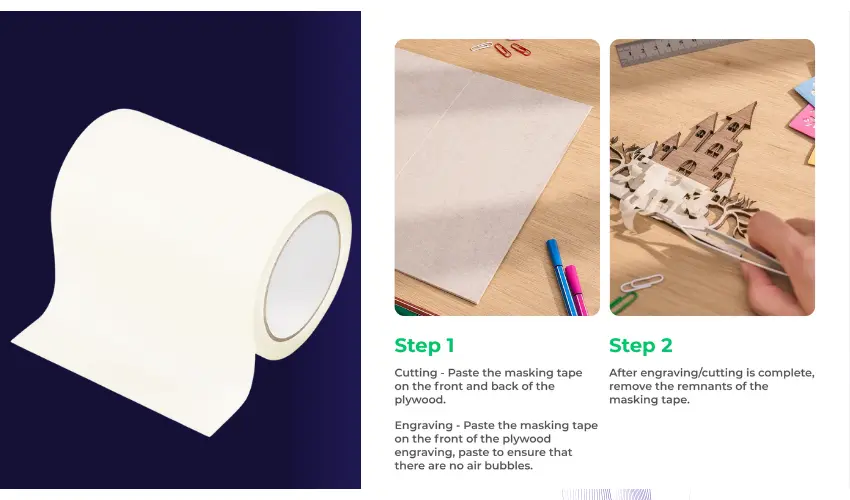
- Use low-tack masking tape
- Apply smoothly with no bubbles
- Remove slowly after cutting
This step is especially important for light-colored woods like maple or birch.
We recommend TapeManBlue Wide Painters Tape, which yields excellent results.

- SUPERIOR ADHESION & CLEAN REMOVAL: Our wide blue painters tape, perfect as 3D printer tape or laser masking tape, removes cleanly without residue, streaks, or stains for up to 21 days. Unlike other painting tape or masking tape that peels prematurely, TapeManBlue's extra wide painters tape stays put on your surfaces. Whether you're using it as 3D printing tape, for laser engraving, or general painting projects, our thick painters tape delivers reliable performance every time.
Step 7: Secure the Wood For Laser Cutting
Warped or loose wood causes focus issues.
Best Practices
- Use honeycomb beds or magnetic hold-downs
- Ensure the wood is completely flat
- Elevate wood slightly to reduce backside scorching
Flat positioning ensures consistent focus and cleaner cuts.
Step 6: Preparing Your Laser Cutter
The most important settings for you to know on your laser cutter are speed, power, frequency, and focus. As you can guess, the speed determines how fast the laser can cut. The thinner the wood, the higher the speed should be set.
The type of wood and its thickness determine the ideal laser settings.
- Power: Higher power for hardwood, lower for softwood.
- Speed: Adjust to balance between clean cuts and avoiding burns.
- Focus: Ensure the laser beam is correctly focused for precision.
Set The Laser Frequency
In contrast, the frequency – measured in Hz – determines the number of laser pulses per second. Wood typically cuts best on a CO2 Laser with a lower frequency of 1000 Hz.
Set The Focus
Finally, the focusing lens in the laser head is used for precision. The focus point should be set on the material surface. Smooth cuts on wood can be achieved with a lens of 2″ focal length and a small laser spot size of 0.001″.
The depth of focus of a lens with a long focal length is greater than that of a lens with a shorter focal length, a lens with a long focal length is the best choice for cutting thicker pieces of wood.
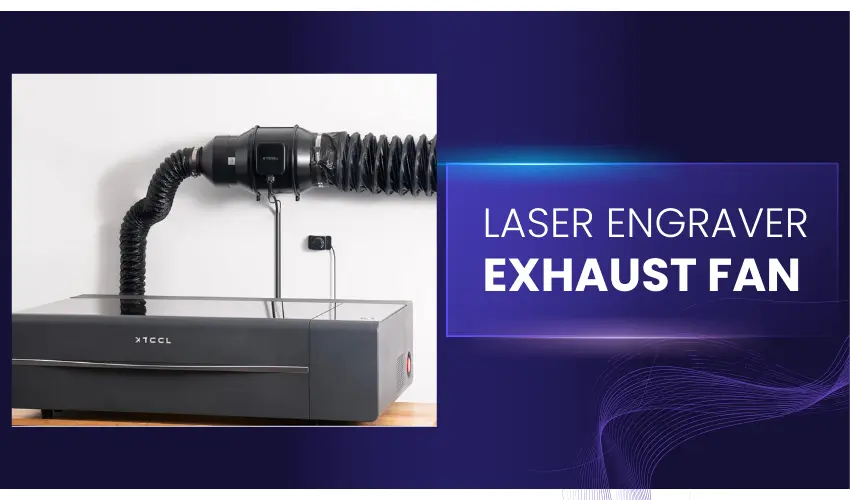
Use an Exhaust System & Air Assist
Using a laser to cut wood produces a lot of smoke and fumes which will obstruct the laser’s path, lower its intensity, and result in uneven cutting. As a result, it’s important to use an exhaust system, fume extractor or laser enclosure along with high-pressure air assist to remove the smoke from the work area.
The air assist and the exhaust system will lessen the impact of charring.
Benefits of Air Assist
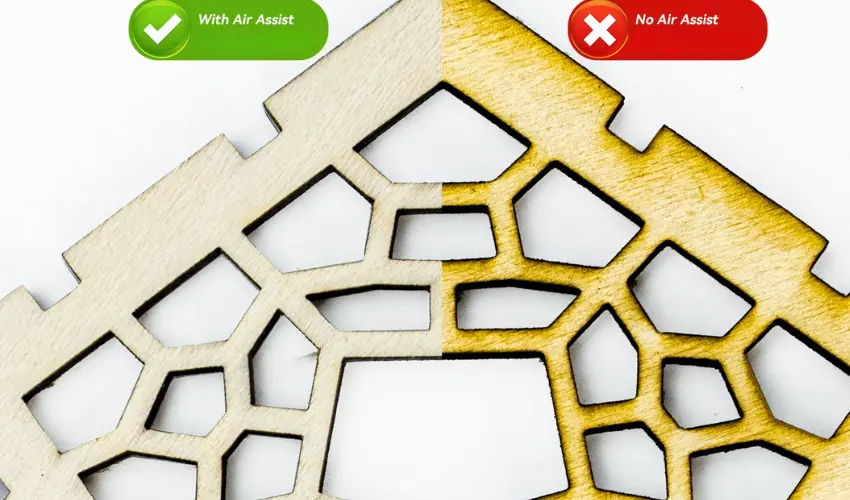
- Reduces charring
- Improves cut edge quality
- Minimizes fire risk
- Clears smoke from the cut path
For best results, keep airflow steady but not excessive.
Once you have this setup, it’s finally time to cut!
Running Test Cuts
It is preferable to test how a laser cutter cuts the wood you intend to use. To determine the best parameters for your test run, use the below laser cutting thickness and speed chart as a reference.
In general, start with the lowest recommended setting and gradually work your way up until you achieve the best results. You can avoid wasting material by using the correct laser settings.
Diode Laser Cutter Thickness & Speed Chart for Wood
(Air Assist ON • Focused at material surface • Single pass unless noted)
5W Diode Laser
Wood Type | Thickness | Speed (mm/min) | Passes |
|---|---|---|---|
Basswood | 2 mm | 300–400 | 1 |
Basswood | 3 mm | 200–250 | 1–2 |
Birch Plywood (Laser Grade) | 3 mm | 180–220 | 2 |
Poplar | 3 mm | 200–240 | 2 |
Maple | 2 mm | 250–300 | 1–2 |
Max practical cut depth: ~3 mm
10W Diode Laser
Wood Type | Thickness | Speed (mm/min) | Passes |
|---|---|---|---|
Basswood | 3 mm | 350–450 | 1 |
Basswood | 5 mm | 220–300 | 2 |
Birch Plywood | 3 mm | 300–350 | 1 |
Birch Plywood | 6 mm | 180–220 | 2–3 |
Maple | 4 mm | 220–280 | 2 |
Poplar | 6 mm | 200–250 | 2 |
Max practical cut depth: ~6 mm
20W Diode Laser
Wood Type | Thickness | Speed (mm/min) | Passes |
|---|---|---|---|
Basswood | 5 mm | 450–600 | 1 |
Basswood | 8 mm | 280–350 | 2 |
Birch Plywood | 6 mm | 350–450 | 1 |
Birch Plywood | 9 mm | 220–280 | 2–3 |
Maple | 6 mm | 280–350 | 2 |
Poplar | 10 mm | 200–260 | 3 |
Max practical cut depth: ~8–10 mm (wood-dependent)
Recommended Power Settings
- Power: 90–100%
- Air Assist: ON (essential)
- Focus:
- ≤5 mm thickness → focus on surface
- 5 mm thickness → focus halfway into material
- Line Interval: N/A (cutting only)
Tips for Using the Chart
- Test First: Always perform a test cut on a scrap piece of the same wood to refine the settings.
- Adjust Air Assist: Use air assist to blow away smoke and debris, reducing charring and improving cutting quality.
- Watch for Burn Marks: For thicker wood, slow speed or multiple passes can increase the chance of burns. Use protective masking tape to mitigate this.
- Cooling Period: Allow the laser and material to cool between passes to avoid overheating and warping.
- Fine-Tune Focus: Ensure the laser beam is perfectly focused for maximum efficiency, especially on thicker materials.
This chart is a starting point—specific settings can vary based on the diode laser model, wood type, and environmental conditions.
CO2 Laser Cutter Thickness & Speed Chart for Wood
(Air Assist ON • Focus at material surface unless noted • Single pass unless specified)
40W CO₂ Laser
Wood Type | Thickness | Speed (mm/s) | Passes |
|---|---|---|---|
Basswood | 3 mm | 18–22 | 1 |
Basswood | 6 mm | 8–12 | 1 |
Birch Plywood (Laser Grade) | 3 mm | 14–18 | 1 |
Birch Plywood | 6 mm | 6–8 | 1–2 |
MDF (Laser Grade) | 3 mm | 16–20 | 1 |
Maple | 4 mm | 8–10 | 1–2 |
Max practical cut depth: ~6 mm
60W CO₂ Laser
Wood Type | Thickness | Speed (mm/s) | Passes |
|---|---|---|---|
Basswood | 6 mm | 18–22 | 1 |
Basswood | 9 mm | 10–12 | 1 |
Birch Plywood | 6 mm | 14–18 | 1 |
Birch Plywood | 9 mm | 8–10 | 1–2 |
MDF | 6 mm | 15–18 | 1 |
Maple | 6 mm | 10–12 | 1 |
Max practical cut depth: ~9 mm
80W CO₂ Laser
Wood Type | Thickness | Speed (mm/s) | Passes |
|---|---|---|---|
Basswood | 9 mm | 18–22 | 1 |
Basswood | 12 mm | 10–12 | 1 |
Birch Plywood | 9 mm | 14–16 | 1 |
Birch Plywood | 12 mm | 8–10 | 1–2 |
MDF | 9 mm | 14–16 | 1 |
Hardwood (Maple/Oak) | 8 mm | 8–10 | 1–2 |
Max practical cut depth: ~12 mm
100W CO₂ Laser
Wood Type | Thickness | Speed (mm/s) | Passes |
|---|---|---|---|
Basswood | 12 mm | 18–22 | 1 |
Basswood | 18 mm | 8–10 | 1 |
Birch Plywood | 12 mm | 14–16 | 1 |
Birch Plywood | 18 mm | 8–10 | 1–2 |
MDF | 12 mm | 14–16 | 1 |
Hardwood | 10–12 mm | 8–10 | 1–2 |
Max practical cut depth: ~18 mm
Recommended CO₂ Cutting Settings
- Power: 85–95% (avoid constant 100% to extend tube life)
- Air Assist: ON (essential for clean edges & fire prevention)
- Focus:
- ≤6 mm → surface focus
- 6 mm → focus halfway into material
- Pulse / PPI: 500–1000 (if adjustable)
Best Practices
- Test Cuts: Always perform a small test on scrap wood to fine-tune settings.
- Air Assist: Use air assist to reduce burn marks and remove debris from the cutting path.
- Masking Tape: Apply masking tape to protect the surface and minimize scorching.
- Adjust Focus: Ensure the laser beam is correctly focused for optimal performance.
- Cooling Time: Allow the material to cool between passes to prevent warping or excessive burning.
- Material-Specific Settings: Softwoods like pine cut faster than hardwoods like oak or walnut.
This chart is a starting point, and adjustments may be needed based on the specific CO2 laser cutter model, lens focal length, and material condition. Always prioritize safety and proper ventilation when laser cutting wood.
Step 8: Post-Cutting Cleanup
After cutting:
- Let wood cool before handling
- Remove masking tape carefully
- Lightly sand cut edges if needed
- Wipe residue with a dry cloth
Avoid sealing or staining until all smoke residue is removed.
Common Mistakes to Avoid
- Skipping masking tape
- Cutting damp or warped wood
- Using unknown plywood adhesives
- Ignoring test cuts
- Cutting resin-heavy wood without air assist
Safety Precautions When Laser Cutting Wood
Laser cutting wood is a popular technique for creating intricate designs and precise cuts in woodworking projects. While the process is efficient and produces excellent results, it also poses safety risks if not handled correctly.
Below, we outline the essential safety precautions you should take when laser cutting wood to ensure a safe working environment.
Ensure Proper Ventilation
- Why: Laser cutting generates smoke and fumes, which can be harmful if inhaled.
- Precaution: Use an exhaust system or an air filtration unit to remove smoke and maintain air quality. Position your laser cutter in a well-ventilated area.
Wear Appropriate Personal Protective Equipment (PPE)
- Why: Laser light, wood particles, and fumes can pose health risks.
- Precaution:
- Wear safety goggles rated for laser protection.
- Use a mask or respirator to avoid inhaling fine particles and toxic fumes.
- Gloves may be necessary when handling hot or sharp pieces of wood post-cutting.
Check the Wood for Coatings
- Why: Treated or painted wood can release toxic fumes when laser-cut.
- Precaution: Use only untreated, natural wood. If you must use coated wood, confirm that it is safe for laser cutting and ensure proper ventilation.
Maintain a Clean Workspace
- Why: Dust and debris can ignite, increasing the risk of fire.
- Precaution: Regularly clean the laser cutter bed and surrounding workspace to remove wood dust and leftover scraps.
Inspect and Maintain the Laser Cutter
- Why: Faulty equipment can lead to accidents or fires.
- Precaution:
- Regularly inspect the laser cutter for damage or wear.
- Clean the optics and replace worn-out parts to ensure efficiency and safety.
Use Fire Safety Equipment
- Why: Wood is flammable, and laser cutting can generate enough heat to ignite it.
- Precaution:
- Keep a fire extinguisher (Class A for wood fires) nearby.
- Never leave the laser cutter unattended while in use.
Adjust Laser Settings Correctly
- Why: Excessive power or speed settings can cause burning or fire.
- Precaution: Use recommended power and speed settings for the specific type and thickness of wood you’re cutting. Test on a scrap piece first.
Avoid Direct Contact with the Laser Beam
- Why: The laser beam can cause severe burns or injuries.
- Precaution: Never place your hands or any body part near the laser beam. Ensure that the laser cutter’s safety enclosure is intact and operational.
Monitor for Overheating
- Why: Prolonged operation can cause the laser cutter to overheat, increasing fire risk.
- Precaution: Take breaks during extended cutting sessions to let the machine cool down. Monitor its temperature throughout.
Follow Manufacturer’s Guidelines
- Why: Each laser cutter has specific safety protocols.
- Precaution: Read and adhere to the user manual and manufacturer’s recommendations for your specific laser cutter model.
Safety should always be a priority when laser cutting wood. By ensuring proper ventilation, wearing appropriate PPE, maintaining your equipment, and following all safety guidelines, you can create stunning wood designs while minimizing risks. Always remain vigilant and prepared to address any issues that arise during the cutting process.
The Takeaway: Use Wood for Laser Cutting Your Next Project
To recap, wood is an excellent material for laser cutting, but it’s essential to use the right kind of wood and prepare your wood and laser cutter for precise and accurate cuts.
Hopefully, this article has given you all the information you need to know about preparing laser-cut wood and more to ensure your next project is executed smoothly.
Frequently Asked Questions
What type of wood is best for laser cutting?
Laser-grade plywood, basswood, birch plywood, MDF (laser grade), and maple are among the best options. These woods have consistent density and minimal glue content, which helps ensure clean cuts and predictable results. Avoid construction plywood and pressure-treated wood.
Do I need to dry wood for laser cutting?
Yes. Wood should be fully dry before cutting. High moisture content causes excessive charring, poor edge quality, and inconsistent cuts. If the wood feels cool or damp, allow it to acclimate indoors for 24–72 hours before laser processing.
Should I sand wood for laser cutting?
Light sanding is recommended. Sanding removes surface oils, mill glaze, and rough fibers, helping the laser cut more evenly and improving engraving detail. Use fine-grit sandpaper (220–320 grit) and wipe away dust before cutting.
How can I reduce burn marks when laser cutting wood?
You can reduce burn marks by applying masking paper, using air assist, ensuring correct focus, and increasing cutting speed where possible. Keeping optics clean and using laser-grade materials also significantly improves results.
Is it safe to laser cut painted or treated wood?
No. Painted, stained, or pressure-treated wood can release toxic fumes and damage your laser system. Always use raw, untreated wood specifically labeled safe for laser cutting.